基本(首次使用 intra-mart Accel Platform 进行编程)
本项为了引入 intra-mart Accel Platform 开发,通过在 intra-mart e Builder for Accel Platform 上创建使用脚本开发的 Hello World,体验在 intra-mart Accel Platform 上进行脚本开发的流程。
教程
前提条件
已安装 intra-mart e Builder for Accel Platform 。
已安装 intra-mart Accel Platform ,并已完成初始设置。
请创建在基础模块中包含脚本开发框架的环境。请按照单元测试要求创建开发环境的 Resin 服务器。
我们开始在 intra-mart e Builder for Accel Platform 中创建 Hello World 吧。
按照以下步骤创建 Hello World 。
步骤1:项目的创建和设置
在intra-mart e Builder for Accel Platform 上创建模块项目,进行项目设置。关于项目的创建和设置方法,请参阅《intra-mart e Builder for Accel Platform 用户操作指南》的《模块项目创建》,及《项目设置》。
步骤2:输入页面的创建
创建输入页面( input.html )。在项目的 src/main/jssp/src/ 下创建 helloworld/js/ 文件夹,在所创建的文件夹下创建“ input.html ”文件,如下编写代码。<!-- HEAD 标签 --> <imart type="head"> <title>Hello, World</title> <script type="text/javascript"> $(function() { $('#button').click(function() { $('#hello_info').submit(); }); }); </script> </imart> <!-- 页面上显示的标签 --> <div class="imui-title"> <h1>Hello, World (脚本开发)</h1> </div> <!-- 输入页面 --> <div class="imui-form-container-narrow"> <p> <label>Please input the name. </label> </p> <!-- 在 Form 的设置操作中记载输出结果的路径 --> <form action="helloworld/output" name=form id="hello_info" method="post"> <div> <!-- 文本框的设置 --> <imart type="imuiTextbox" id="name" name="name" size="10" ></imart> </div> <!-- 提交按钮的设置 --> <imart type ="imuiButton" value="Hello!!" name="button" class="mt-10" id="button" inputType="submit"></imart> </form> </div>警告
请将字符代码改为 UTF-8 并保存。
步骤3:创建输出页面
创建输出页面( output.html )。在项目的 src/main/jssp/src/helloworld/js/ 下创建“ output.html”文件,如下编写代码。<!-- HEAD 标签 --> <imart type="head"> <title>Hello, World</title> <script type="text/javascript"> function back() { $('#back-form').submit(); }; </script> </imart> <!-- 页面上显示的标题 --> <div class="imui-title"> <h1>Hello, World (脚本开发)</h1> </div> <!-- 工具栏(配置返回到前一页面的按钮) --> <div class="imui-toolbar-wrap"> <div class="imui-toolbar-inner"> <ul class="imui-list-toolbar"> <li> <!-- 创建“返回”按钮图标,调用 JavaScript 函数 --> <a href="javascript:back();" class="imui-toolbar-icon" title="back"> <span class="im-ui-icon-common-16-back"></span> </a> </li> </ul> </div> </div> <!-- 输出结果 --> <div class="imui-form-container-narrow"> <label> <imart type="imuiTextbox" id="result" name="result" value=name class="imui-text-readonly" readonly /> </label> </div> <!-- 在“返回”按钮的表单信息操作中,设置输入页面的路径。--> <form id="back-form" name="backForm" action="helloworld/input" method="POST"></form>注解
intra-mart Accel Platform 上执行的HTML文件中记载的标签中,不要记述<HTML> 、 <BODY>, <HEAD>请使用<imart type=”head”> 。关于详细内容,请参阅 UI(设计准则) 。警告
请将字符代码改为 UTF-8 并保存。
步骤4:输入页面处理的创建
创建对输入页面进行初始化处理的JS 文件( input.js )。在项目的 src/main/jssp/src/helloworld/js/ 目录下创建“input.js”文件,按照以下要求编程。/** * Hello World 中没有特殊处理,故未进行处理 * 需要进行初始化时,请在 init() 中编写该处理。 */ function init(request) { }警告
请将字符代码改为 UTF-8 并保存。
步骤5:输出页面处理的创建
创建对于输入信息进行结果显示处理的JS文件( output.js )。在项目的 src/main/jssp/src/helloworld/js/ 目录下创建“output.js”文件,按照以下要求进行编码。/** * 输出结果的绑定变量 */ var name; /** * 初始显示 * 传递名称 */ function init(request) { name = 'Hello, ' + request['name']; // 创建输出结果,保存在绑定变量中 }警告
请将字符代码改为 UTF-8 并保存。
步骤6:创建路由配置文件
创建路由用 xml ( helloworld.xml )文件。在项目的 src/main/conf/routing-jssp-config/ 目录下创建 helloworld.xml 文件,如下记述文件的映射信息。在认可设置 authz-default 的 mapper 属性中设置 “welcome-all” 。关于URL设置的 file-mapping,分别在 path 属性中设置2个页面的URL;在 page 属性里设置2个页面的文件路径。<?xml version="1.0" encoding="UTF-8"?> <routing-jssp-config xmlns="http://www.intra-mart.jp/router/routing-jssp-config" xmlns:xsi="http://www.w3.org/2001/XMLSchema-instance" xsi:schemaLocation="http://www.intra-mart.jp/router/routing-jssp-config routing-jssp-config.xsd "> <authz-default mapper="welcome-all" /> <file-mapping path="/helloworld/input" page="/helloworld/js/input" /> <file-mapping path="/helloworld/output" page="/helloworld/js/output" /> </routing-jssp-config>注解
关于路由的详细设置,请参阅 路由 。警告
请将字符代码改为 UTF-8 并保存。至此,脚本开发示例的创建就完成了。以上创建的代码将按项目设置,被适当部署在 Resin 服务器的文件夹中。转到正式环境时,可以对已创建的项目进行用户定义模块化,或部署源代码后进行应用。
登记及页面显示
步骤1:菜单登记
在此,我们把如上创建好的示例登记到网站地图上实际执行一下。启动 Resin ,以Tenant管理员身份登录 Accel Platform 。登录页面的 URL 为“ http://<HOST>:<PORT>/<CONTEXT_PATH>/login ”。然后显示菜单的维护页面,对菜单进行以下设置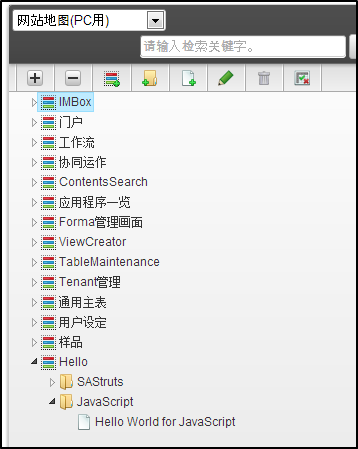 在此创建的新项目中输入以下信息。
菜单项目名 (日文) Hello World for JavaScript URL helloworld/input 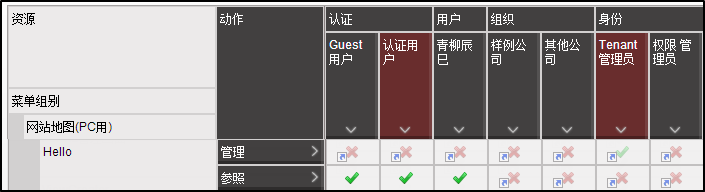
步骤2:Hello World的运行
显示已设置的菜单并执行。如下图所示,可以通过网站地图进行选择。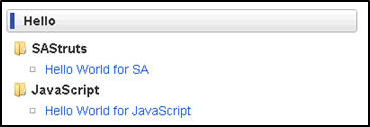 在网站地图中点击先前登记的菜单项目后,显示输入页面。
 在文本框中输入名字后,显示结果页面。
 点击结果页面上的“返回”图标后,返回输入页面。
注解
通过此教程掌握了以下要点。