Datasource definition
Contents
- Datasource type: Register the datasource definition of tenant DB query
- Datasource type: Register the datasource definition of shared DB query
- Datasource type: Register the datasource definition of SOAP
- Datasource type: Register the datasource definition of REST
- Datasource type: Register datasource definition of JAVA
- Methods of setting hierarchical request parameters and response fields
Datasource type: Register the datasource definition of tenant DB query
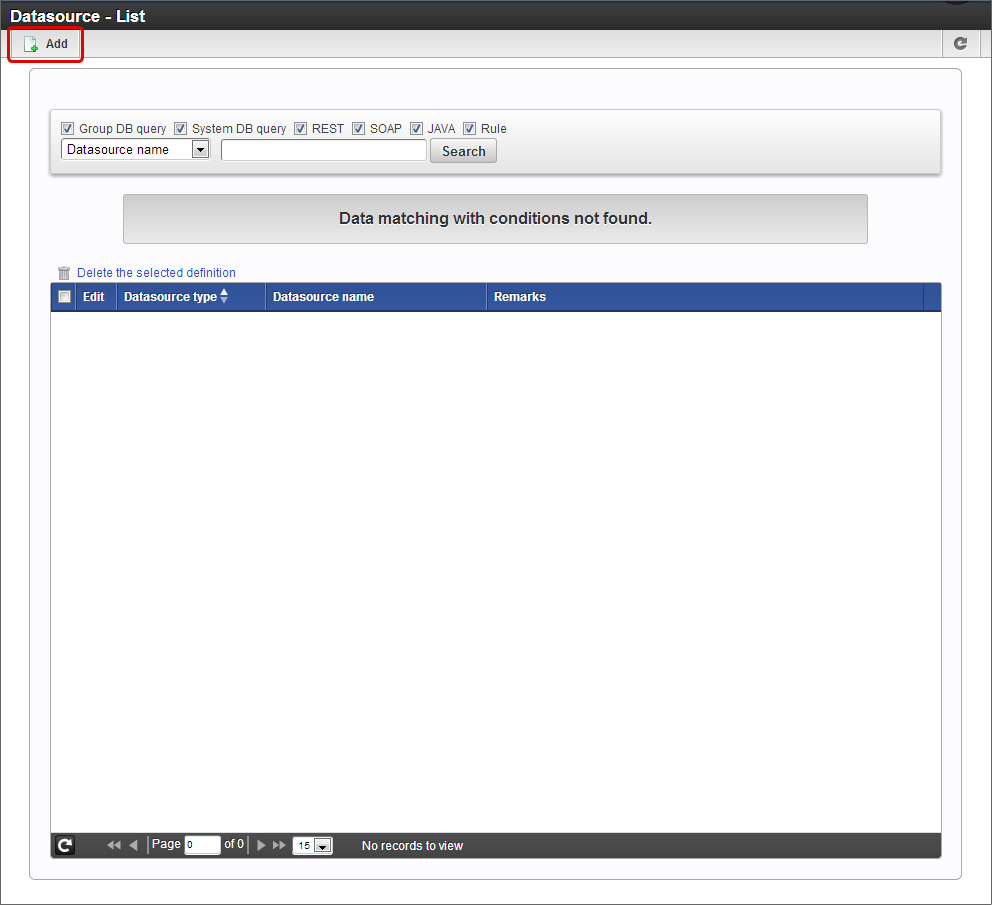
Click “Site map” -> “IM-BIS” -> “System administrator” -> “Master Maintenance” -> “External linkage” -> “Datasource definition”.
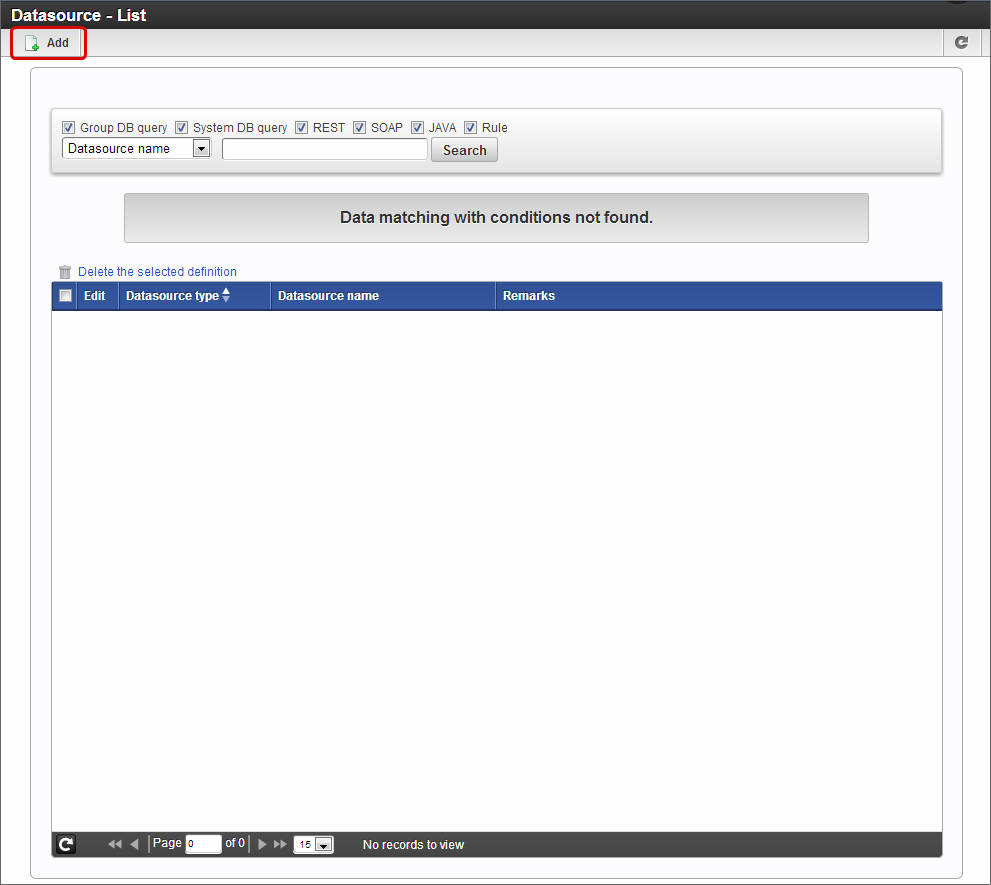
Click “Add” on “Datasource - List” screen.
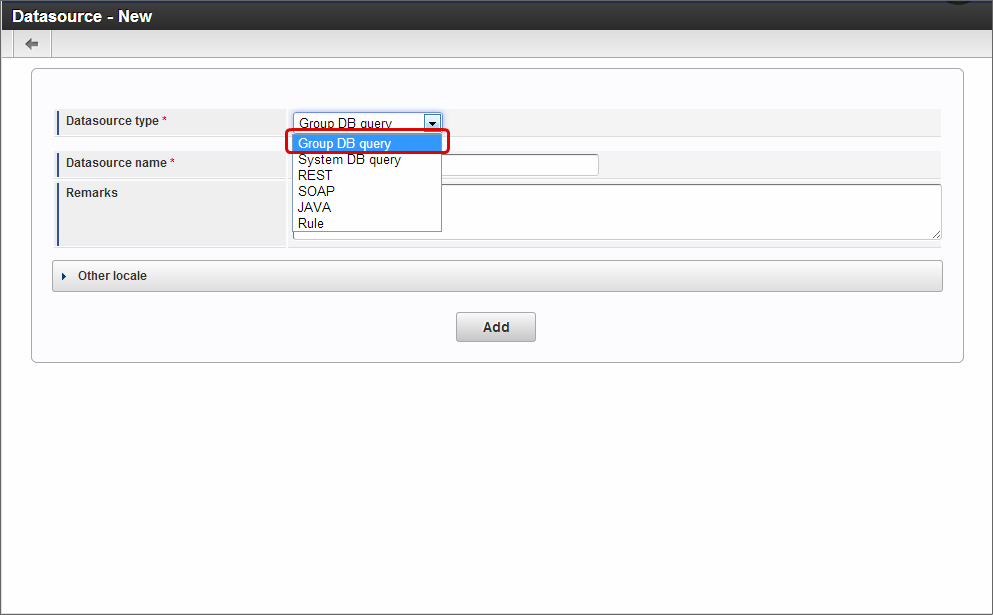
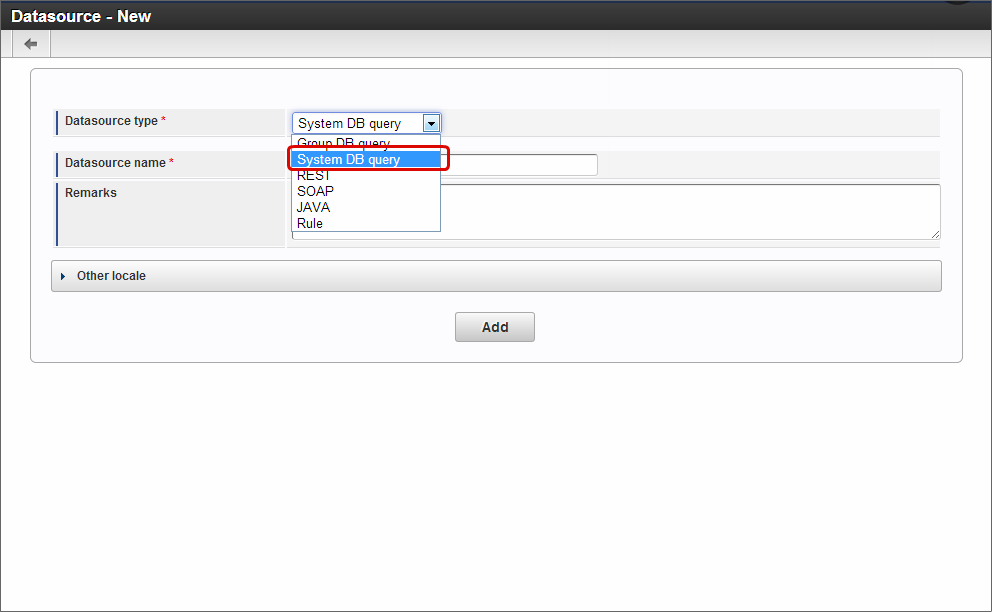
Select “Group DB query” in datasource type.
Click “Add” after entering datasource name and remarks.

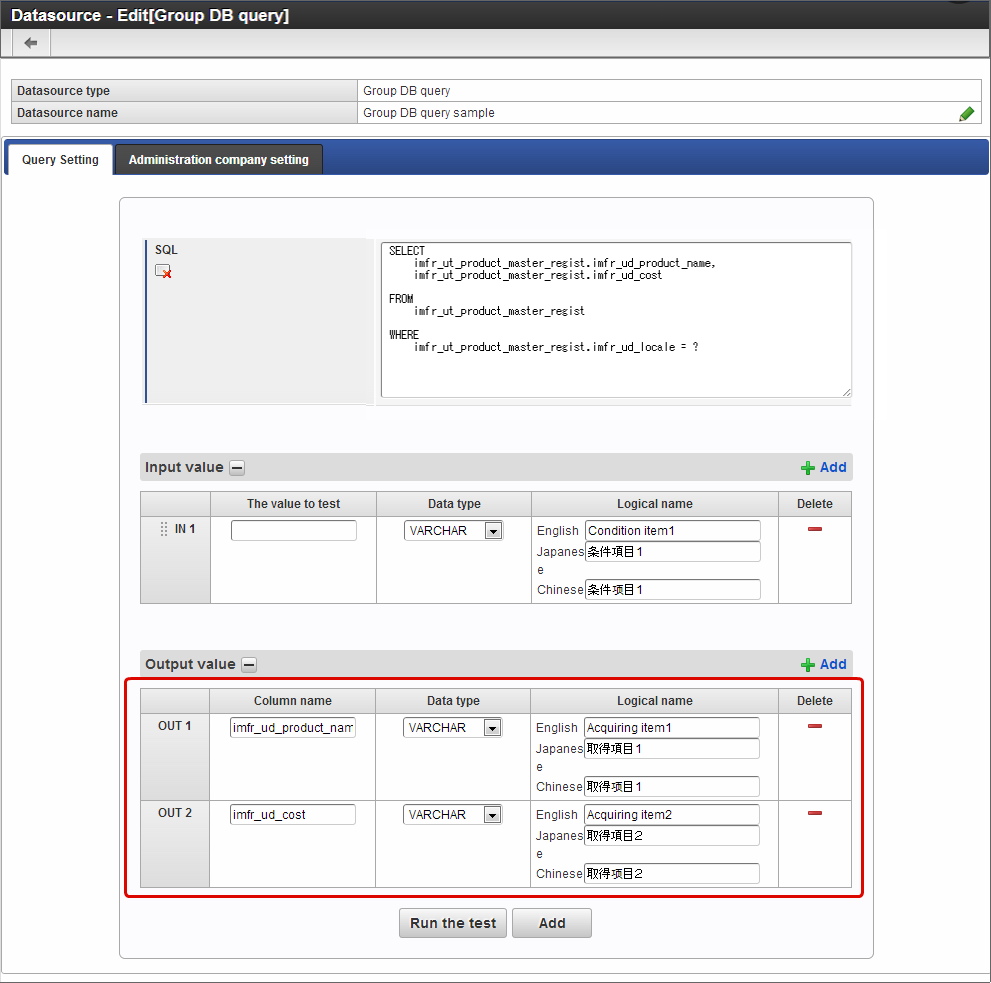
Enter the SQL to be executed.
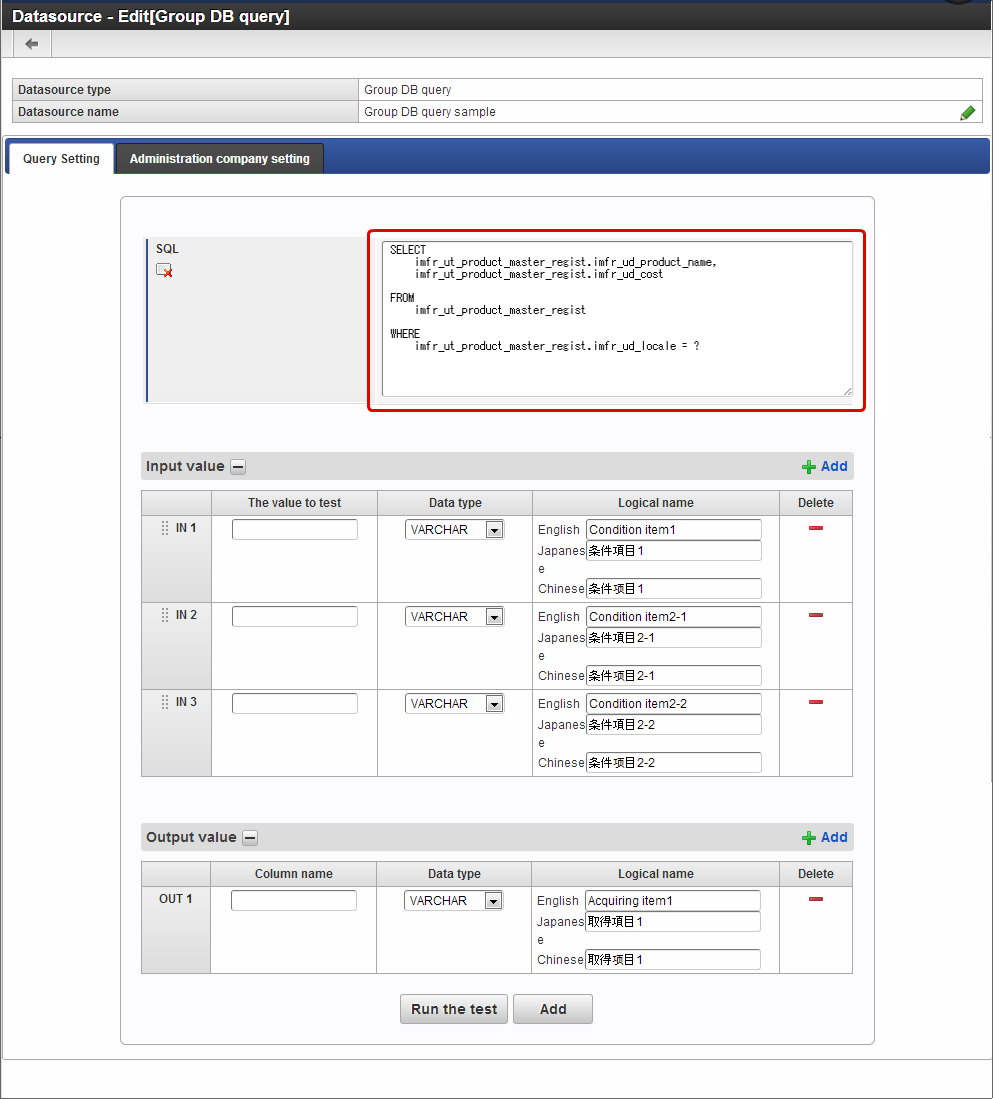
Set the input value matching with ”?” when ”?” is used in WHERE clause of SQL.
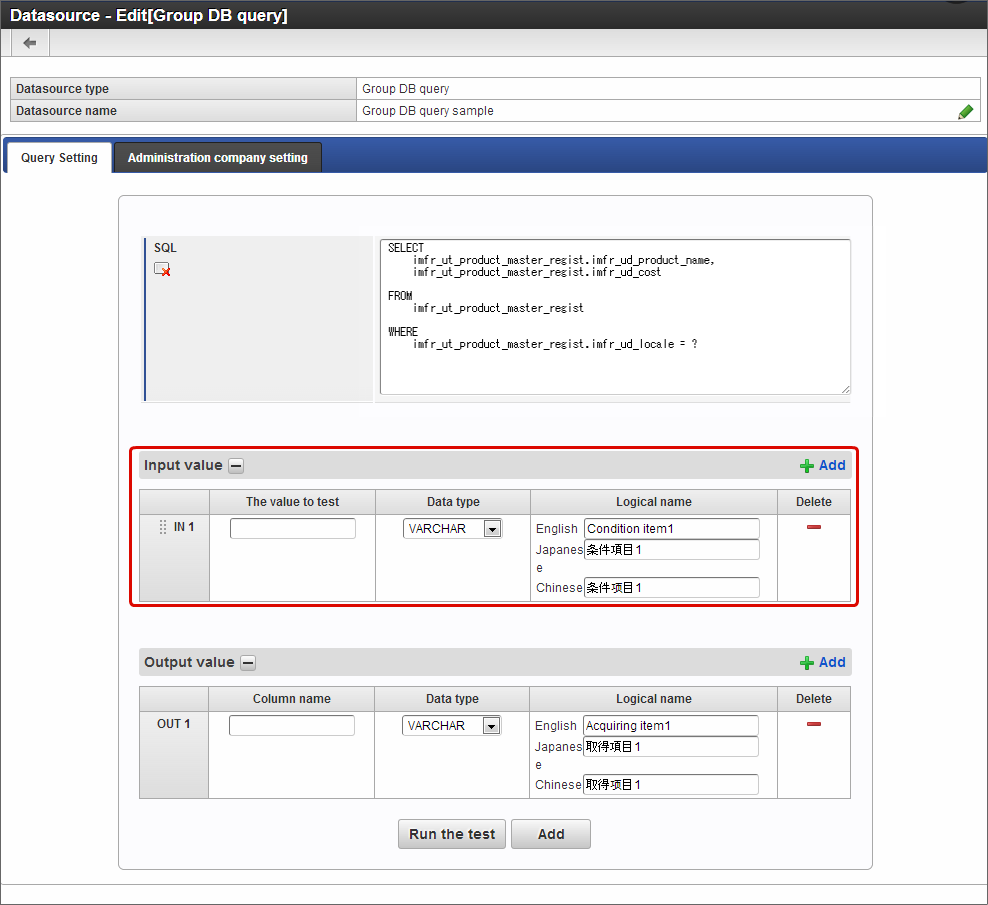
Set the output value matching with the column set in SELECT statement of SQL.
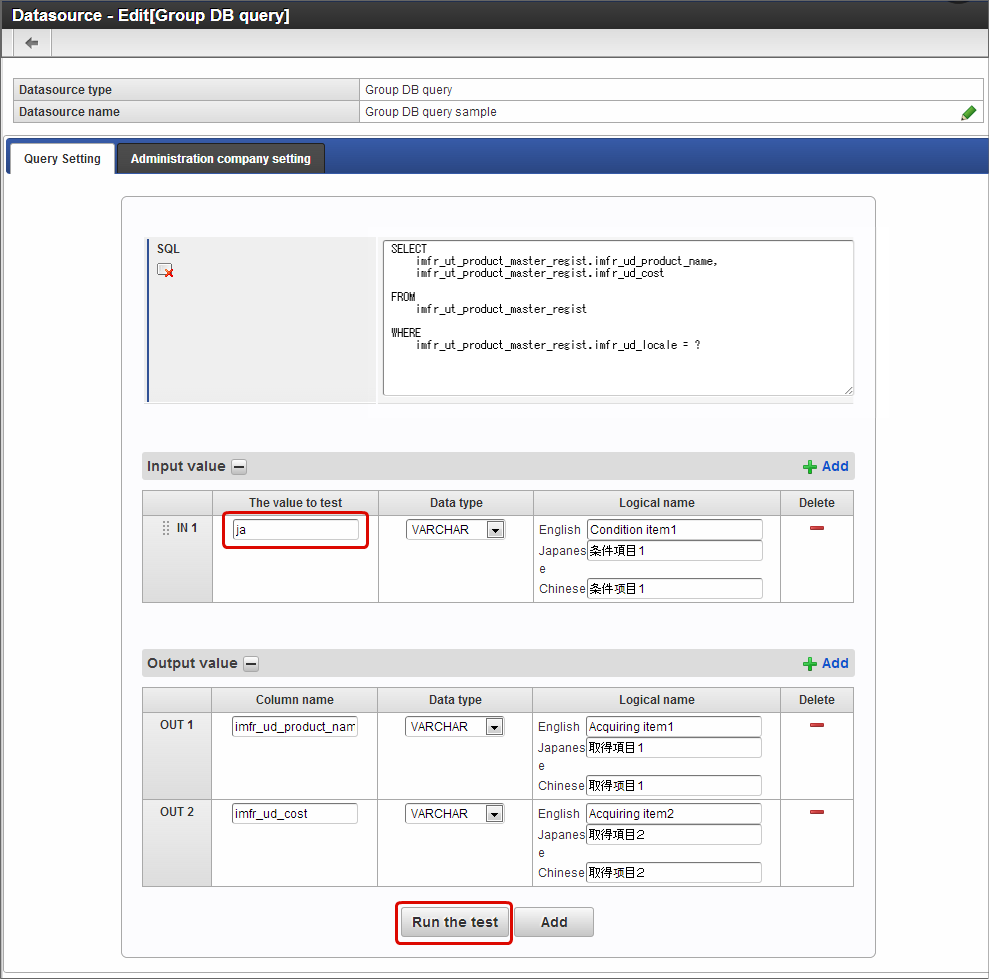
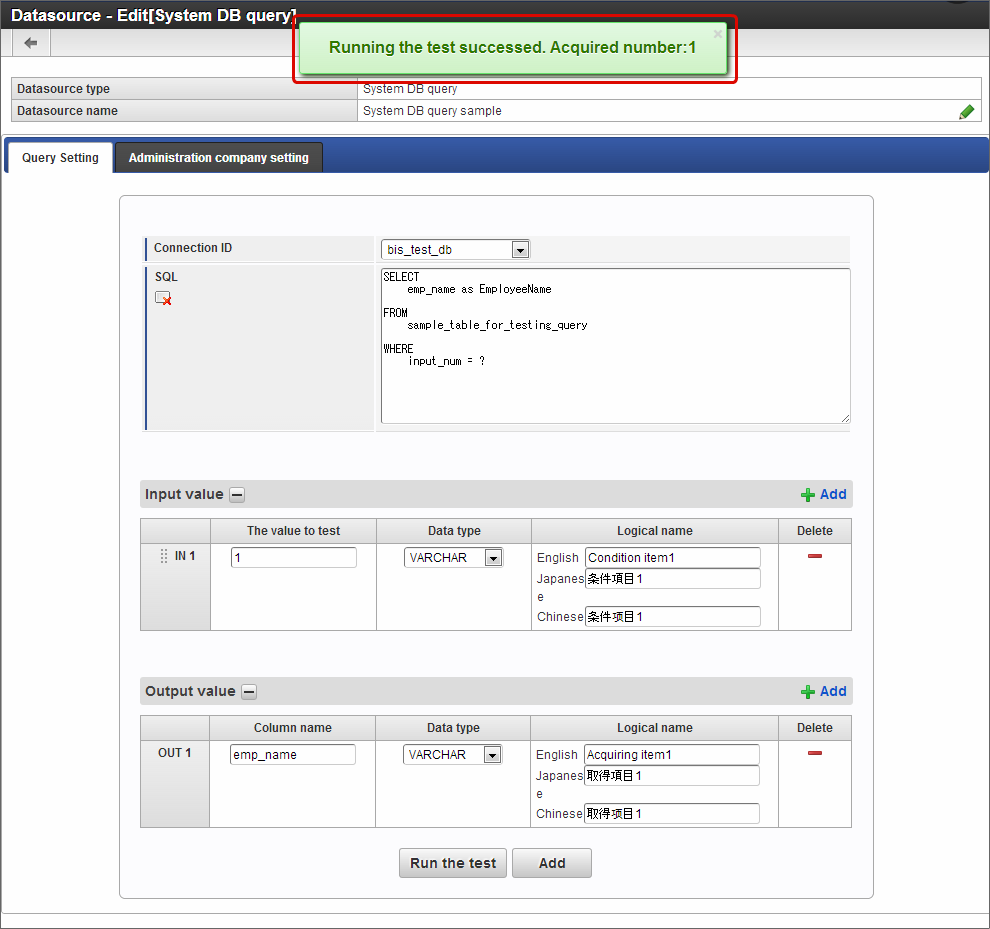
Click “Run the test” after entering the value for test in “The value to test”.
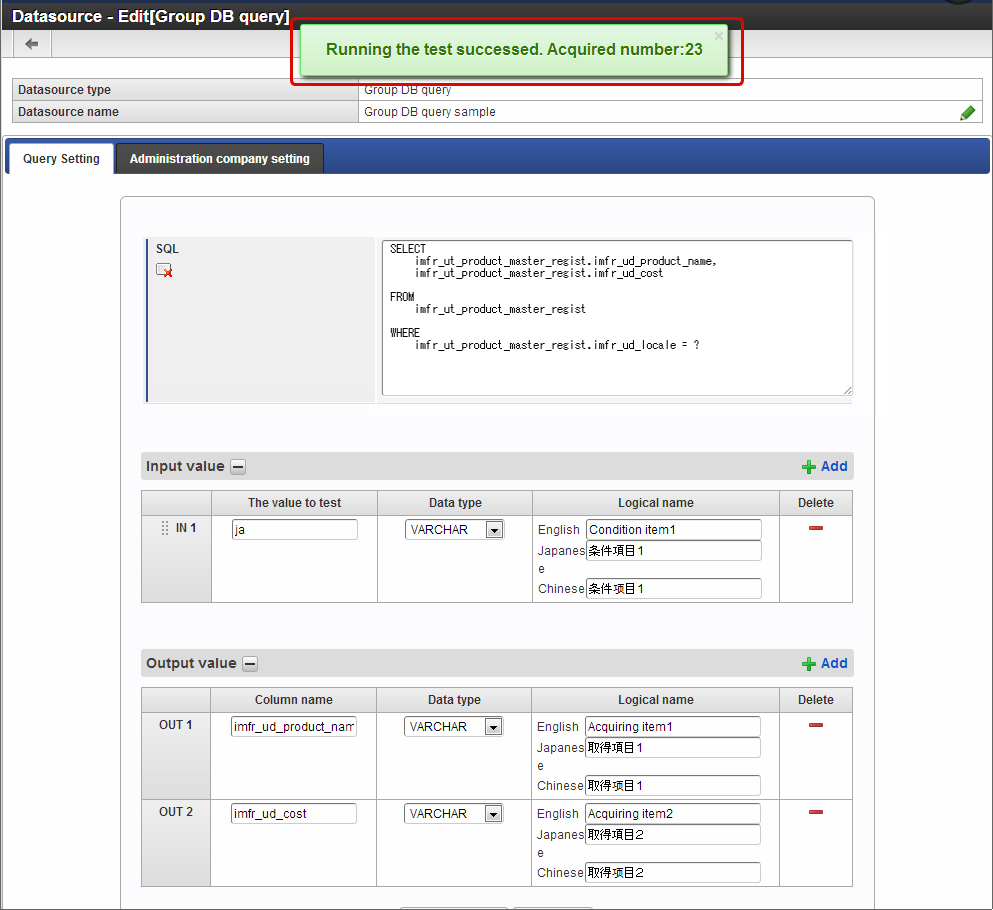
The following message is displayed when the test is successful.
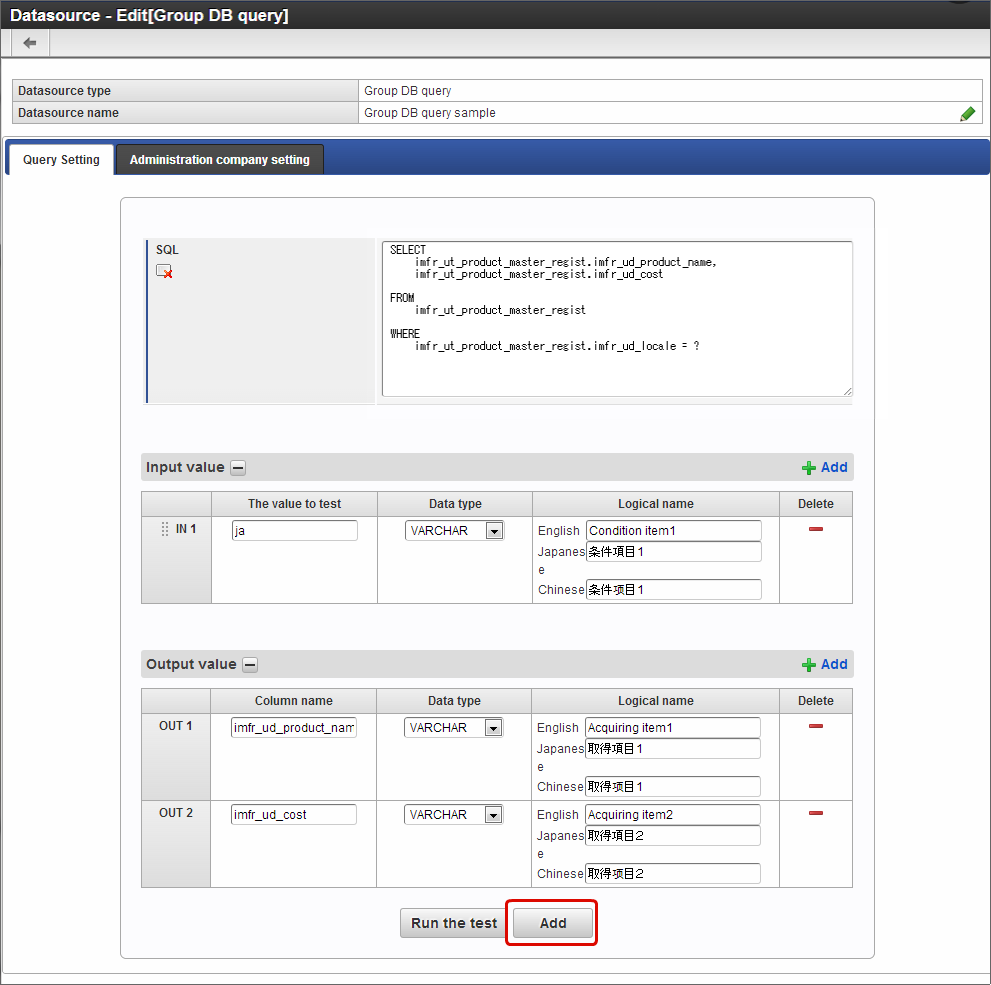
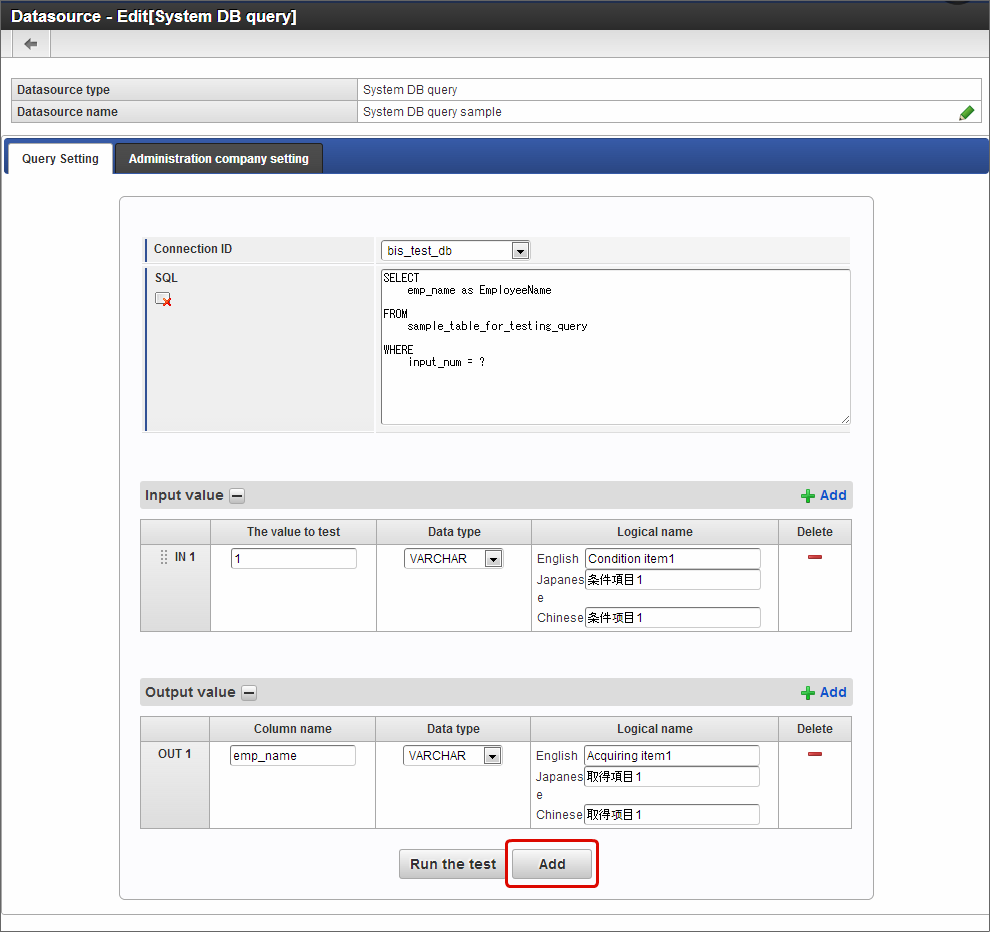
Click “Add” after confirming the contents.
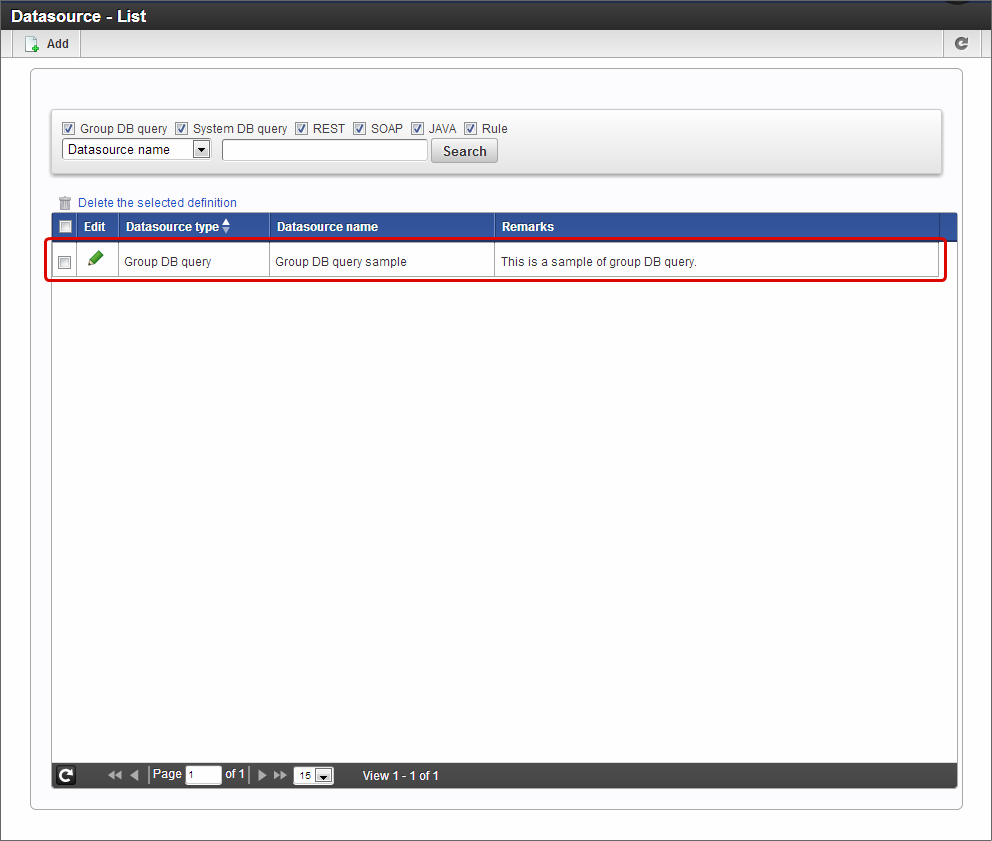
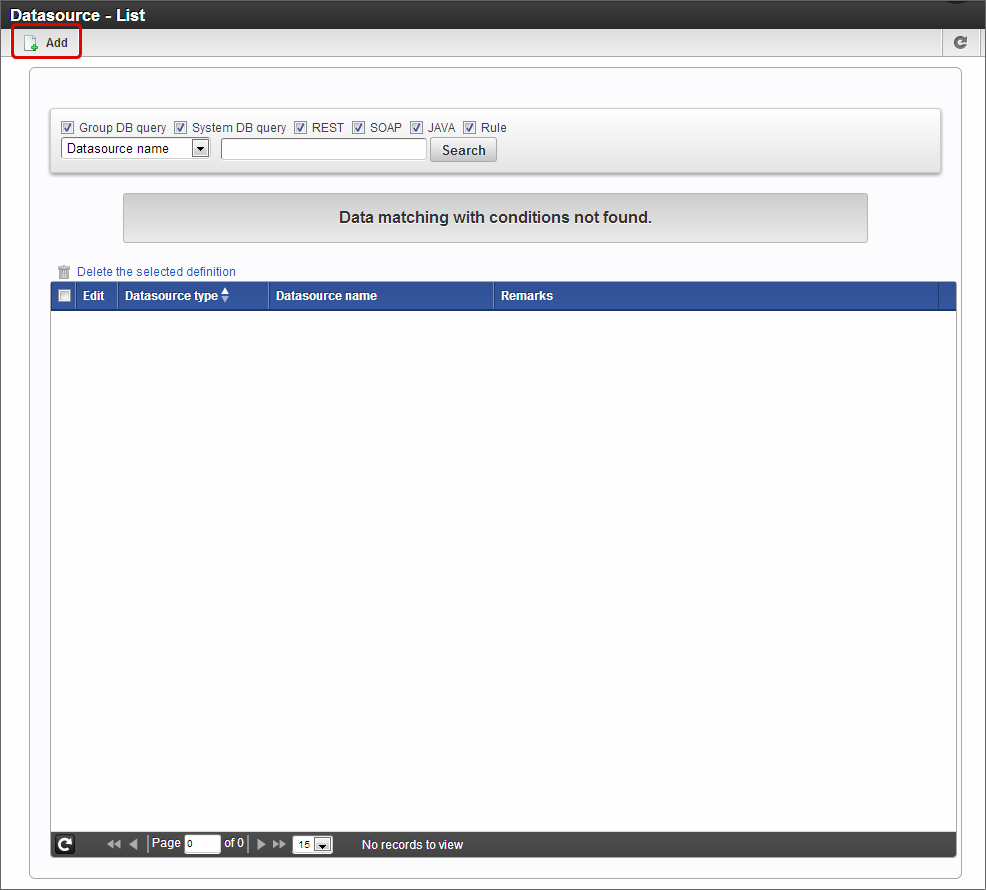
Added to “Datasource - List” as shown below if registered normally.
Datasource type: Register the datasource definition of shared DB query
Click “Site map” -> “IM-BIS” -> “System administrator” -> “Master Maintenance” -> “External linkage” -> “Datasource definition”.
Click “Add” on “Datasource - List” screen.
Select “System DB query” in datasource type.
Click “Add” after entering datasource name and remarks.

Select connection ID.
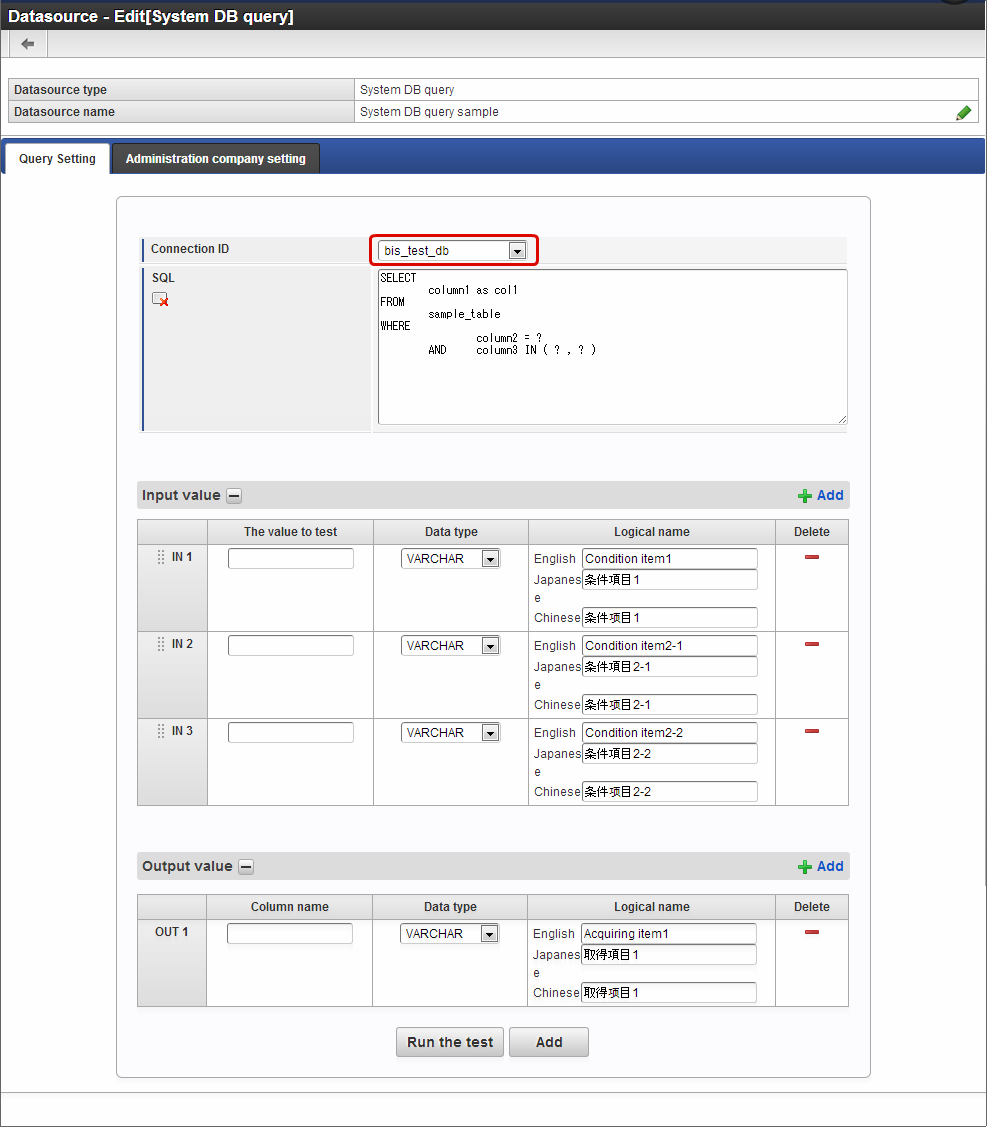
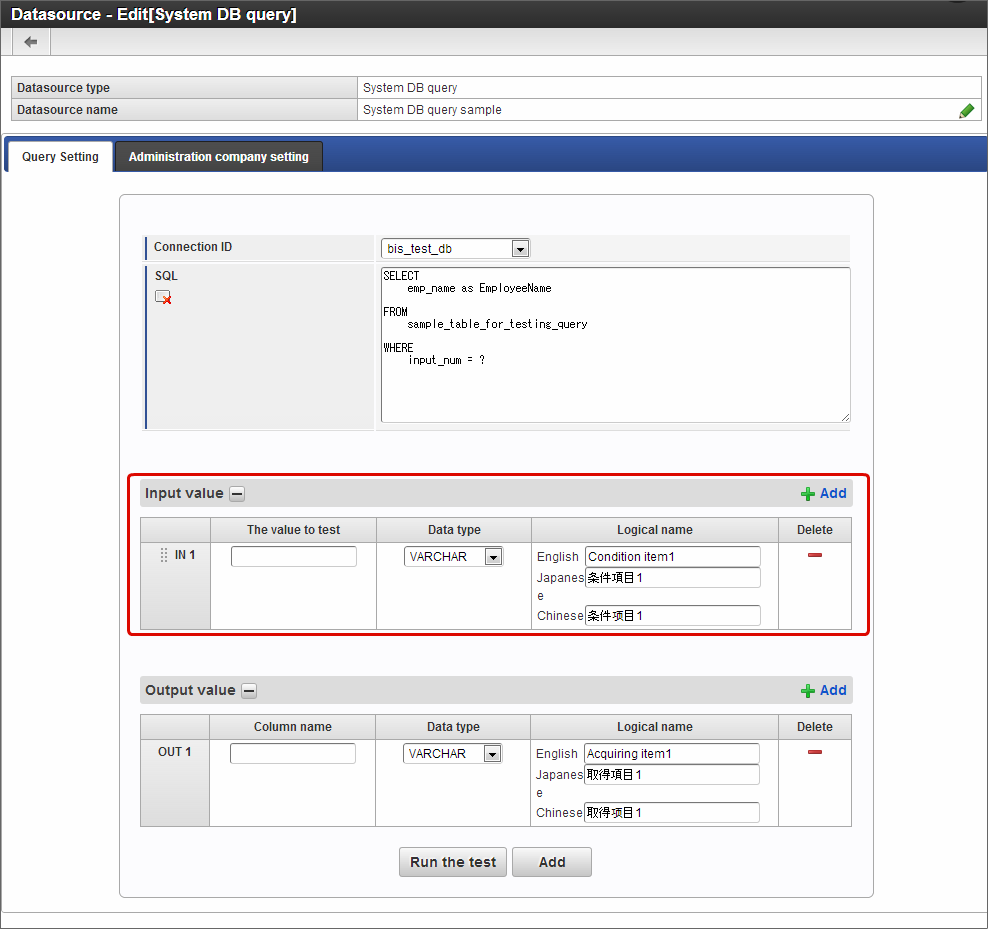
Enter the SQL to be executed.
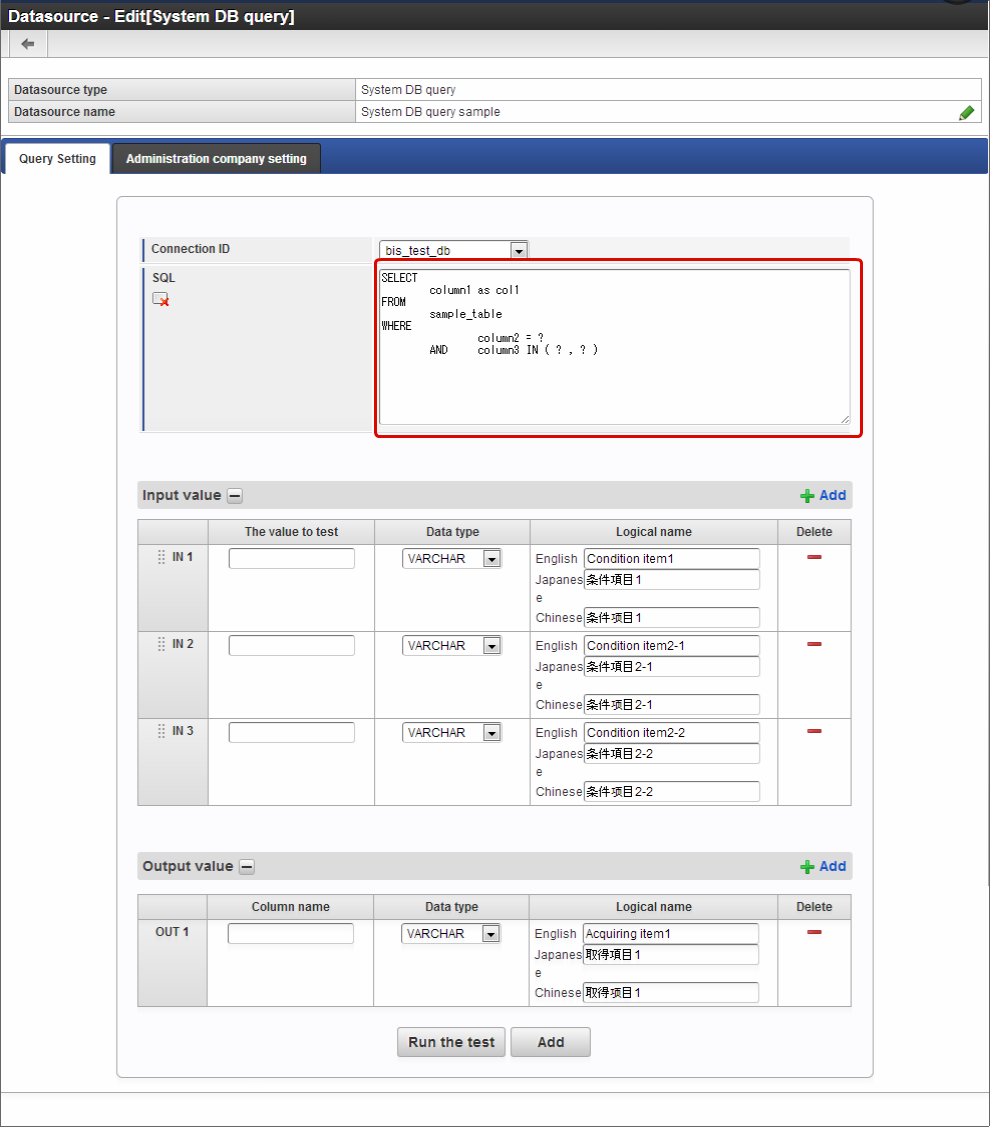
Set the input value matching with ”?” when ”?” is used in WHERE clause of SQL.
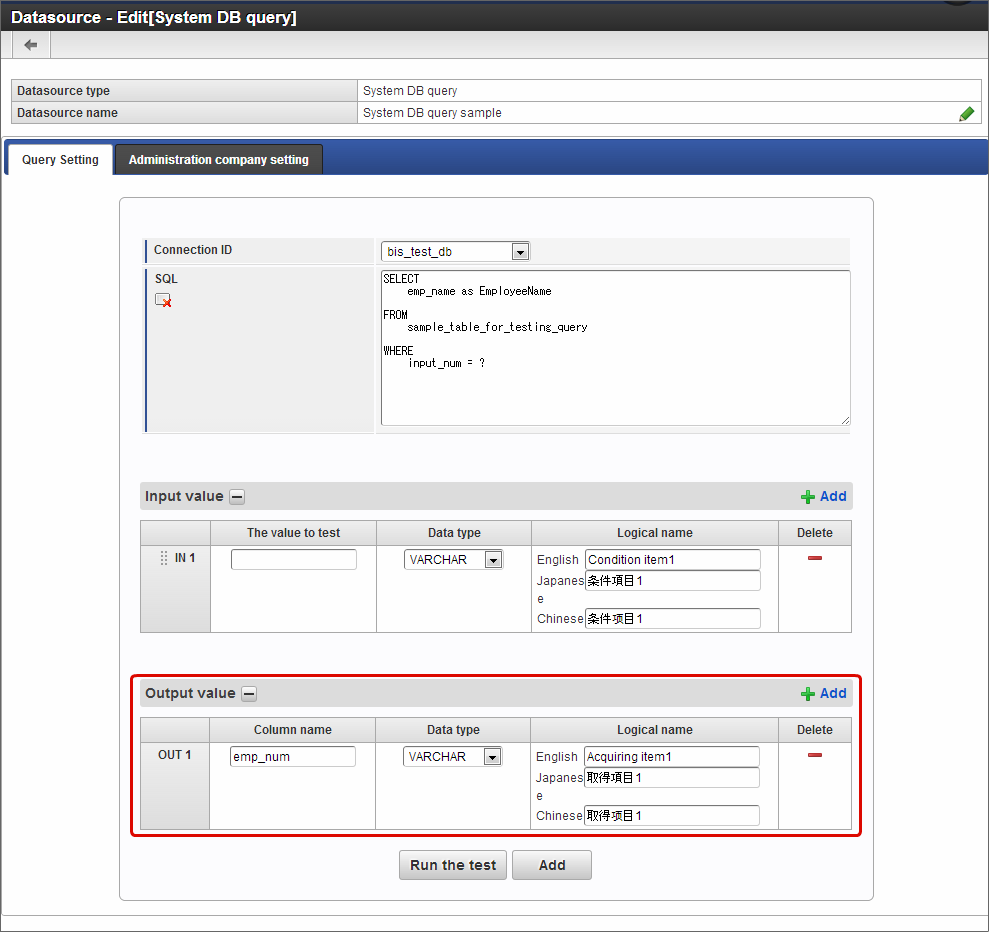
Set the output value matching with the column set in SELECT statement of SQL.
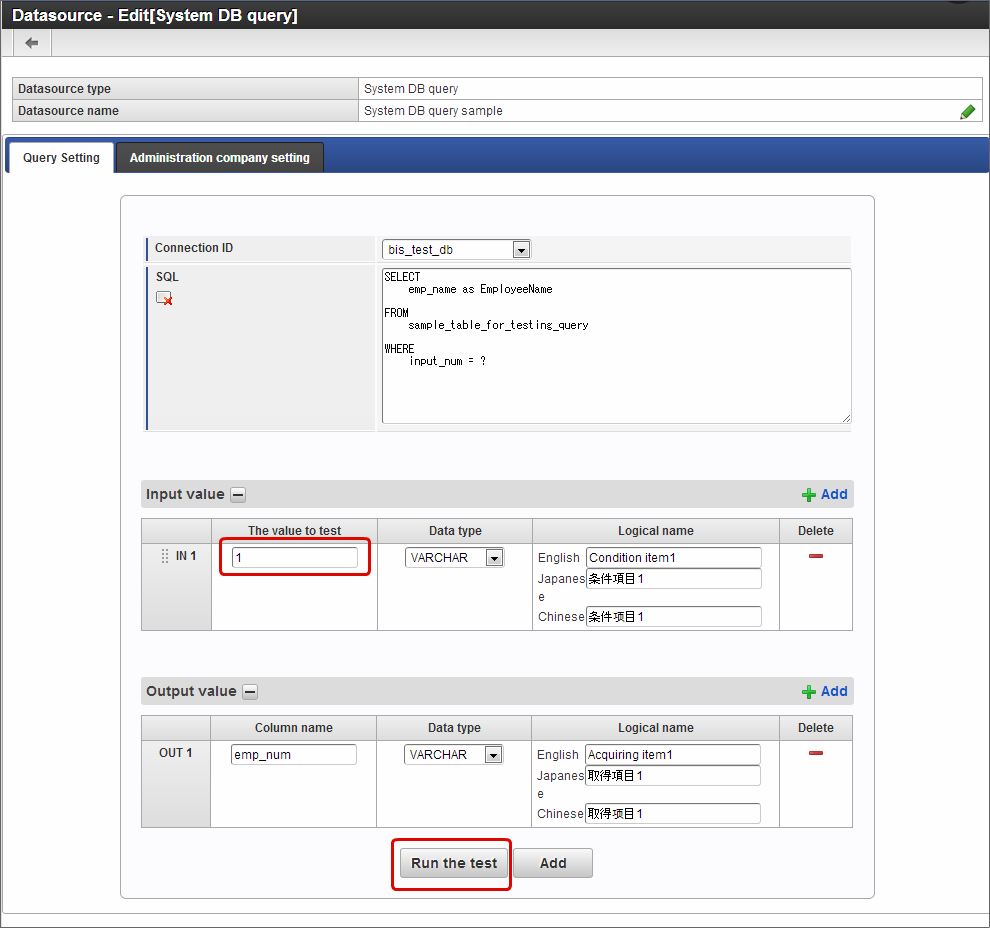
Click “Run the test” after entering the value for test in “The value to test”.
The following message is displayed when the test is successful.
Click “Add” after confirming the contents.
Added to “Datasource - List” as shown below if registered normally.

Datasource type: Register the datasource definition of SOAP
Click “Site map” -> “IM-BIS” -> “System administrator” -> “Master Maintenance” -> “External linkage” -> “Datasource definition”.
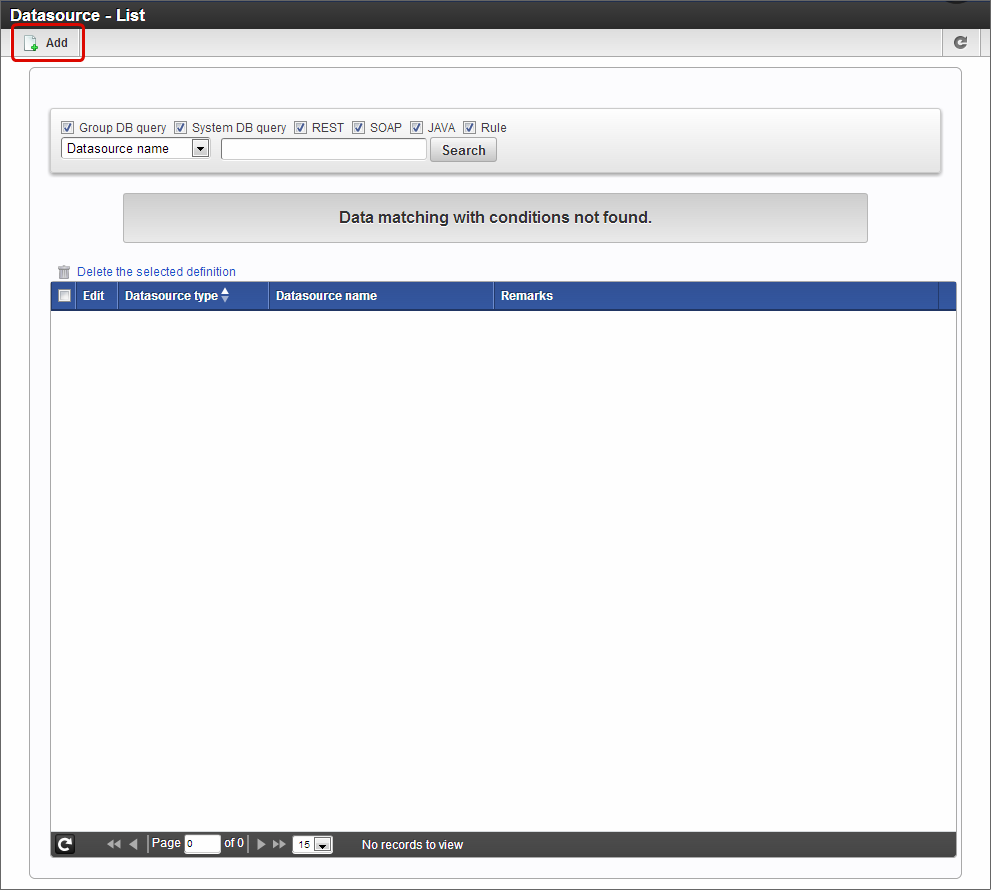
Click “Add” on “Datasource - List” screen.
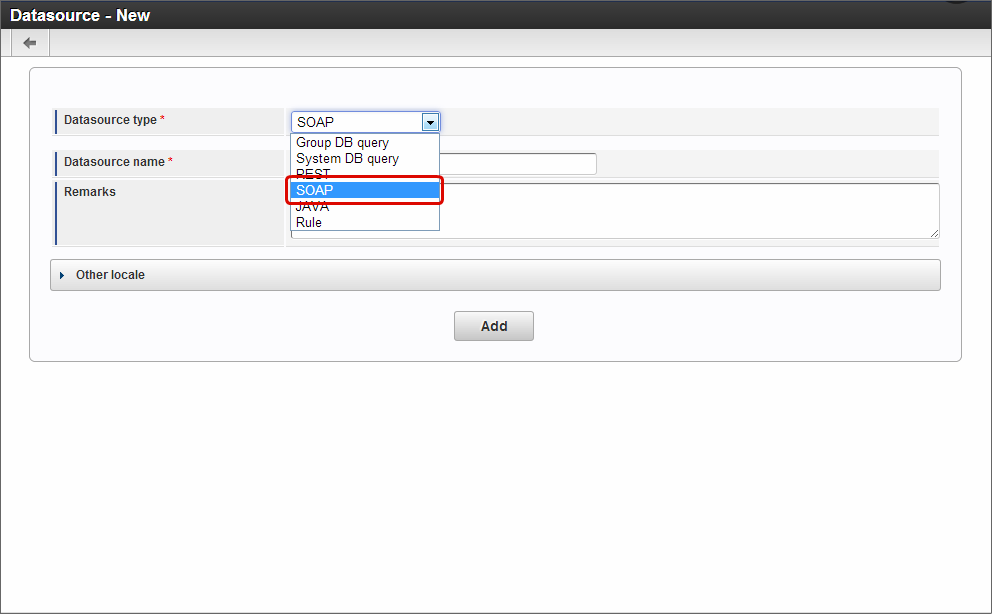
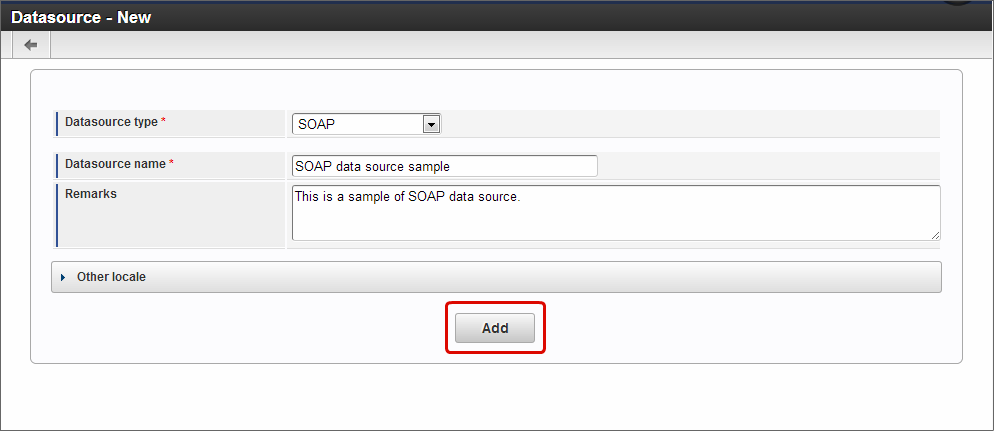
Select “SOAP” in datasource type.
Click “Add” after entering datasource name and remarks.
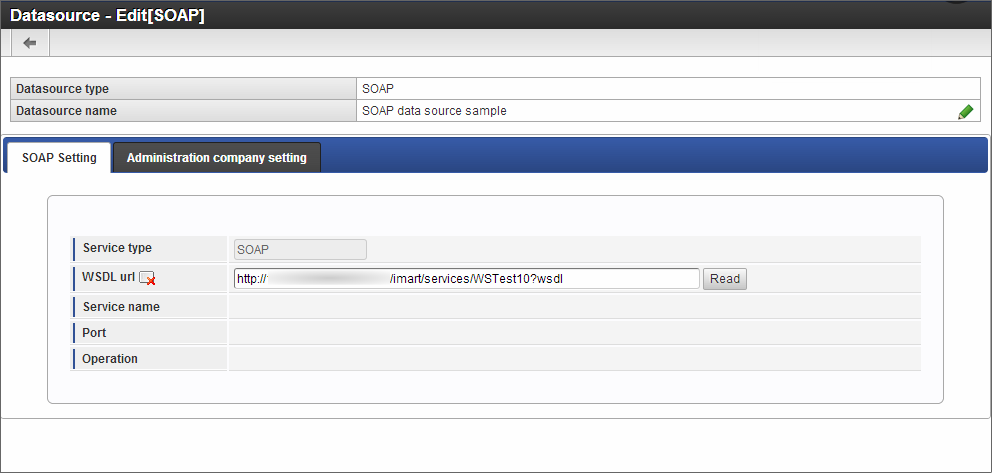
Enter the Web service address used in “Datasource - Edit [SOAP]” in “WSDL url”.
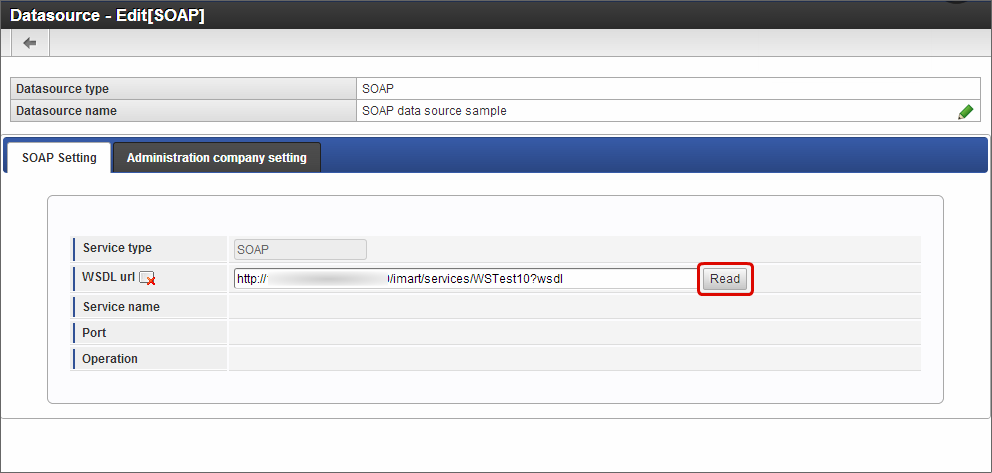
Click “Read”.
“Reading the wsdl succeeded.” message is displayed when read correctly.
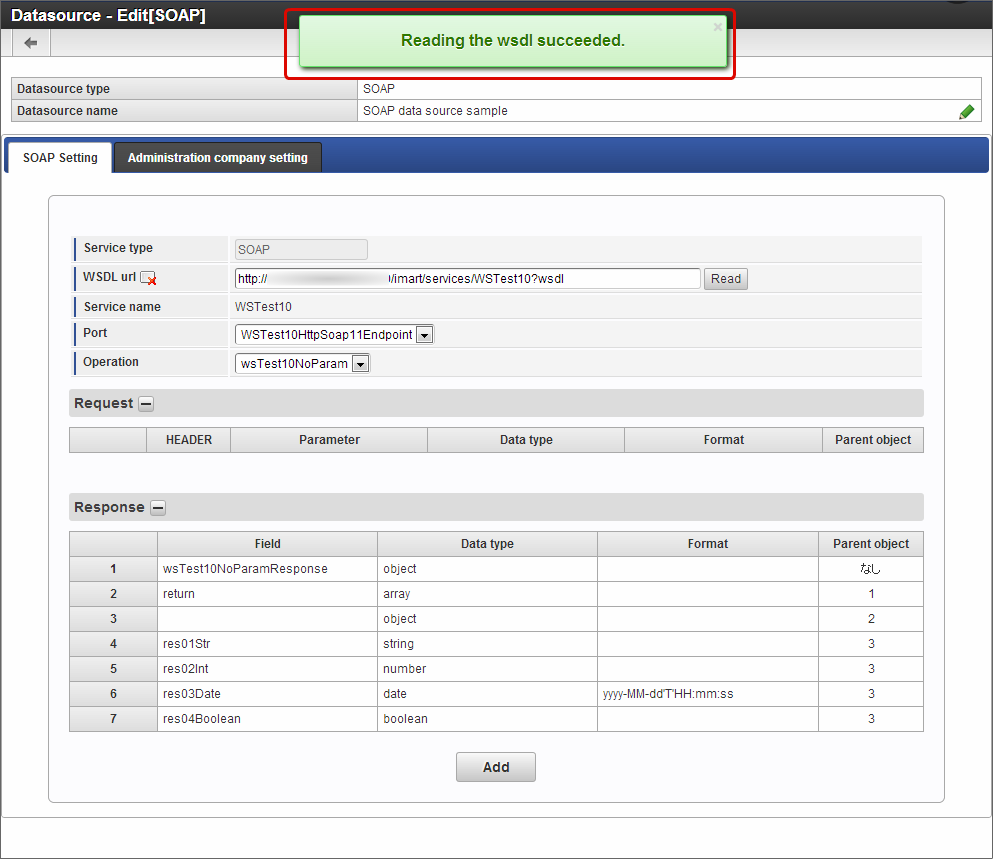
Set port and operations.
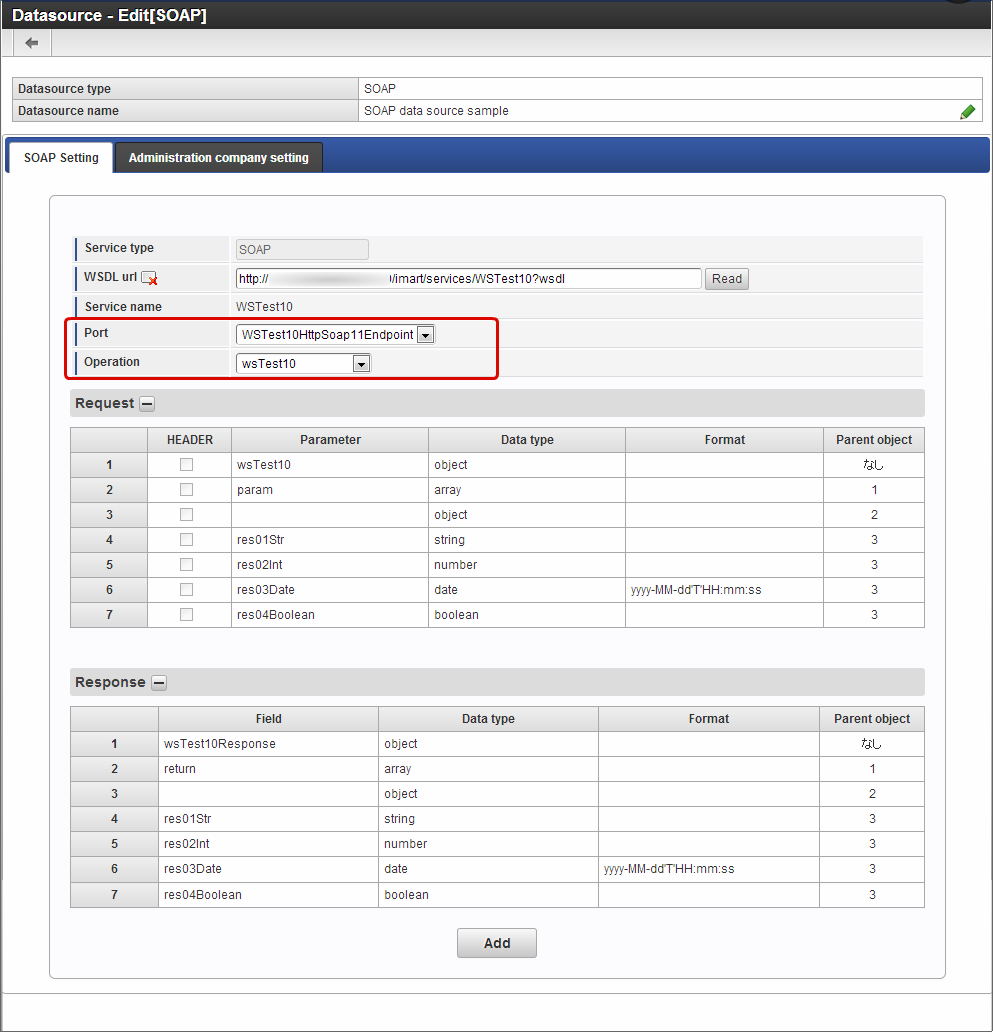
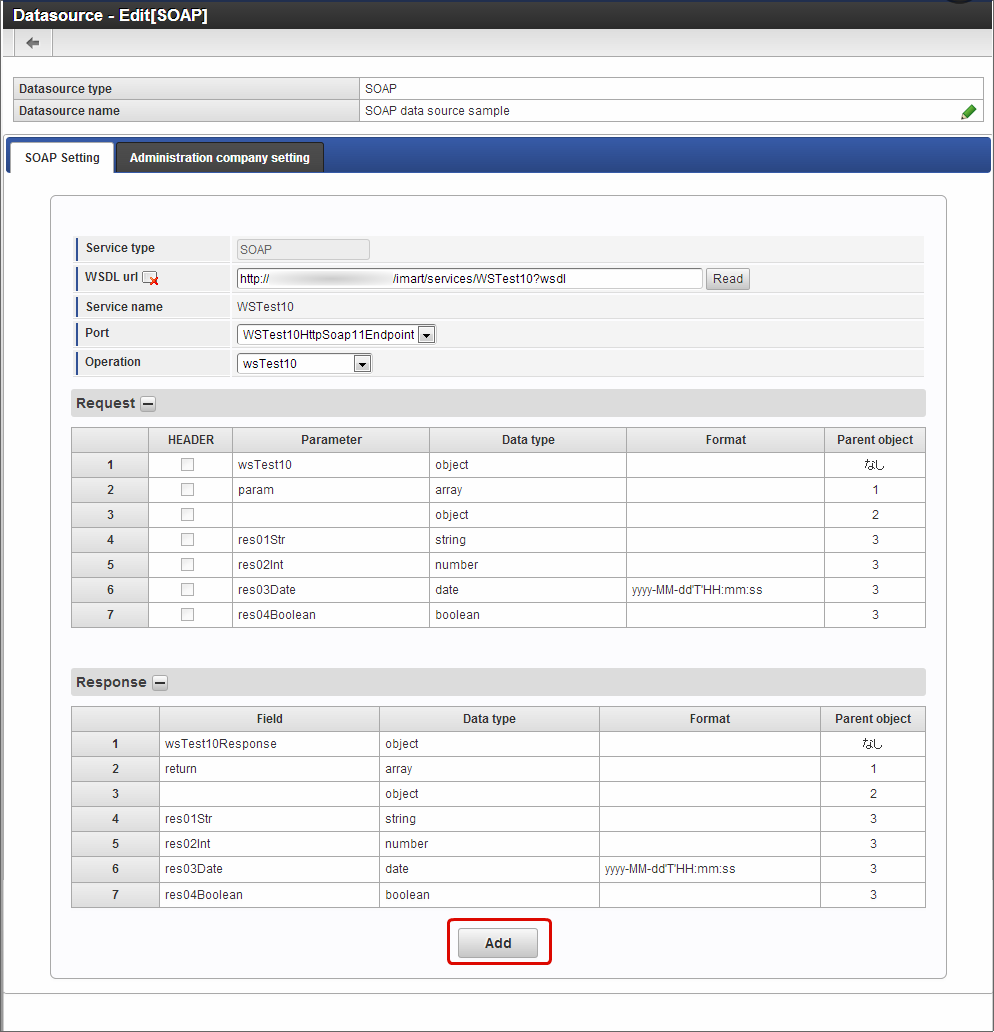
Click “Add” after checking that the request and response matching with the selected port and operation is displayed.
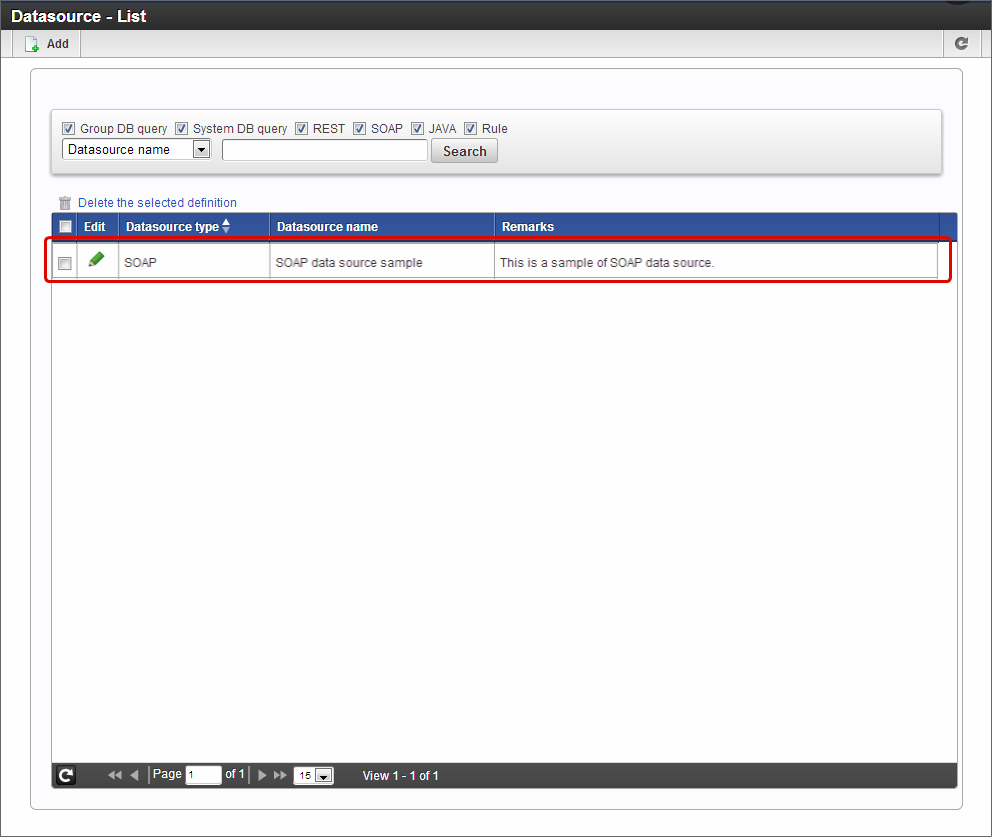
Added to “Datasource - List” as shown below if registered normally.
Datasource type: Register the datasource definition of REST
Click “Site map” -> “IM-BIS” -> “System administrator” -> “Master Maintenance” -> “External linkage” -> “Datasource definition”.
Click “Add” on “Datasource - List” screen.
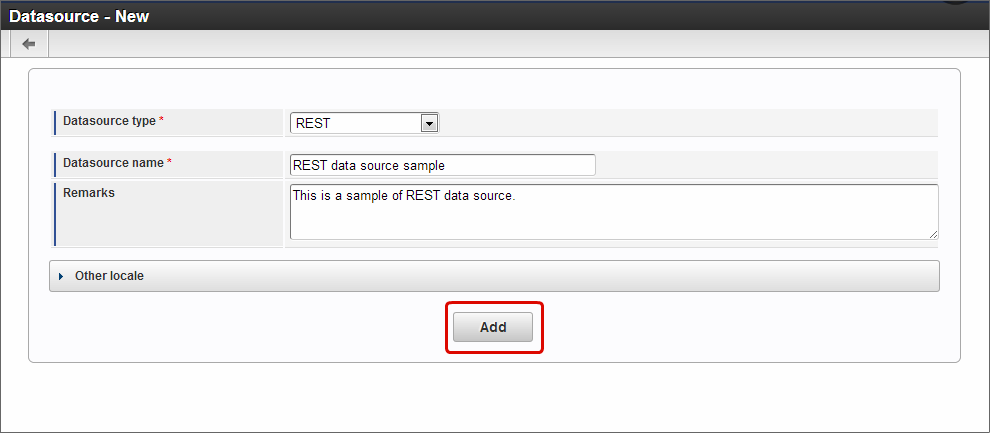
Select “REST” in datasource type.
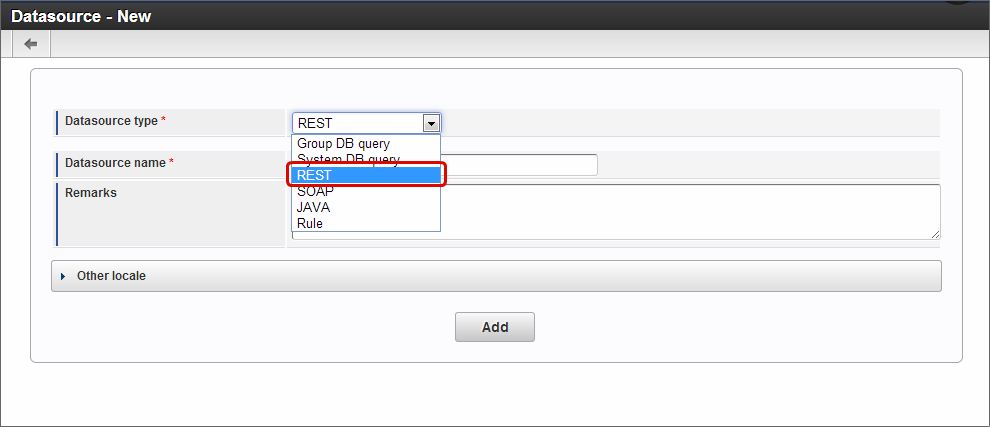
Click “Add” after entering datasource name and remarks.
Set “URL of REST”, “URI”, “Method”, “Return format”, “Return character code”.
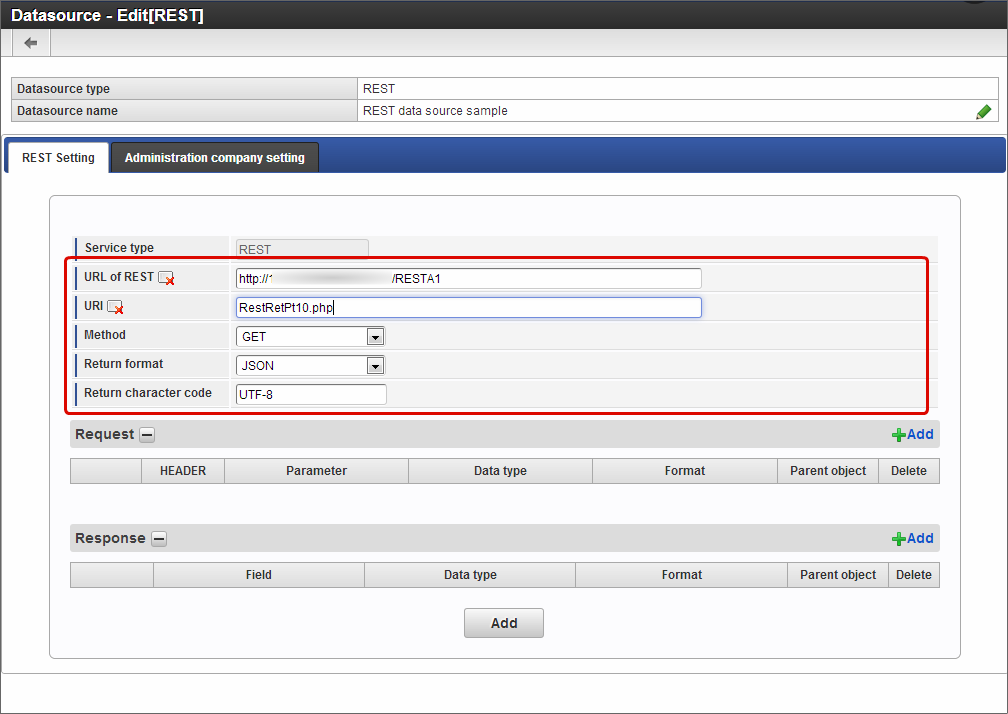
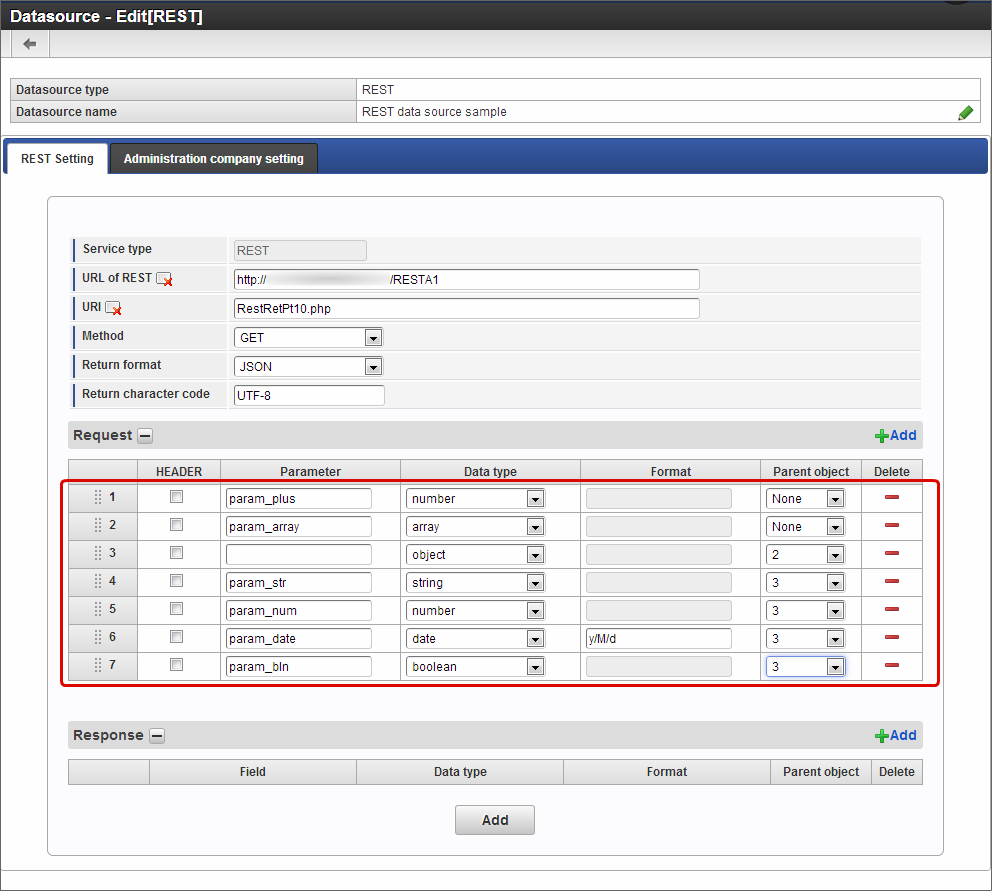
Click “Add” in “Request”.
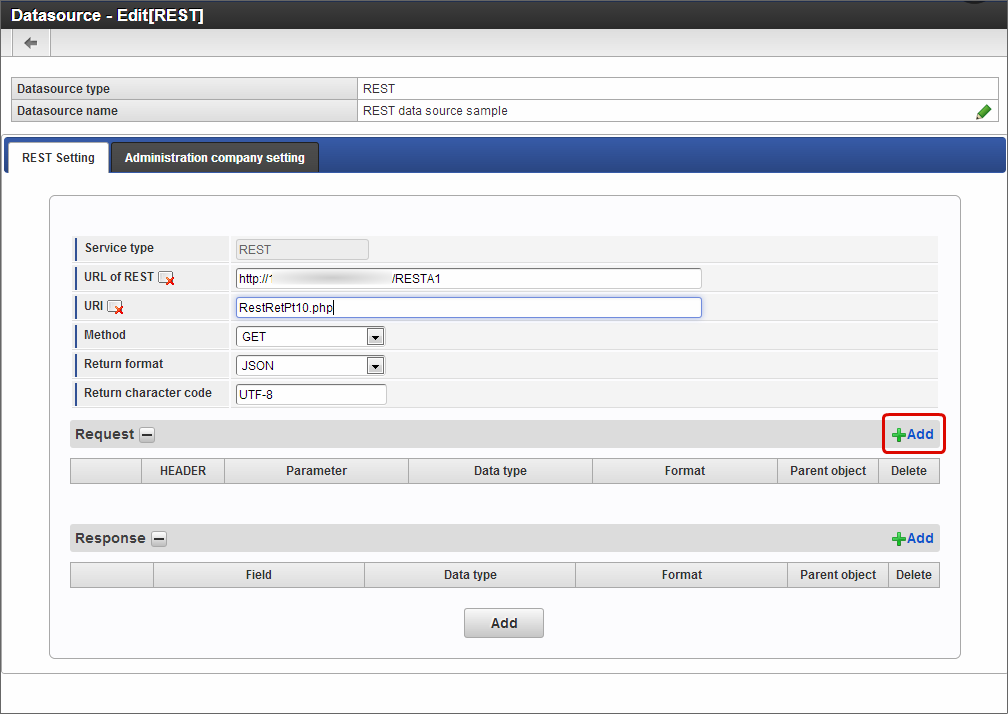
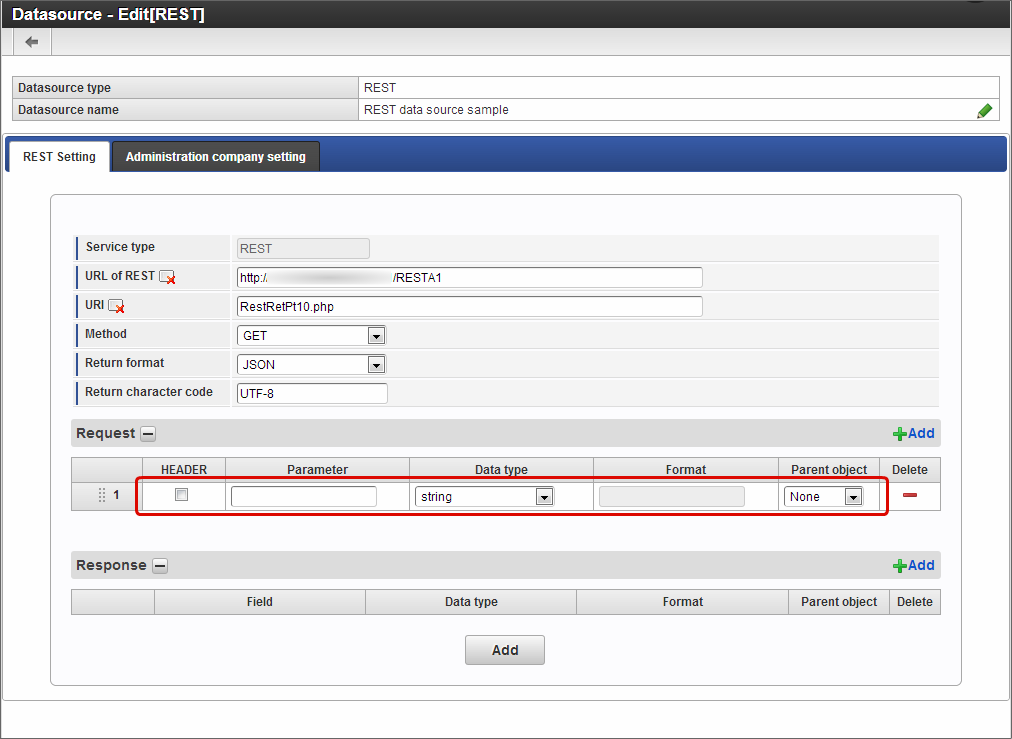
Repeat the steps 6~7 and set the required request parameters.
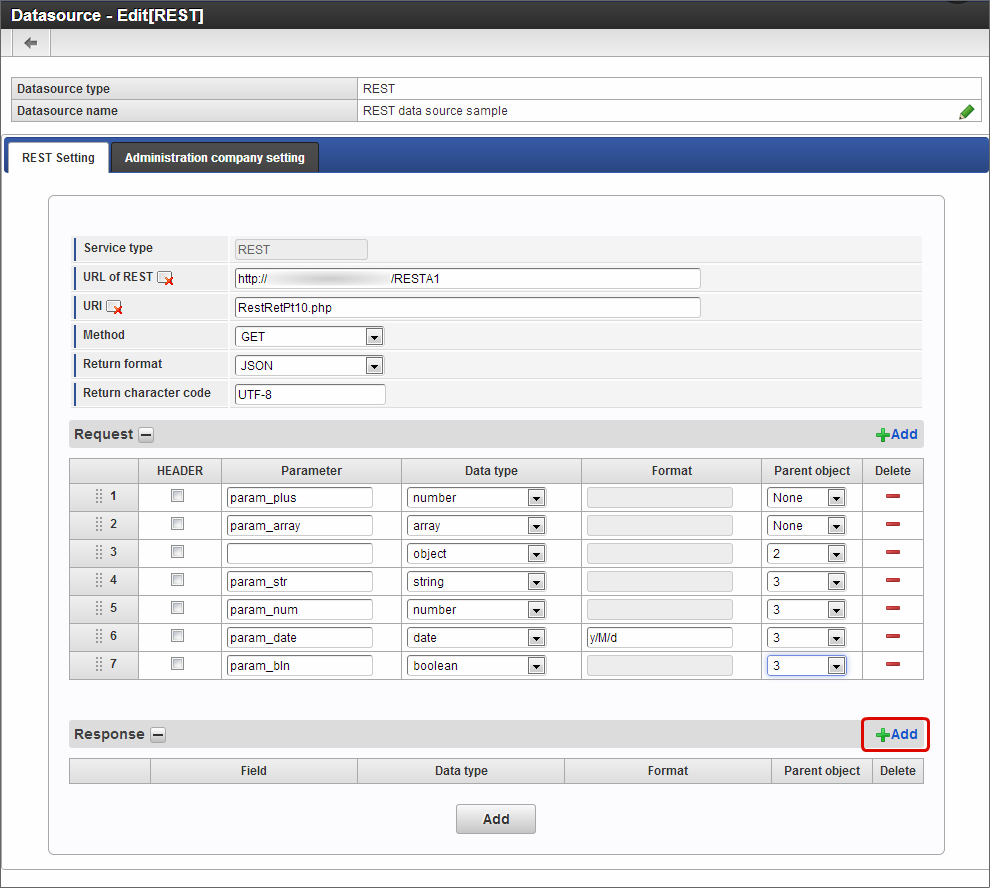
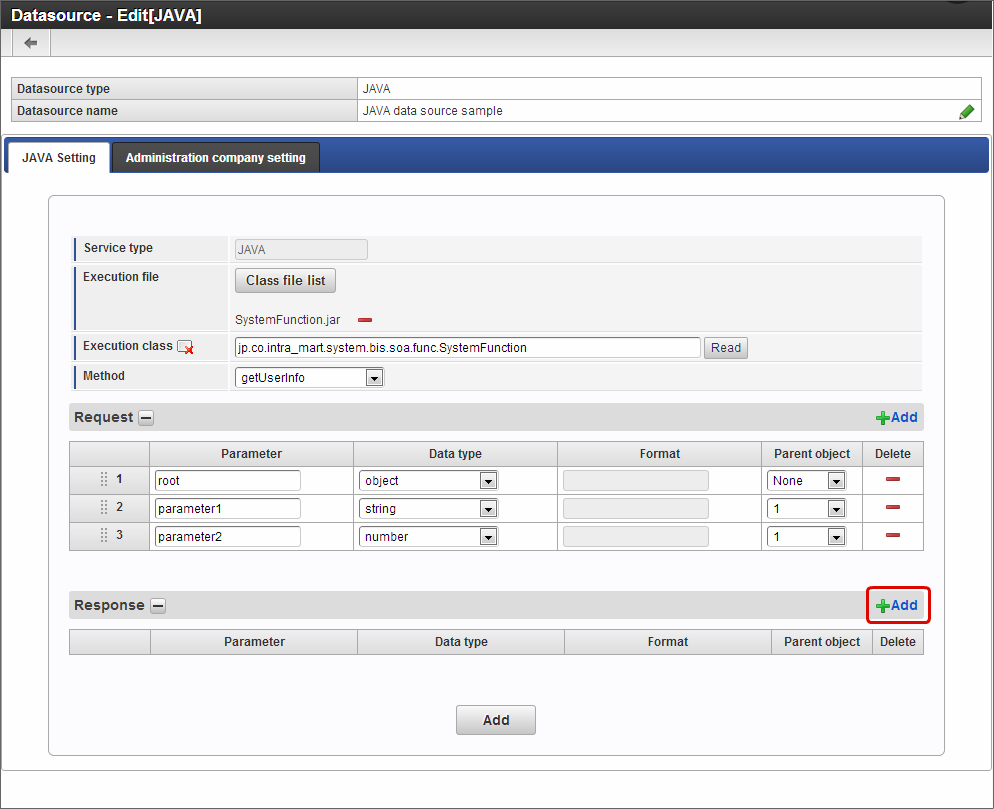
Click “Add” in “Response”.
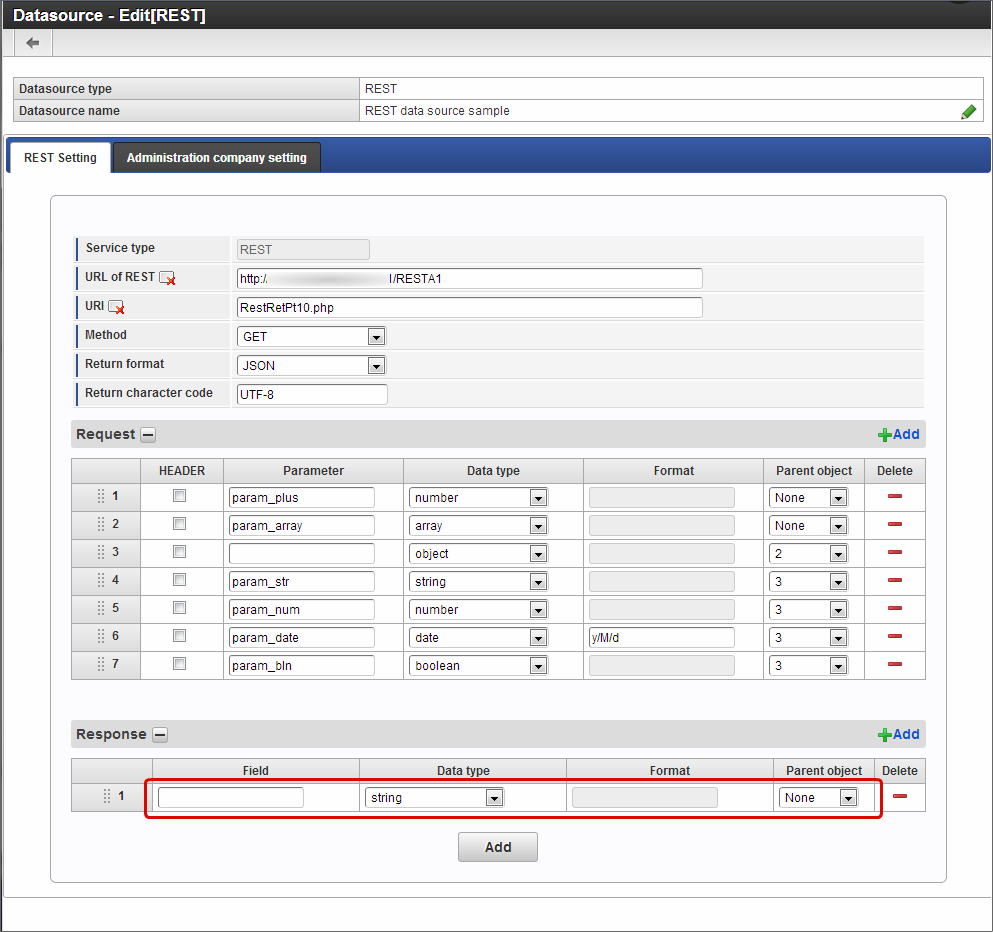
Repeat steps 9~10 and set the required response field.
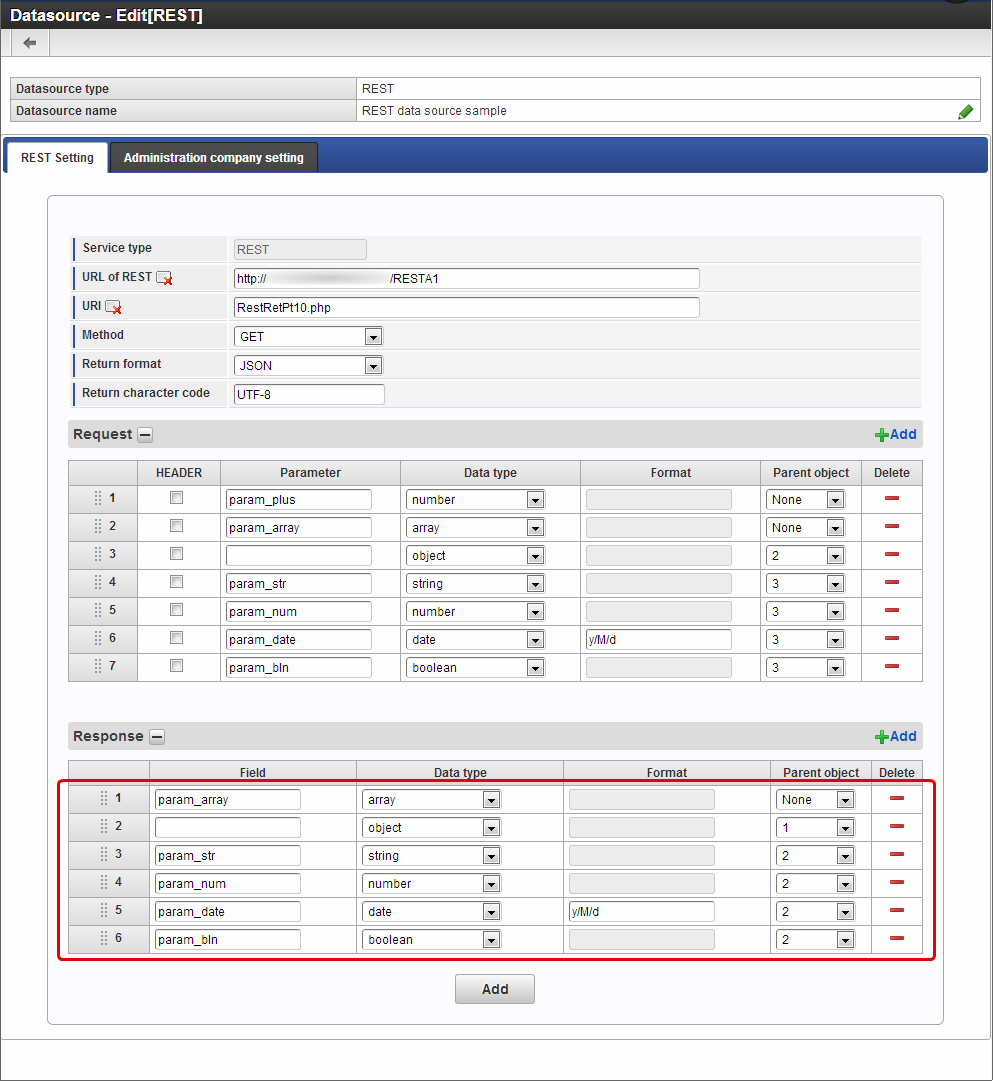
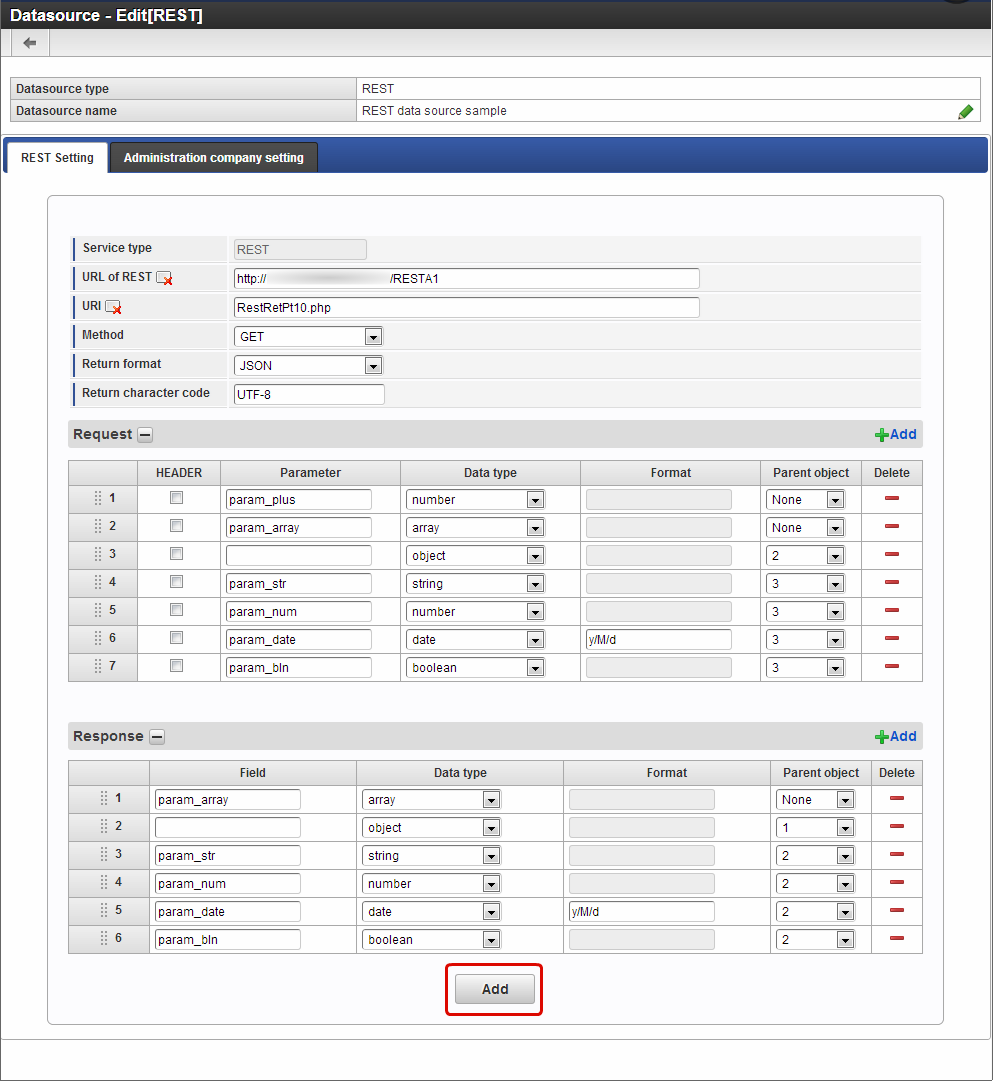
Click “Add” after setting the required information.
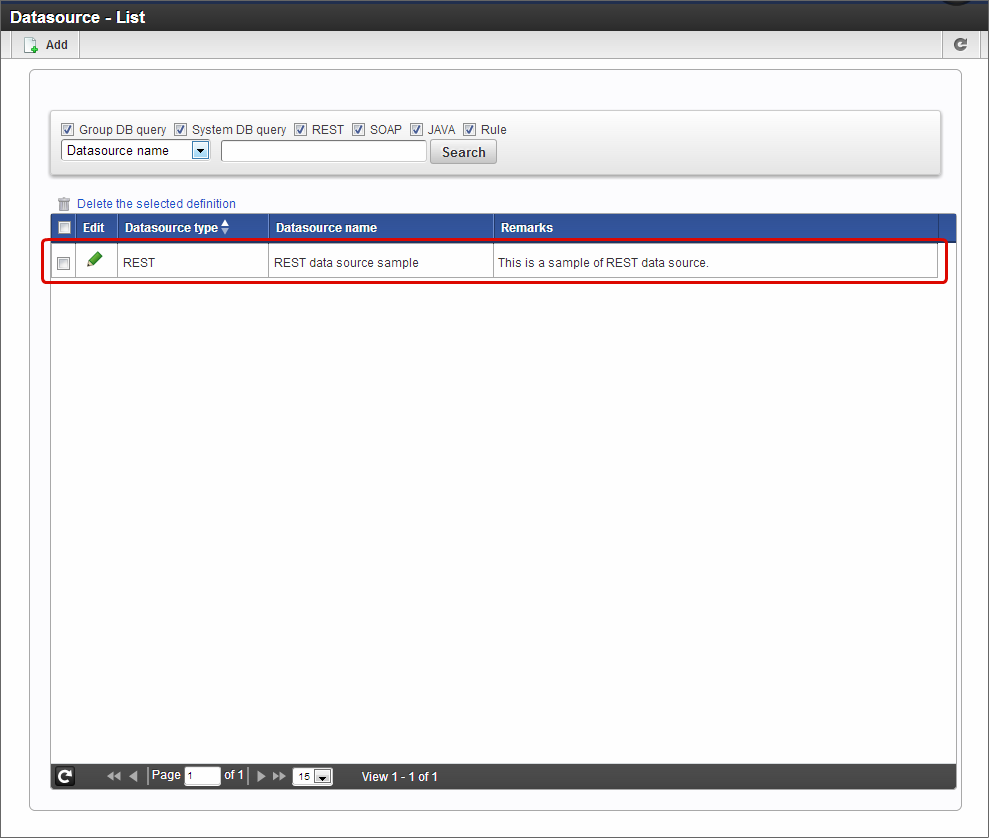
Added to “Datasource - List” as shown below if registered normally.
Datasource type: Register datasource definition of JAVA
Click “Site map” -> “IM-BIS” -> “System administrator” -> “Master Maintenance” -> “External linkage” -> “Datasource definition”.
Click “Add” on “Datasource - List” screen.

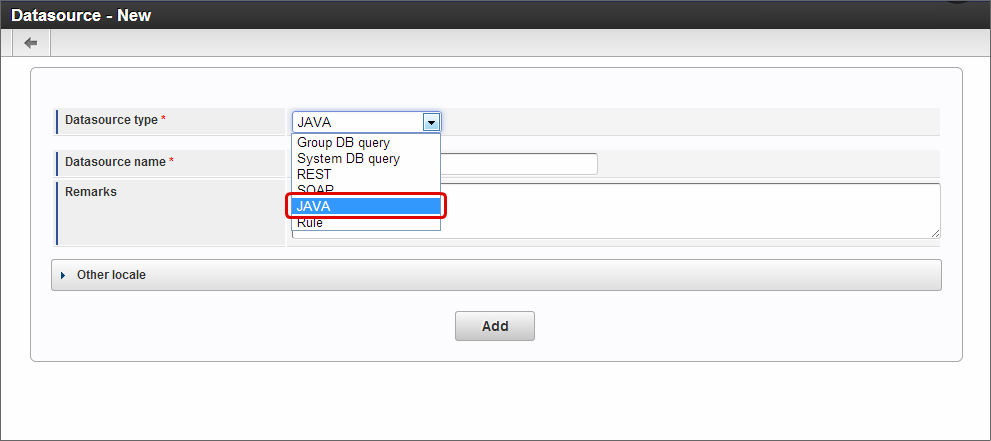
Select “JAVA” in datasource type.
Click “Add” after entering the datasource name and remarks.

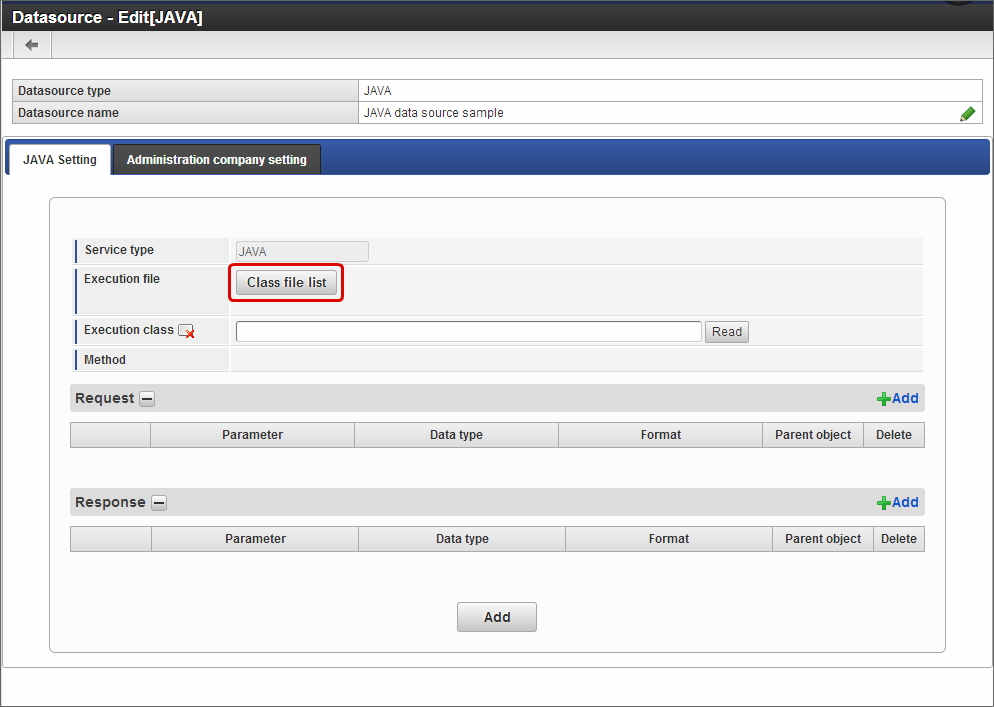
Click “Class file list”.
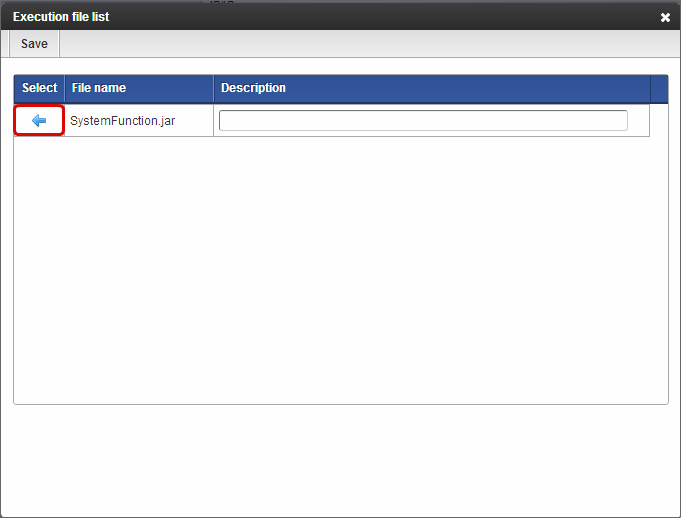
Click “Select” of file set from “Execution file list”.
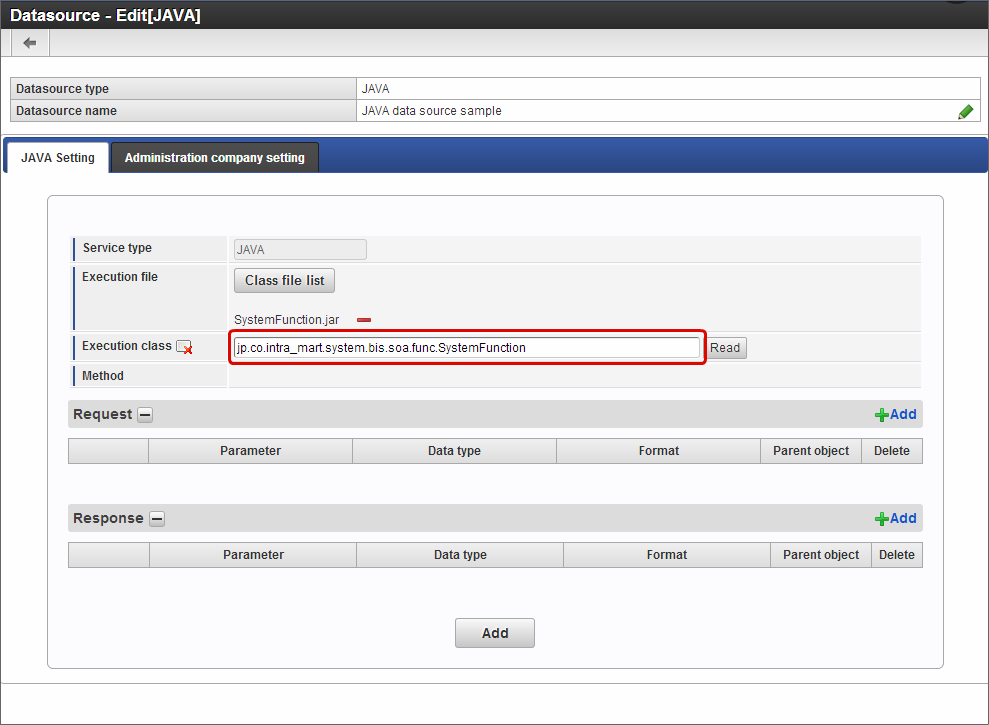
Enter the fully qualified class name of the class included in the file set in “Execution class”.
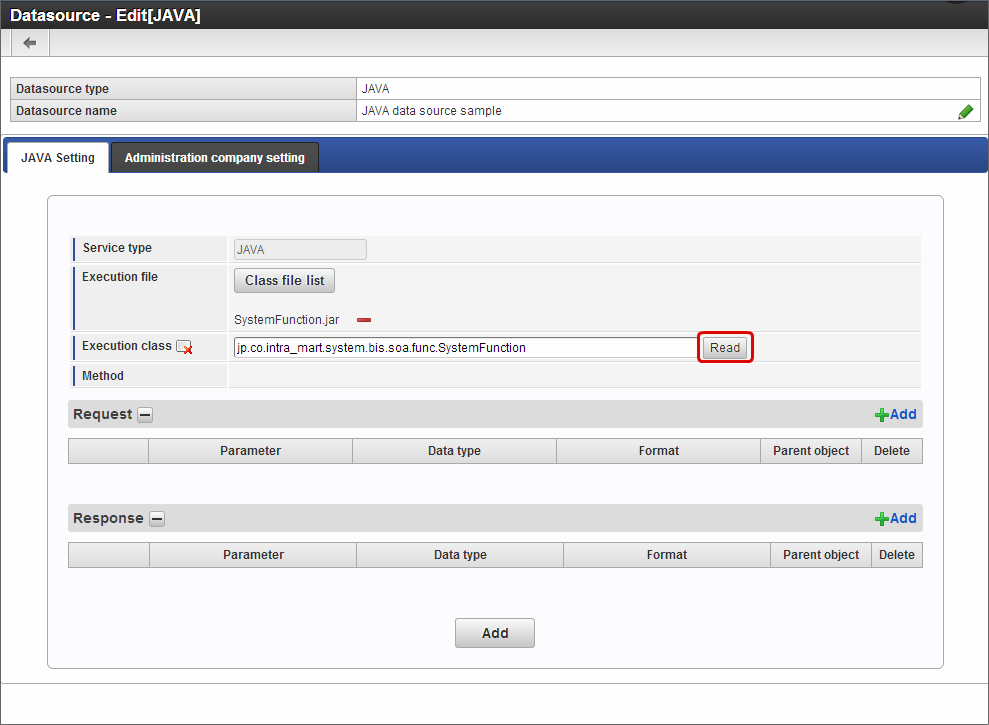
Click “Read”.
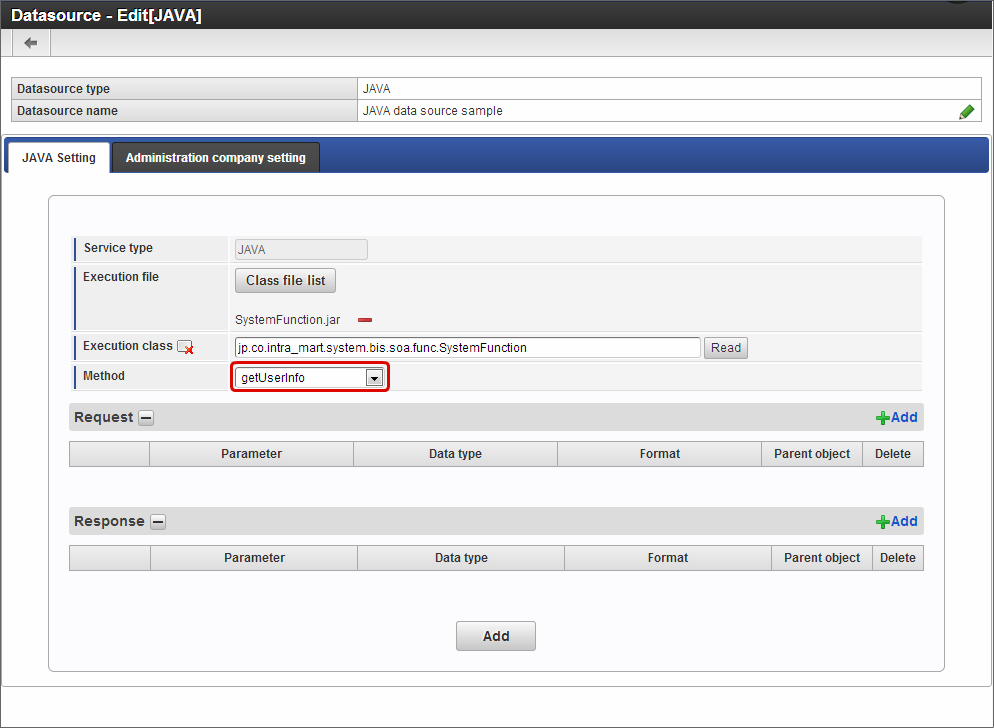
Select the method to be used from the methods displayed after reading is successful.
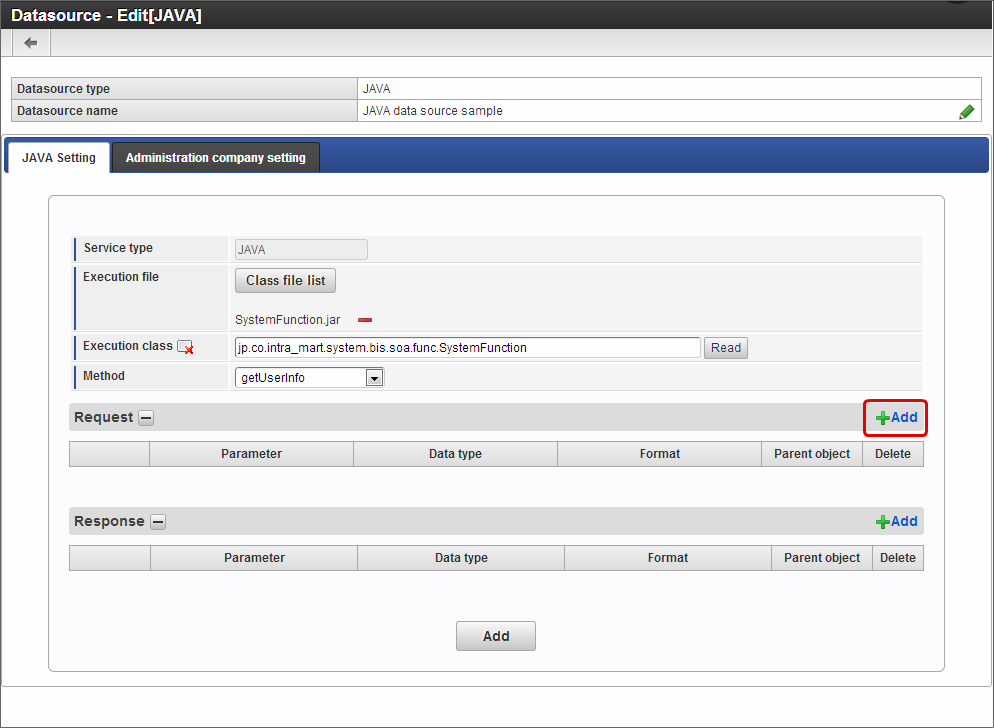
Click “Add” in “Request”.
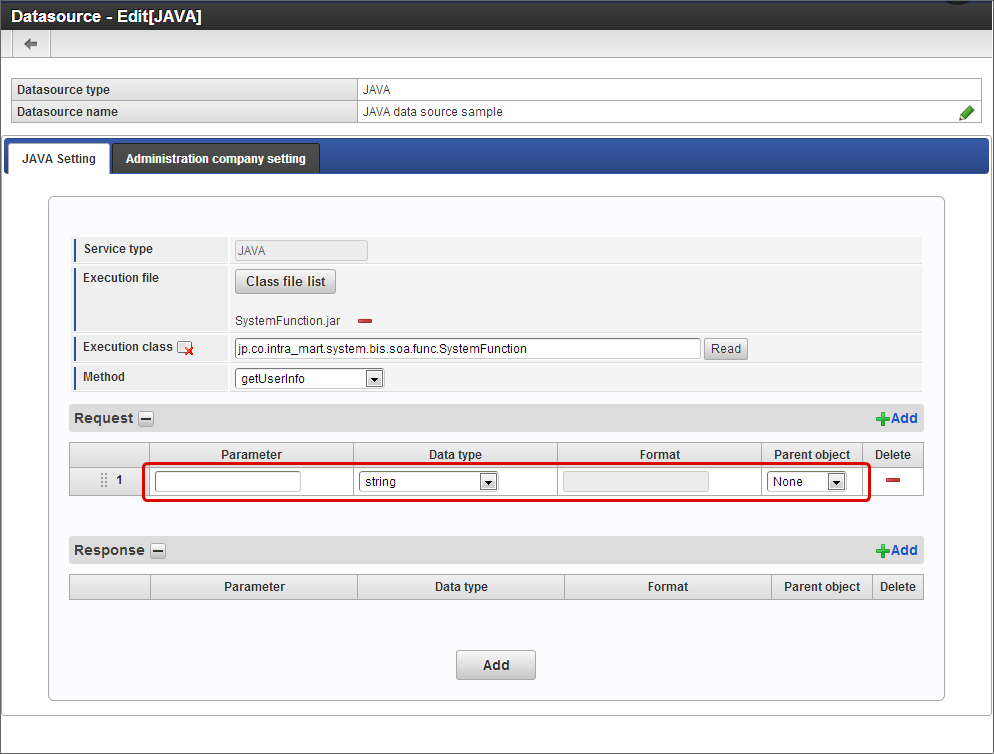
Repeat steps 10~11 and set the required request parameters.
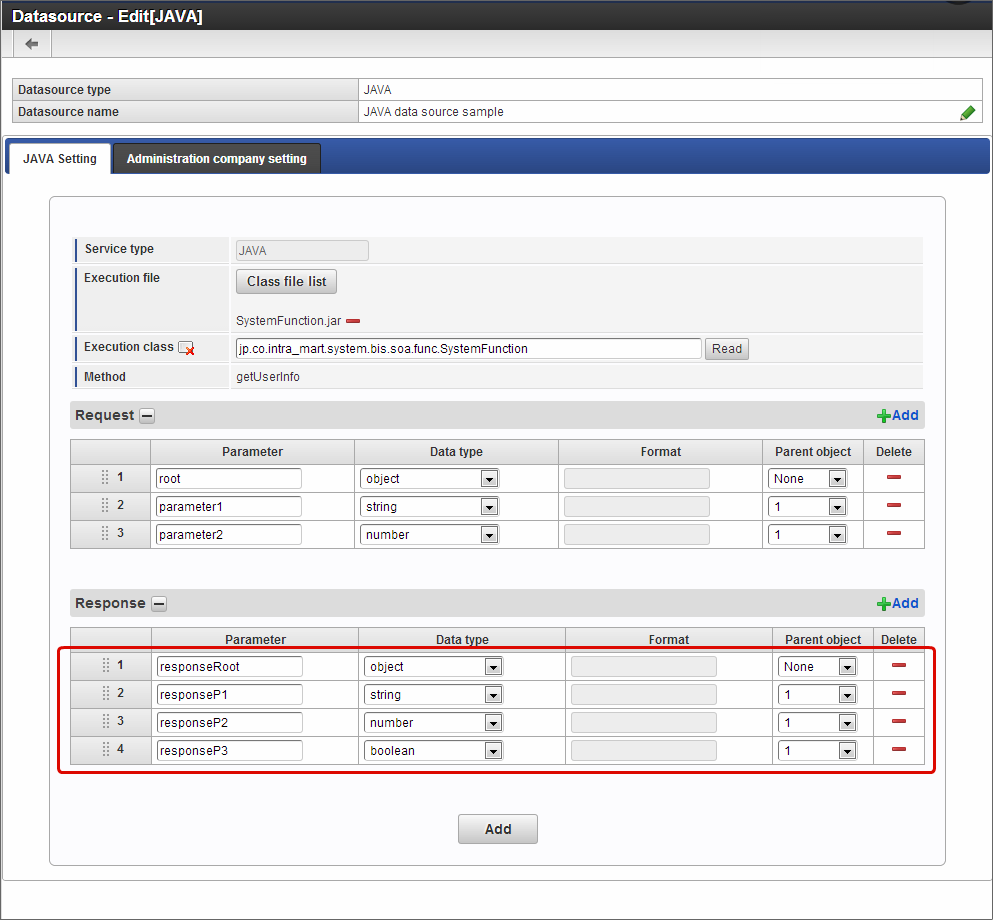
Click “Add” in “Response”.

Repeat steps 13~14 and set the required response parameters.
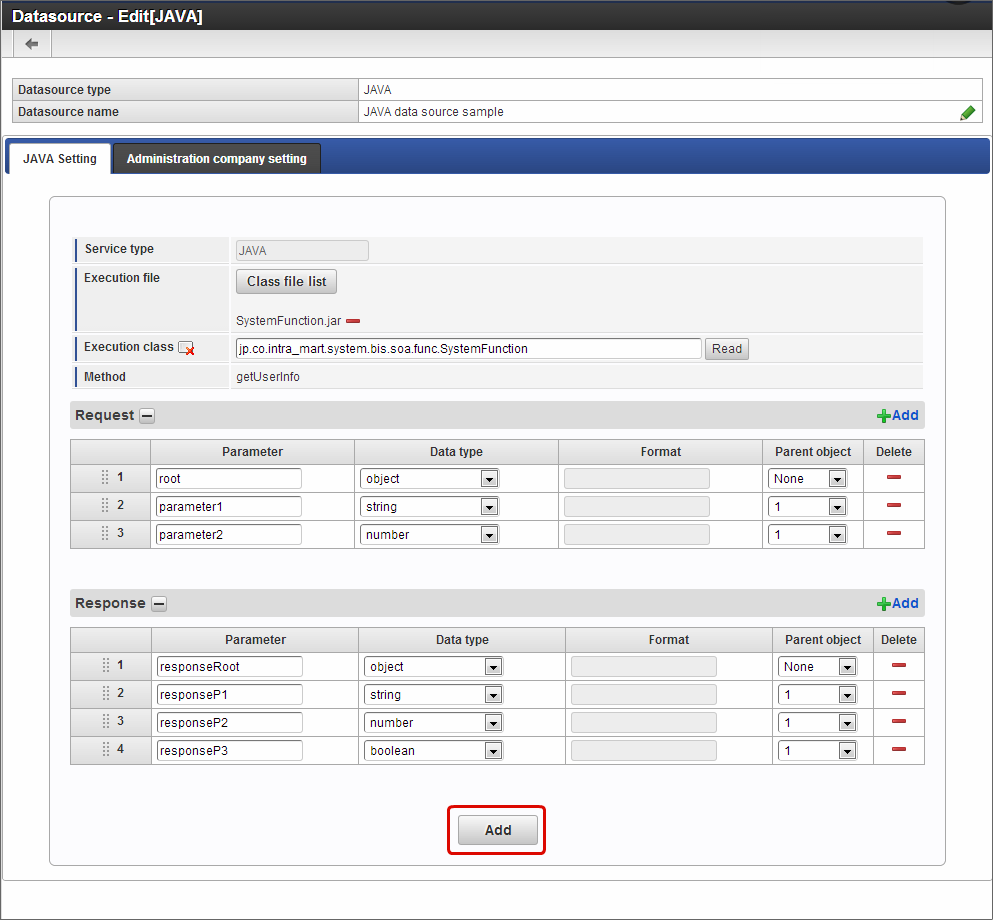
Click “Add” after setting the required information.
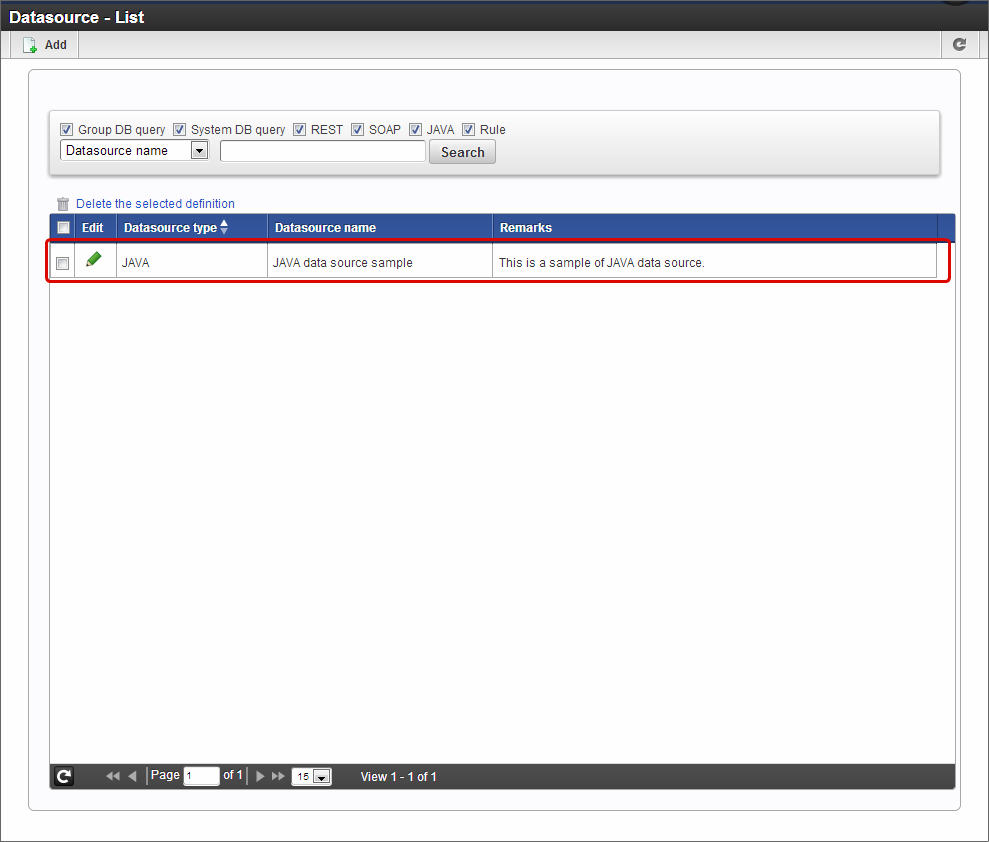
Added to “Datasource - List” as shown below if registered normally.
Note
Since the BIS business administrator uses the registered datasource definition, add to administration target of administration group according to the procedure of following link destinations after registration.
Methods of setting hierarchical request parameters and response fields
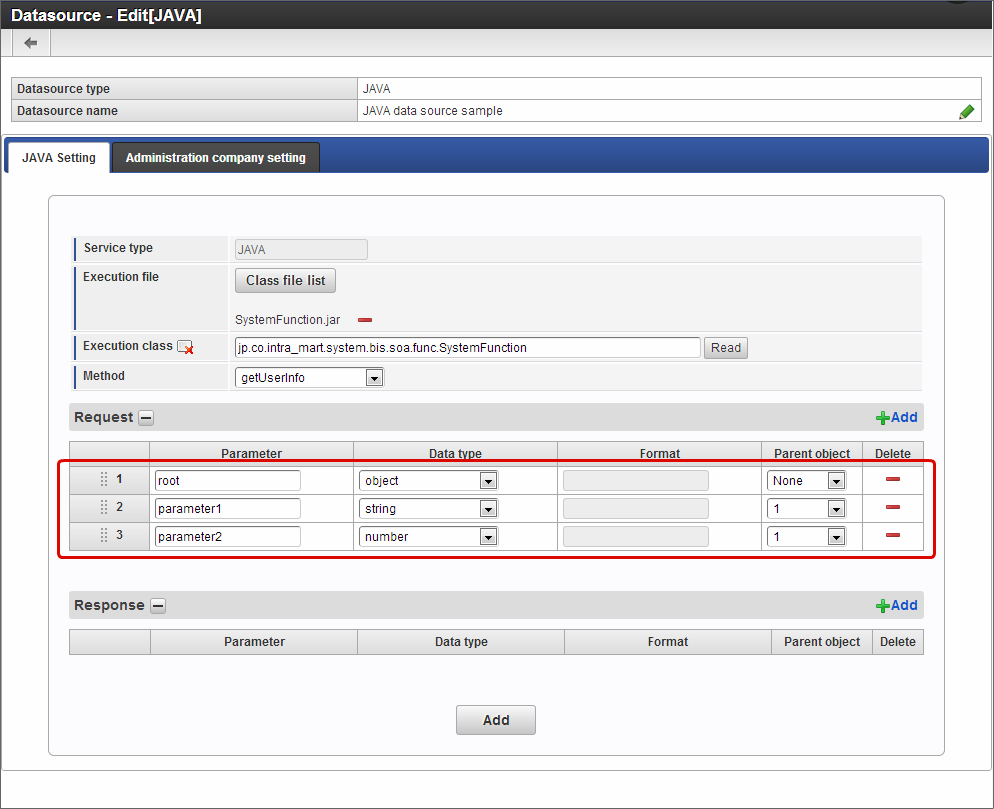
When the settings of parameter fields to be called are in hierarchical structure, set by matching with the hierarchy specified in call destination.The setting example of definition of parameter field in hierarchical structure and datasource definition is as shown in the following figure.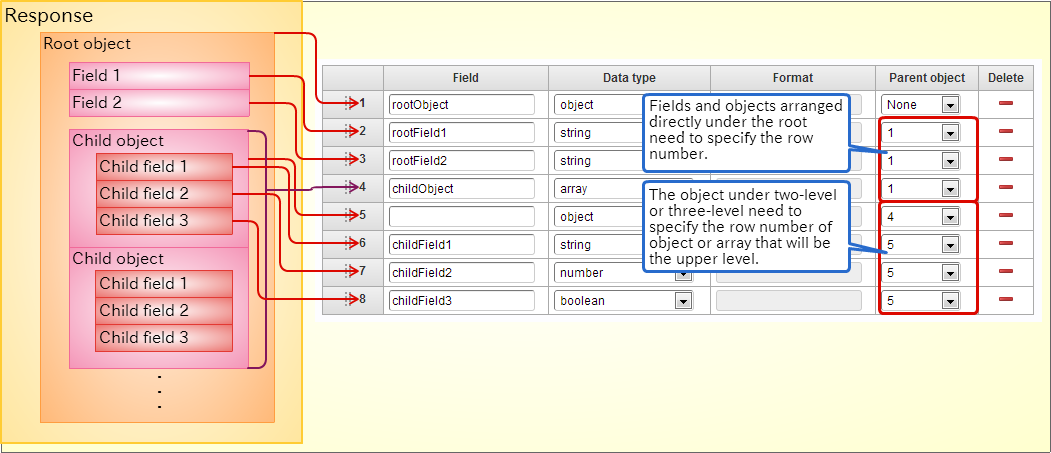 If set in the above format, display by hierarchizing in tree format in data mapper.
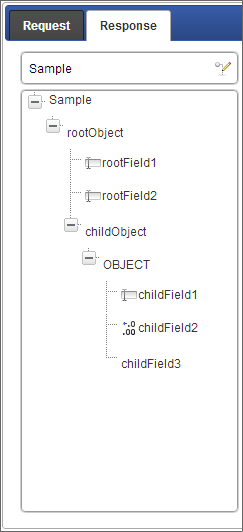
Note
- Display as “OBJECT” when data type is “object”.
- Display as “ARRAY” when data type is “array”.
- Display as “VALUE” when data type is any of the “string”, “number”, “date”, “boolean”.