3.2. 前処理のサンプル実装
3.2.1. Java による前処理の実装
Java で前処理を実装するには、 jp.co.intra_mart.foundation.bloommaker.route.preprocess.BMContentPreprocessor を実装したクラスを作成してください。
public class PreProcessor implements BMContentPreprocessor {

    @Override
    public Map<String, Object> execute(final BMContentPreprocessorContext context) throws BloomMakerException {
        // 返却するマップ
        final Map<String, Object> result = new HashMap<>();

        // 単純なキー・バリューをセットします。
        result.put("foo", "bar");

        // アカウントコンテキストをセットします。
        final Map<String, Object> accountContextMap = new HashMap<>();
        final AccountContext accountContext = Contexts.get(AccountContext.class);
        accountContextMap.put("calendarId", accountContext.getCalendarId());
        accountContextMap.put("encoding", accountContext.getEncoding());
        accountContextMap.put("userCd", accountContext.getUserCd());
        result.put("accountContext", accountContextMap);

        // リクエストパラメータを取得します。
        final String targetLocale = (String) context.getParsedRequestParameters().get("locale");

        // 取得したロケールに応じたフォーマットで現在日時をフォーマットします。
        final DateTimeFormatSetInfo[] formats = SystemDateTimeFormat.getFormatSets();
        final String formatsetId = Arrays.asList(formats).stream()
                .filter(format -> format.getLocale().toString().equals(targetLocale))
                .findFirst().map(format -> format.getFormatSetId())
                .orElse(SystemDateTimeFormat.getDefaultFormatSet().getFormatSetId());
        final String format = SystemDateTimeFormat.getFormats(formatsetId)
                .get("IM_DATETIME_FORMAT_DATE_STANDARD");
        final DateTimeFormatter formatter = DateTimeFormatter.withPattern(format);
        result.put("currentDate", formatter.format(new Date()));

        // 結果として、次のようなオブジェクトを返します。
        // {
        //   "foo": "bar",
        //   "accountContext": {
        //     "calendarId": "カレンダーID",
        //     "encoding": "エンコーディング",
        //     "userCd": "ユーザコード"
        //   },
        //   "currentDate": "ロケールに応じた現在日時"
        // }

        return result;
    }
}
実装した前処理の結果を受け取るためには、Im-BloomMakerのデザイナ画面で入力を設定する必要があります。設定内容は次の通りです。
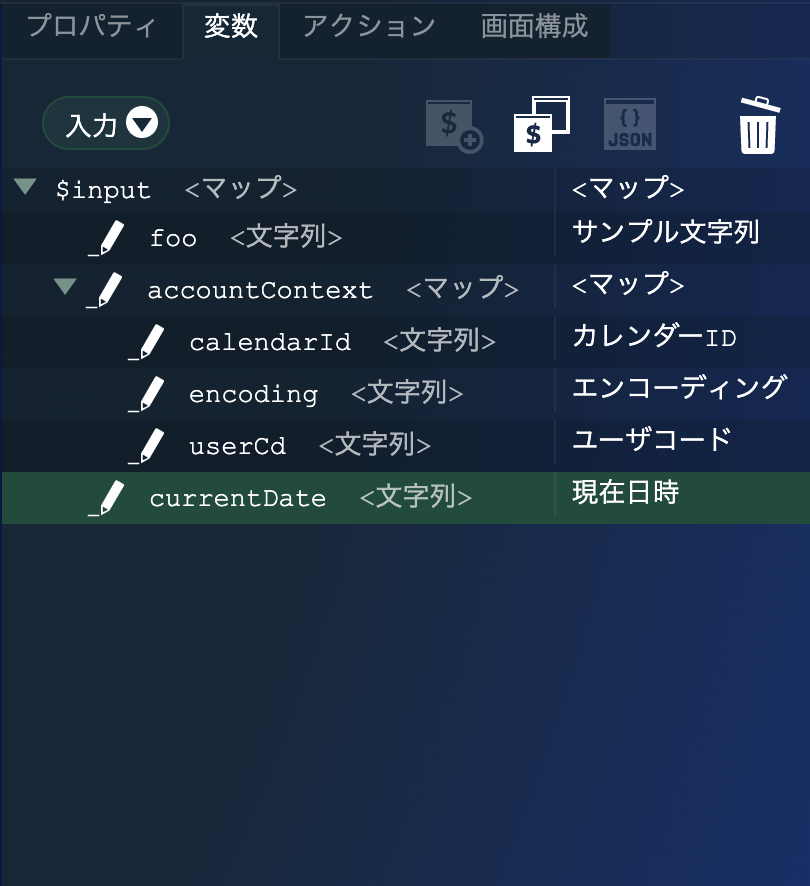
エレメントは以下のように配置します。
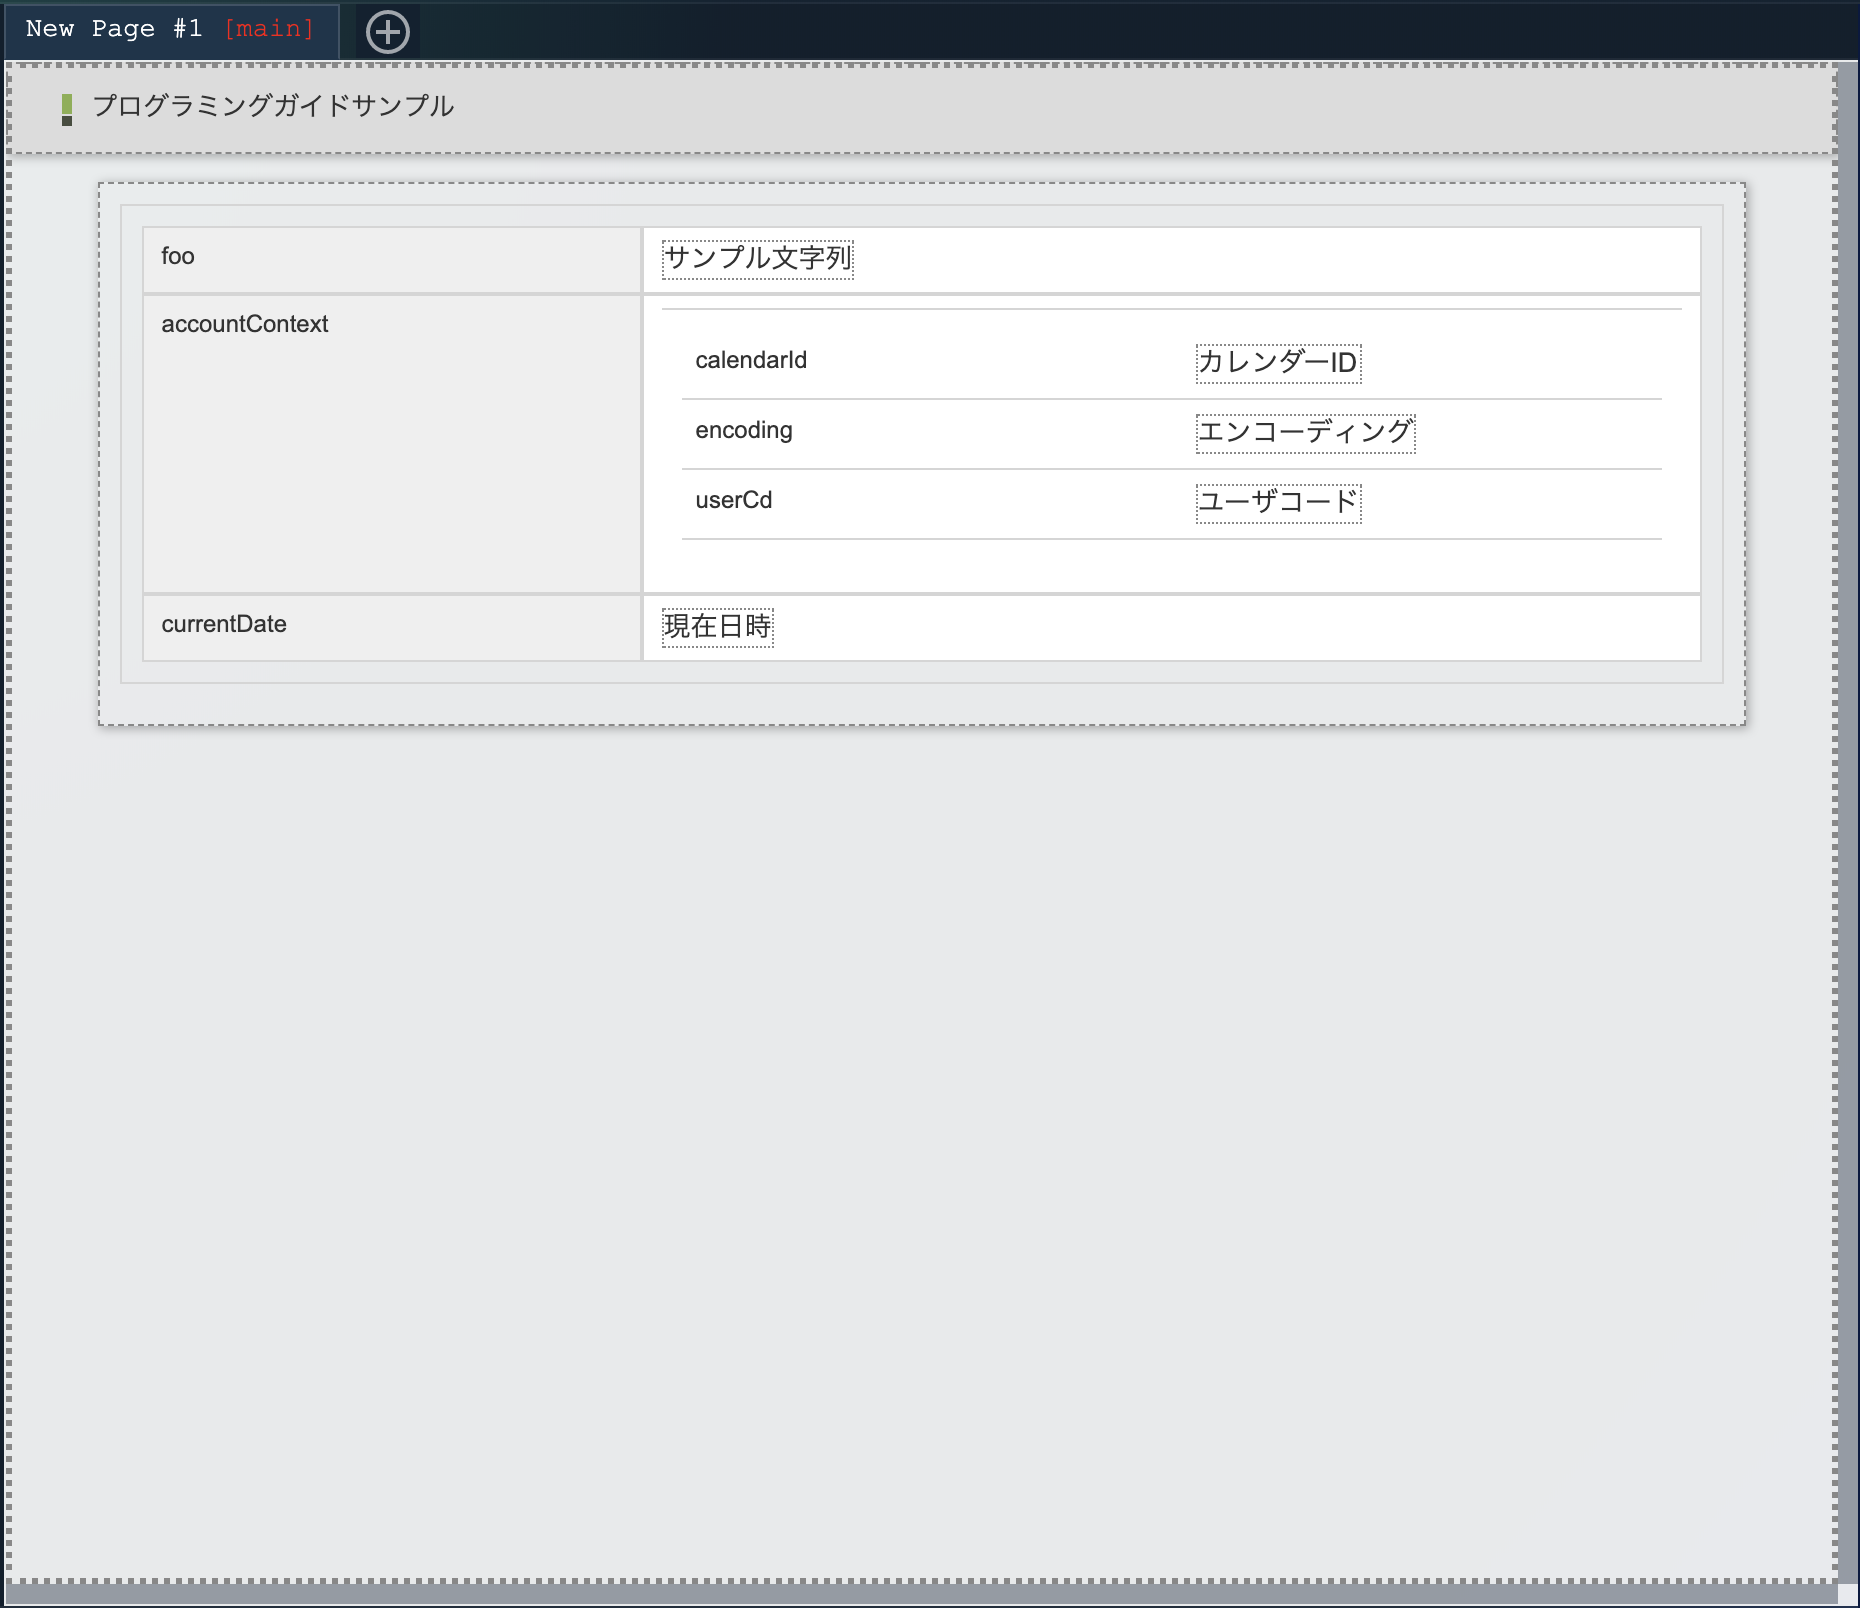
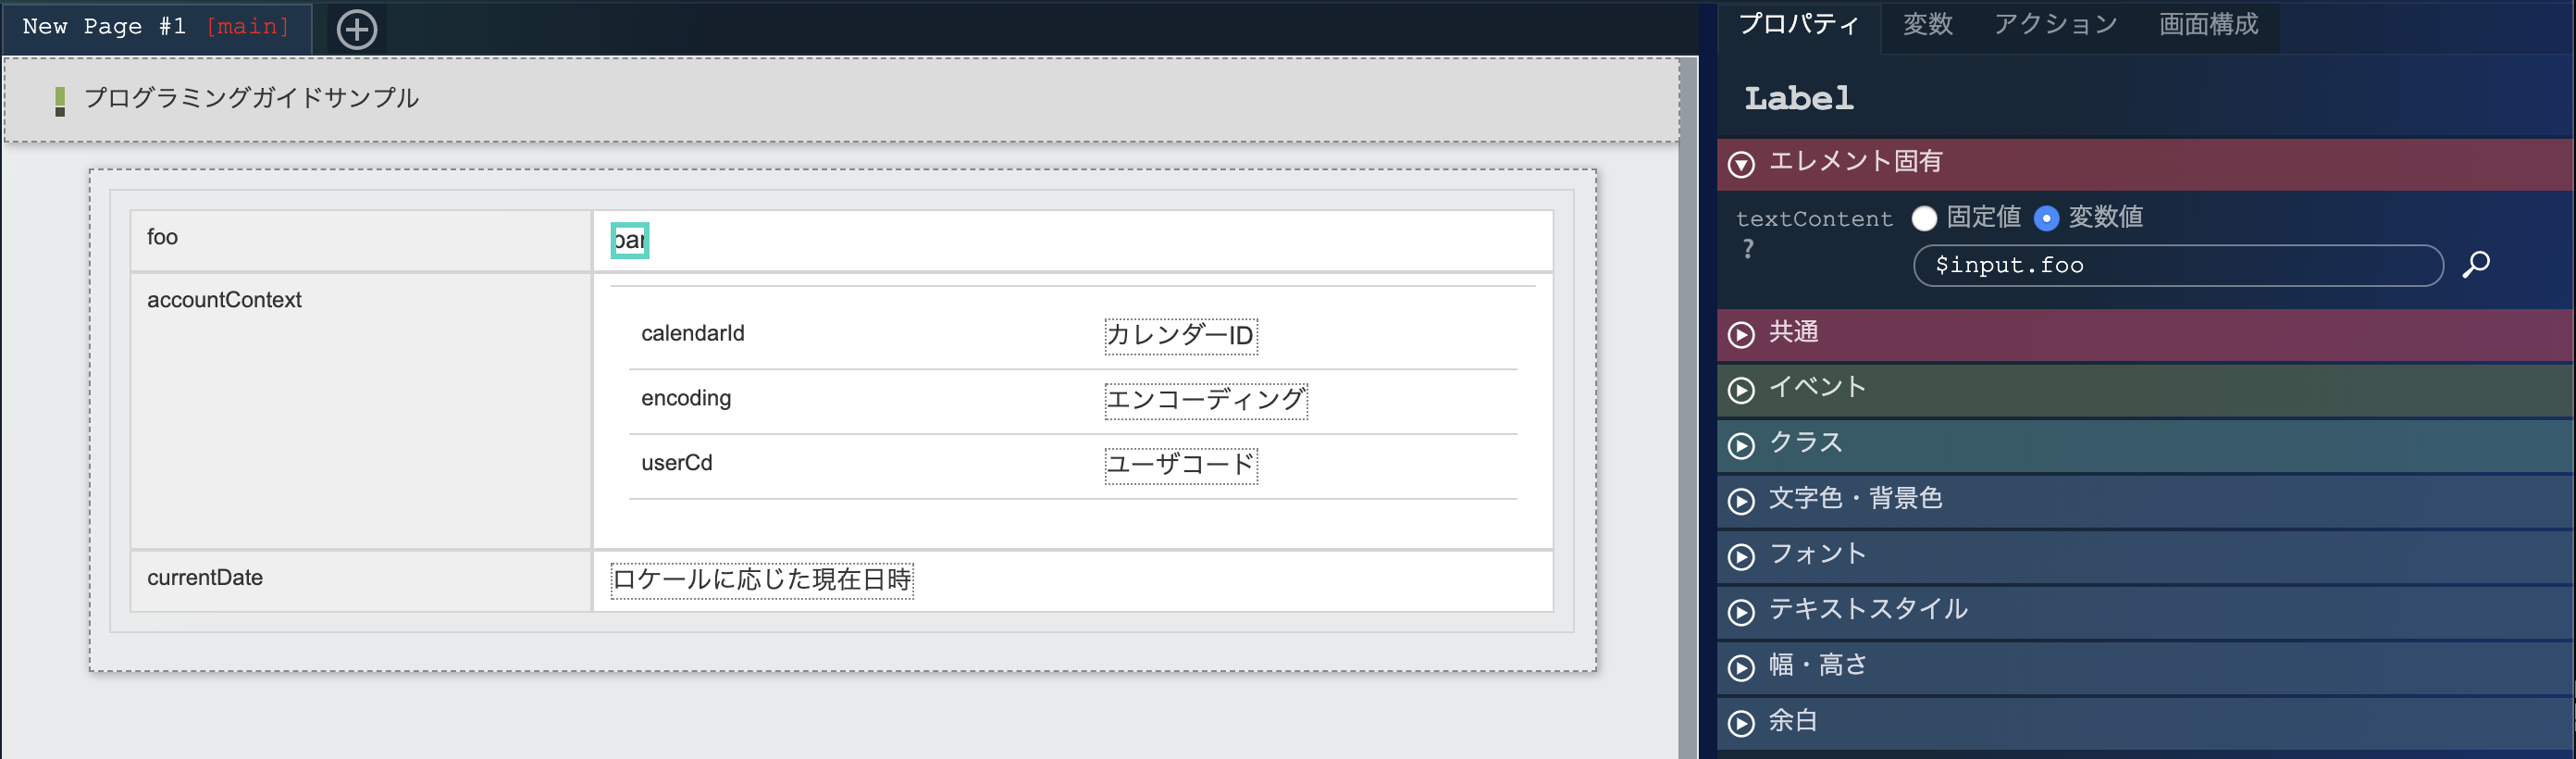
foo の右側のラベルの textContent には $input.foo を指定します。 calendarId の右側のラベルの textContent には $input.accountContext.calendarId を指定します。
他の項目も同様に、テーブルの左側の文字列と同じキーの変数を右側のラベルのプロパティ textContent に指定します。
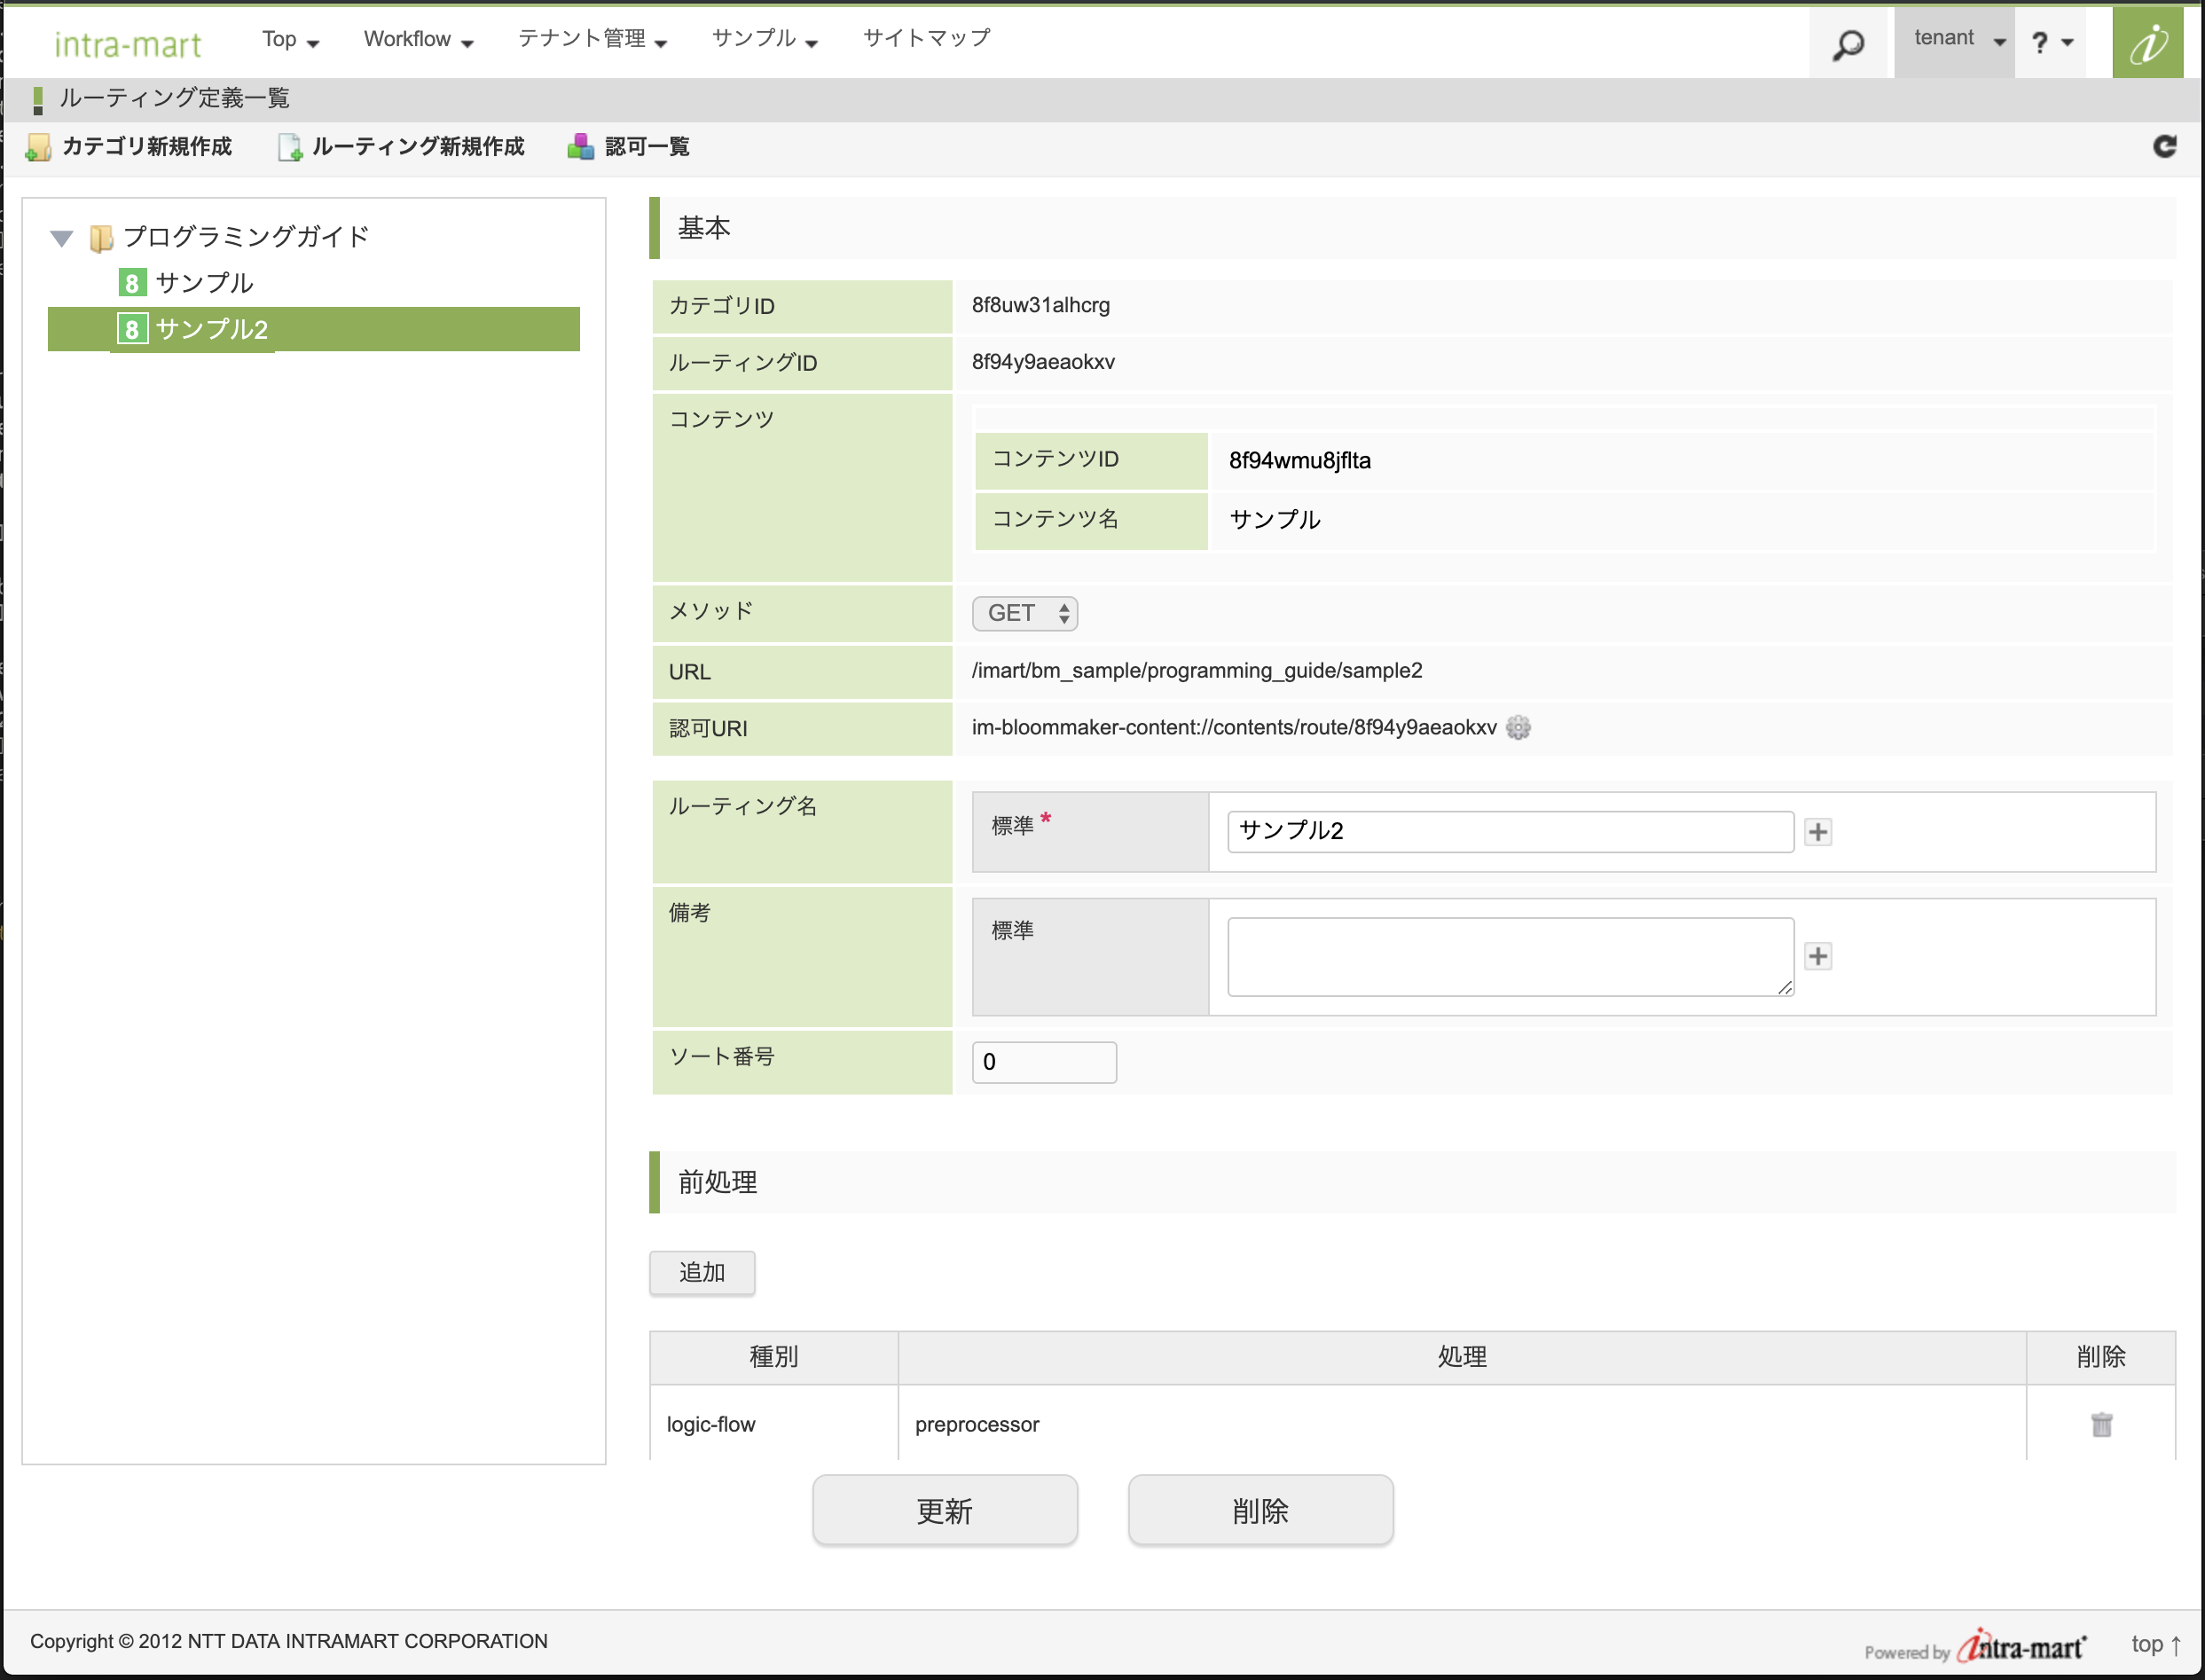
ルーティングは以下のように定義します。

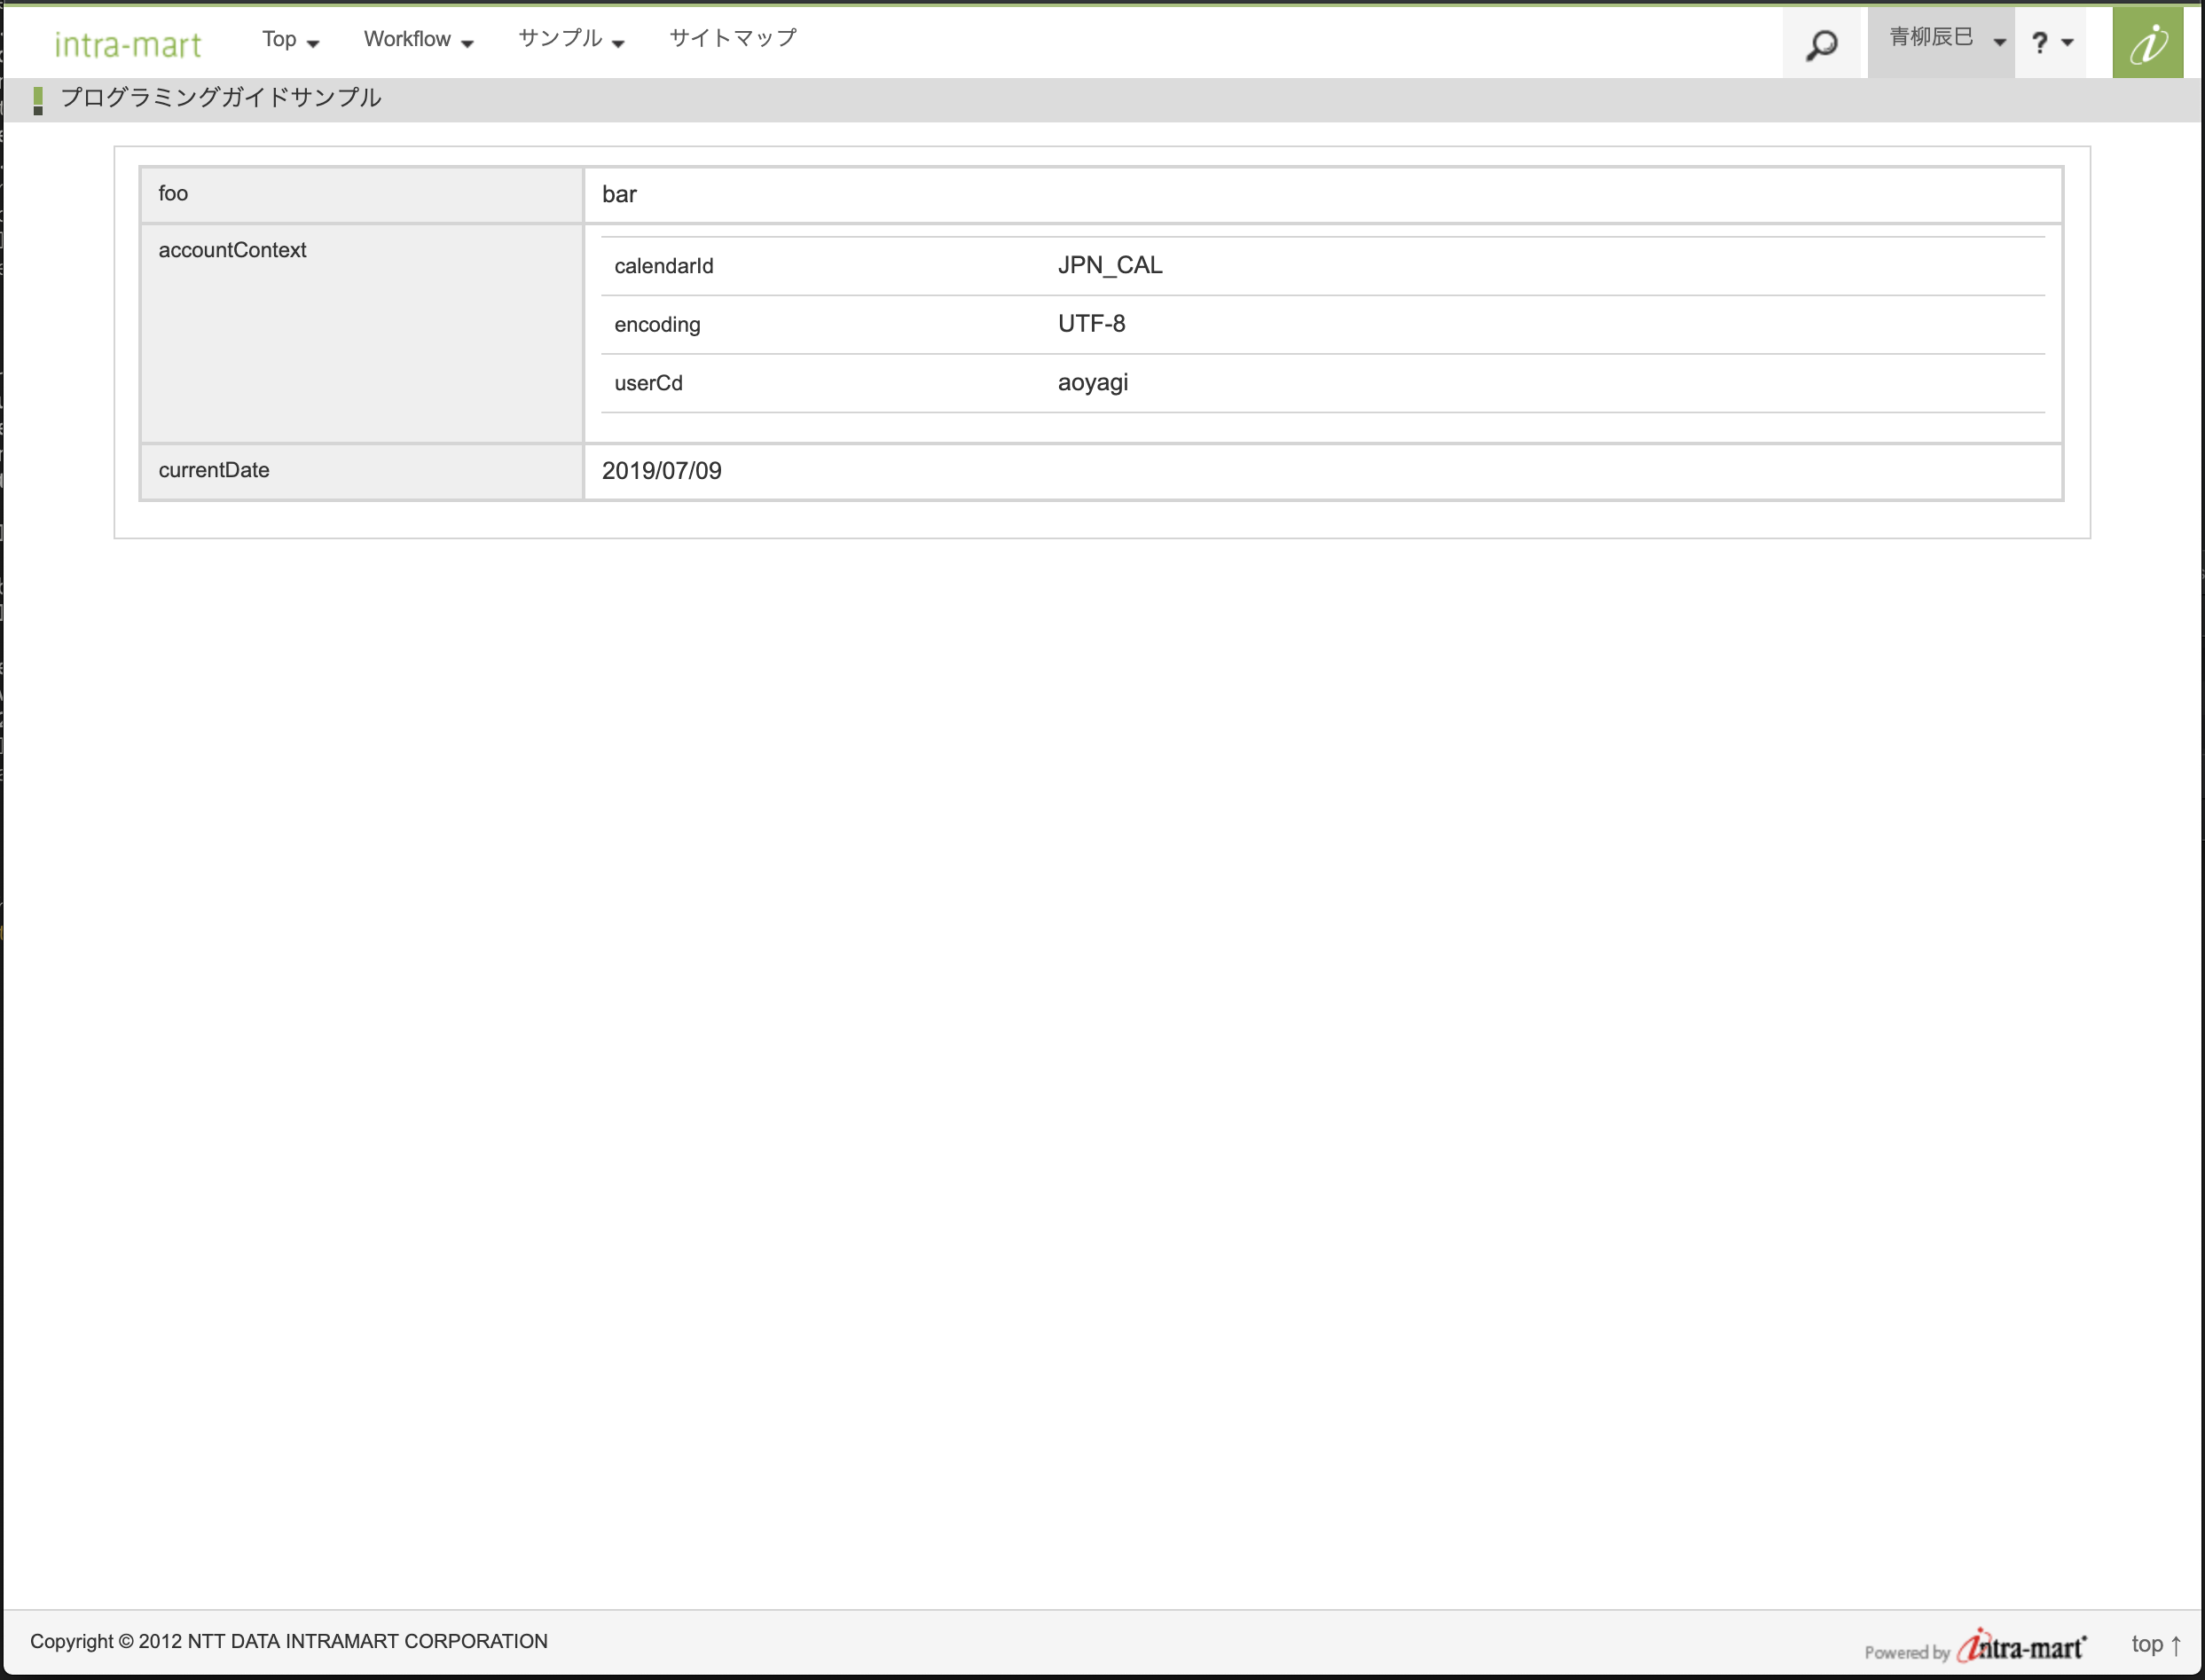
ルーティングに指定した URL にアクセスすると、以下のように表示されます。
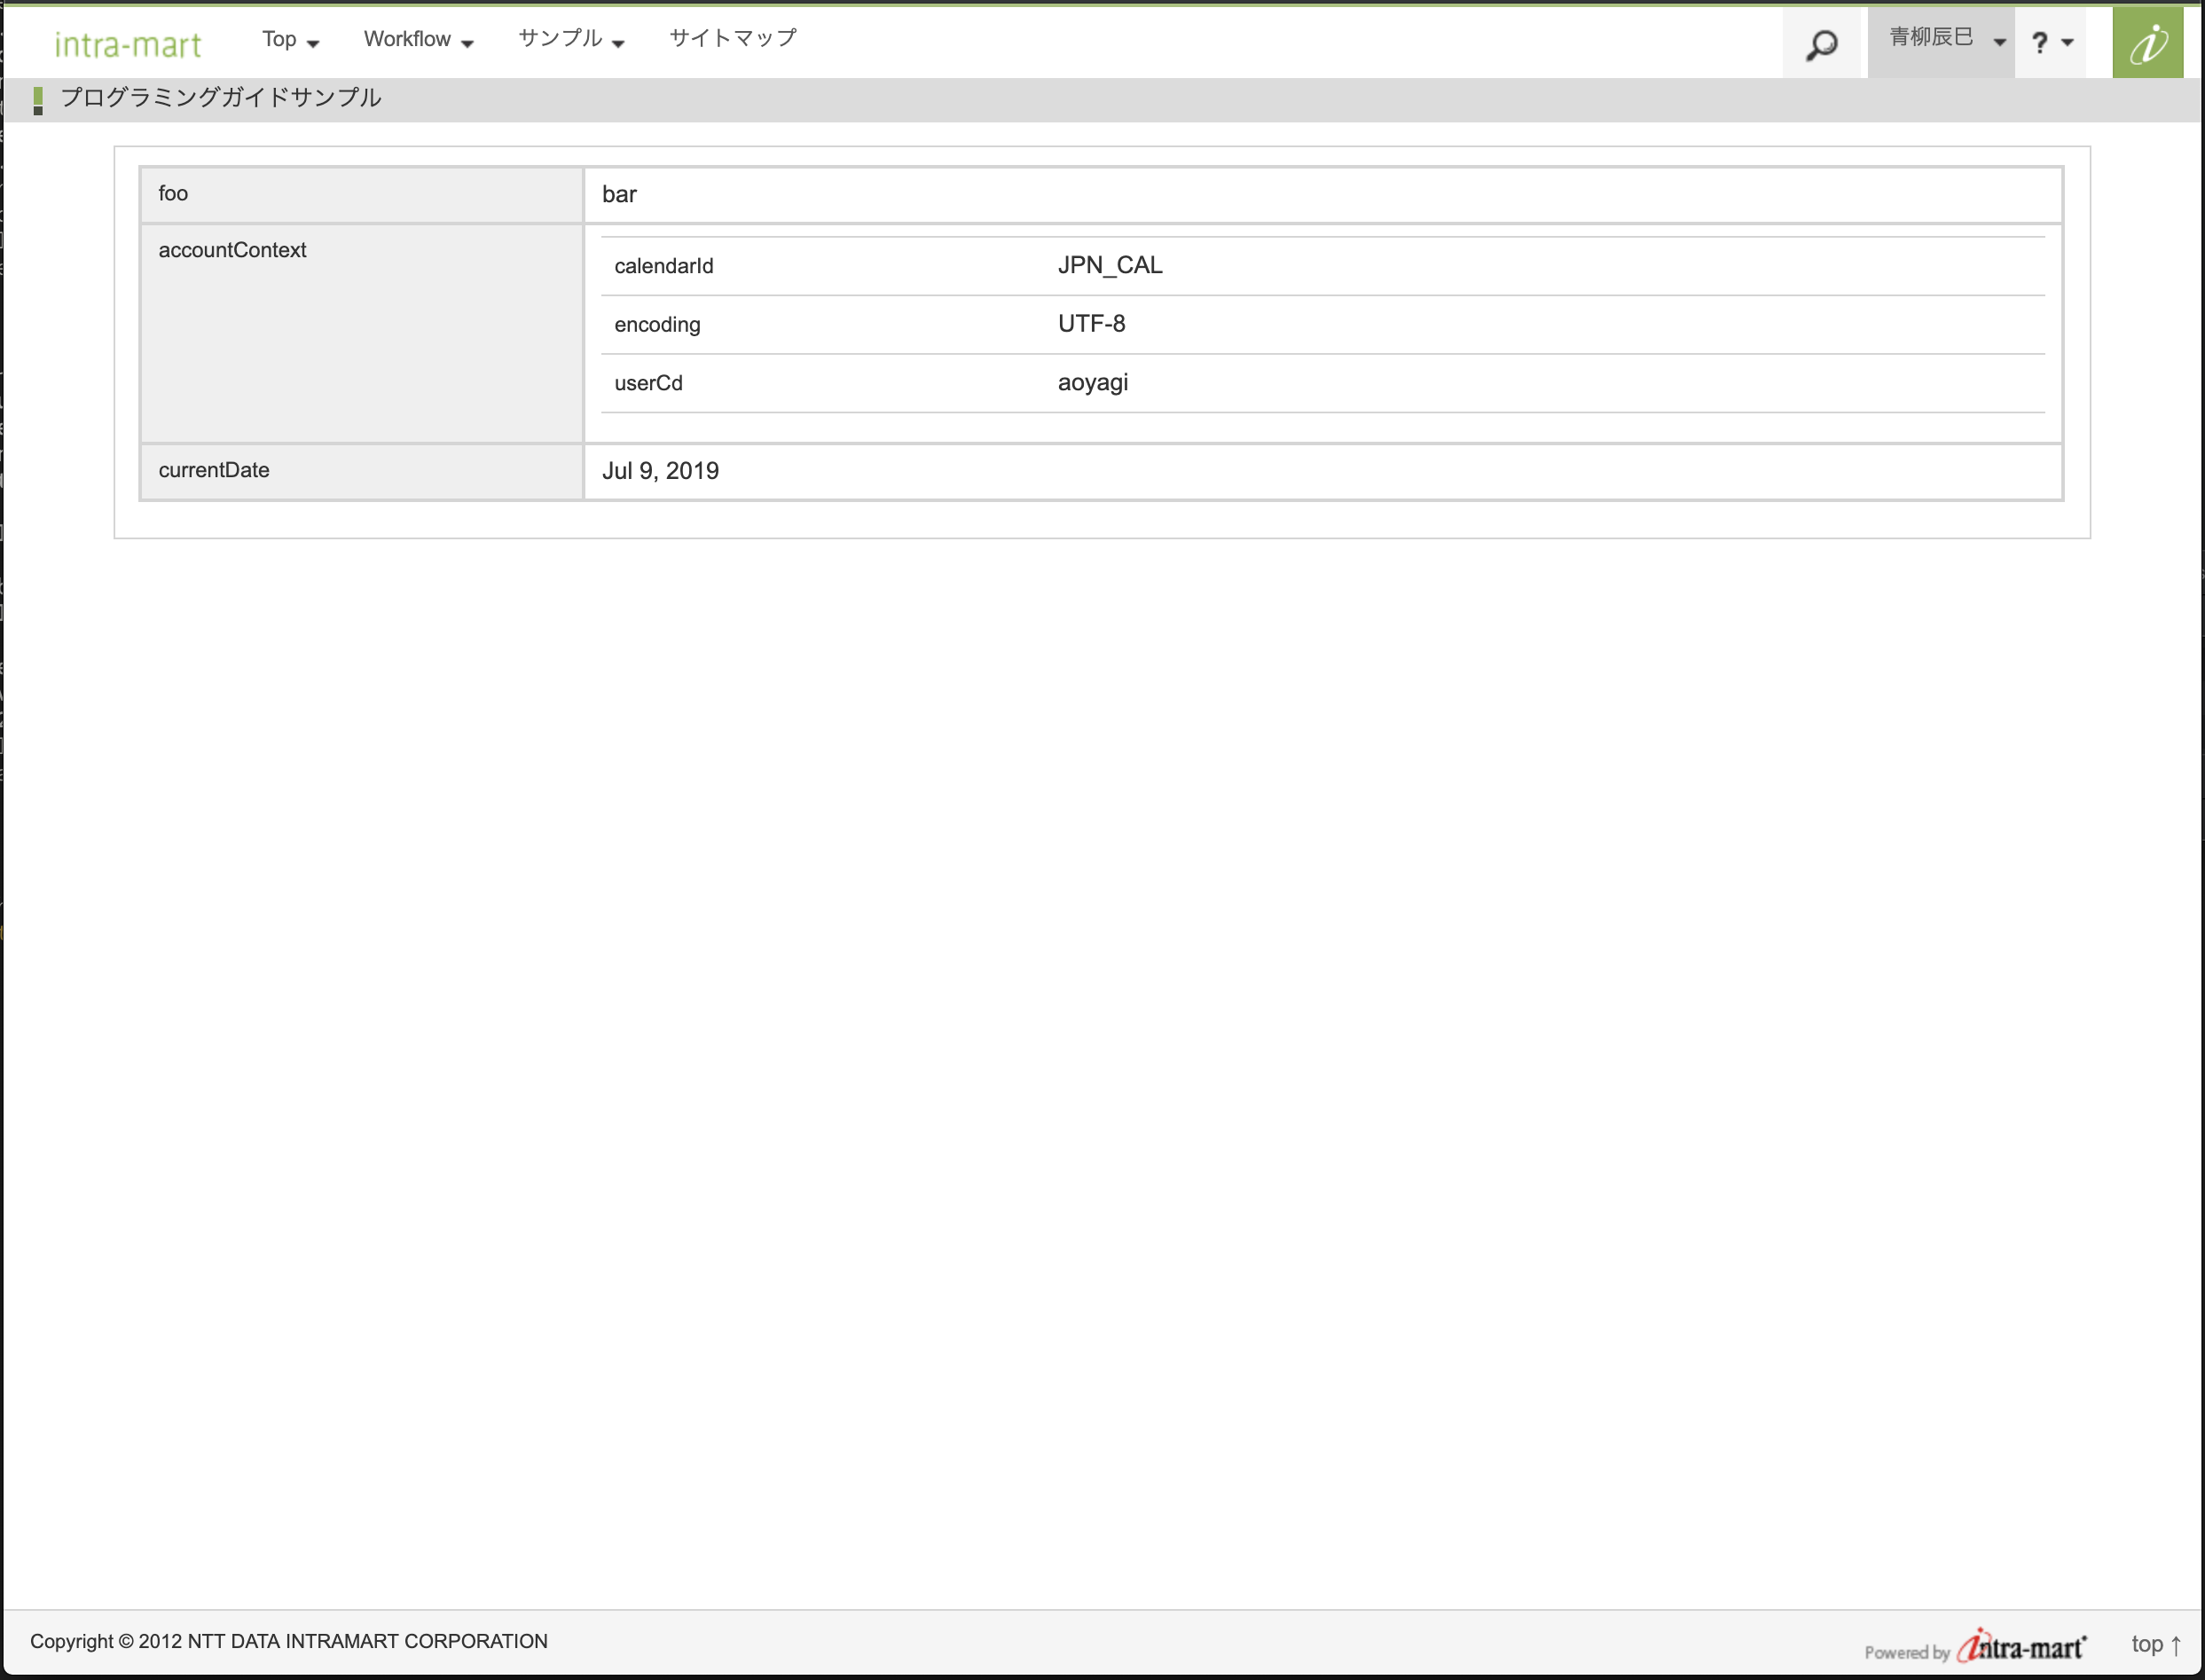
URLに ?locale=ja を追加すると、currentDate の表示が変化します。

3.2.2. IM-LogicDesigner のフロー定義による前処理の実装
上記の Java による前処理プログラムを IM-LogicDesigner でも実装してみます。
IM-LogicDesigner の JavaScript 定義を新規に作成し、以下のような実装を行います。
function run(input) {
  // 返却するマップ
  const result = {};

  // 単純なキー・バリューをセットします。
  result.foo = "bar";

  // アカウントコンテキストをセットします。
  const accountContext = Contexts.getAccountContext();
  const accountContextMap = {
    calendarId: accountContext.calendarId,
    encoding: accountContext.encoding,
    userCd: accountContext.userCd
  }
  result.accountContext = accountContextMap;

  // リクエストパラメータを取得します。
  const targetLocale = input.locale;

  // 取得したロケールに応じたフォーマットで現在日時をフォーマットします。
  let formatsetId = SystemDateTimeFormat.getDefaultFormats()['format-set-id'];
  const formats = SystemDateTimeFormat.getFormatSets();
  if (!formats.error) {
    const formatsData = formats.data;
    for (let i = 0, len = formatsData.length; i < len; i++) {
      if (formatsData[i].locale === targetLocale) {
        formatsetId = formatsData[i].formatSetId;
        break;
      }
    }
  }
  const format = SystemDateTimeFormat.getFormats(formatsetId).IM_DATETIME_FORMAT_DATE_STANDARD;
  result.currentDate = DateTimeFormatter.format(format, new Date());

  // 結果として、次のようなオブジェクトを返します。
  // {
  //   "foo": "bar",
  //   "accountContext": {
  //     "calendarId": "カレンダーID",
  //     "encoding": "エンコーディング",
  //     "userCd": "ユーザコード"
  //   },
  //   "currentDate": "ロケールに応じた現在日時"
  // }

  return result;
}
入力値は以下のように定義します。
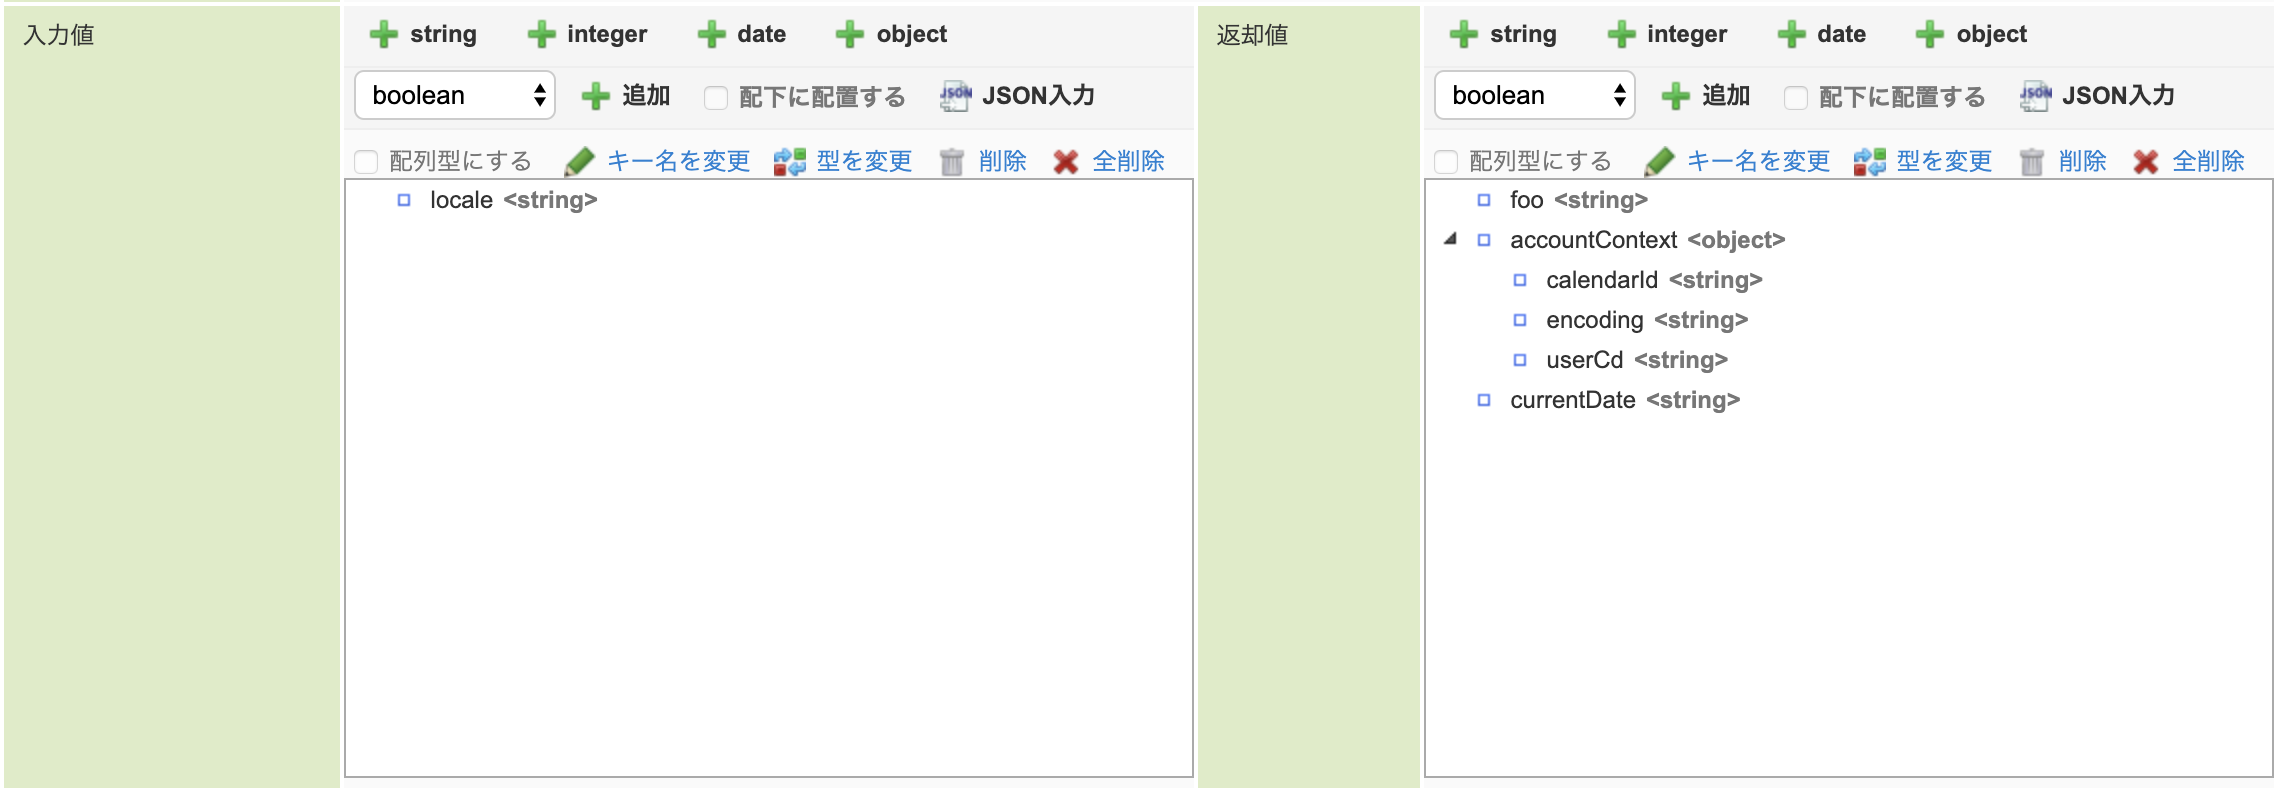
JSON入力に以下の JSON をペーストし、全ての項目を置き換えることでも定義できます。
入力
{
  "request": {
    "locale": ""
  }
}
出力
{
  "foo": "",
  "accountContext": {
    "calendarId": "",
    "encoding": "",
    "userCd": ""
  },
  "currentDate": ""
}
ユーザ定義IDなど、他の項目は適当な値を入力、選択してください。今回はユーザ定義IDを preprocessor とします。
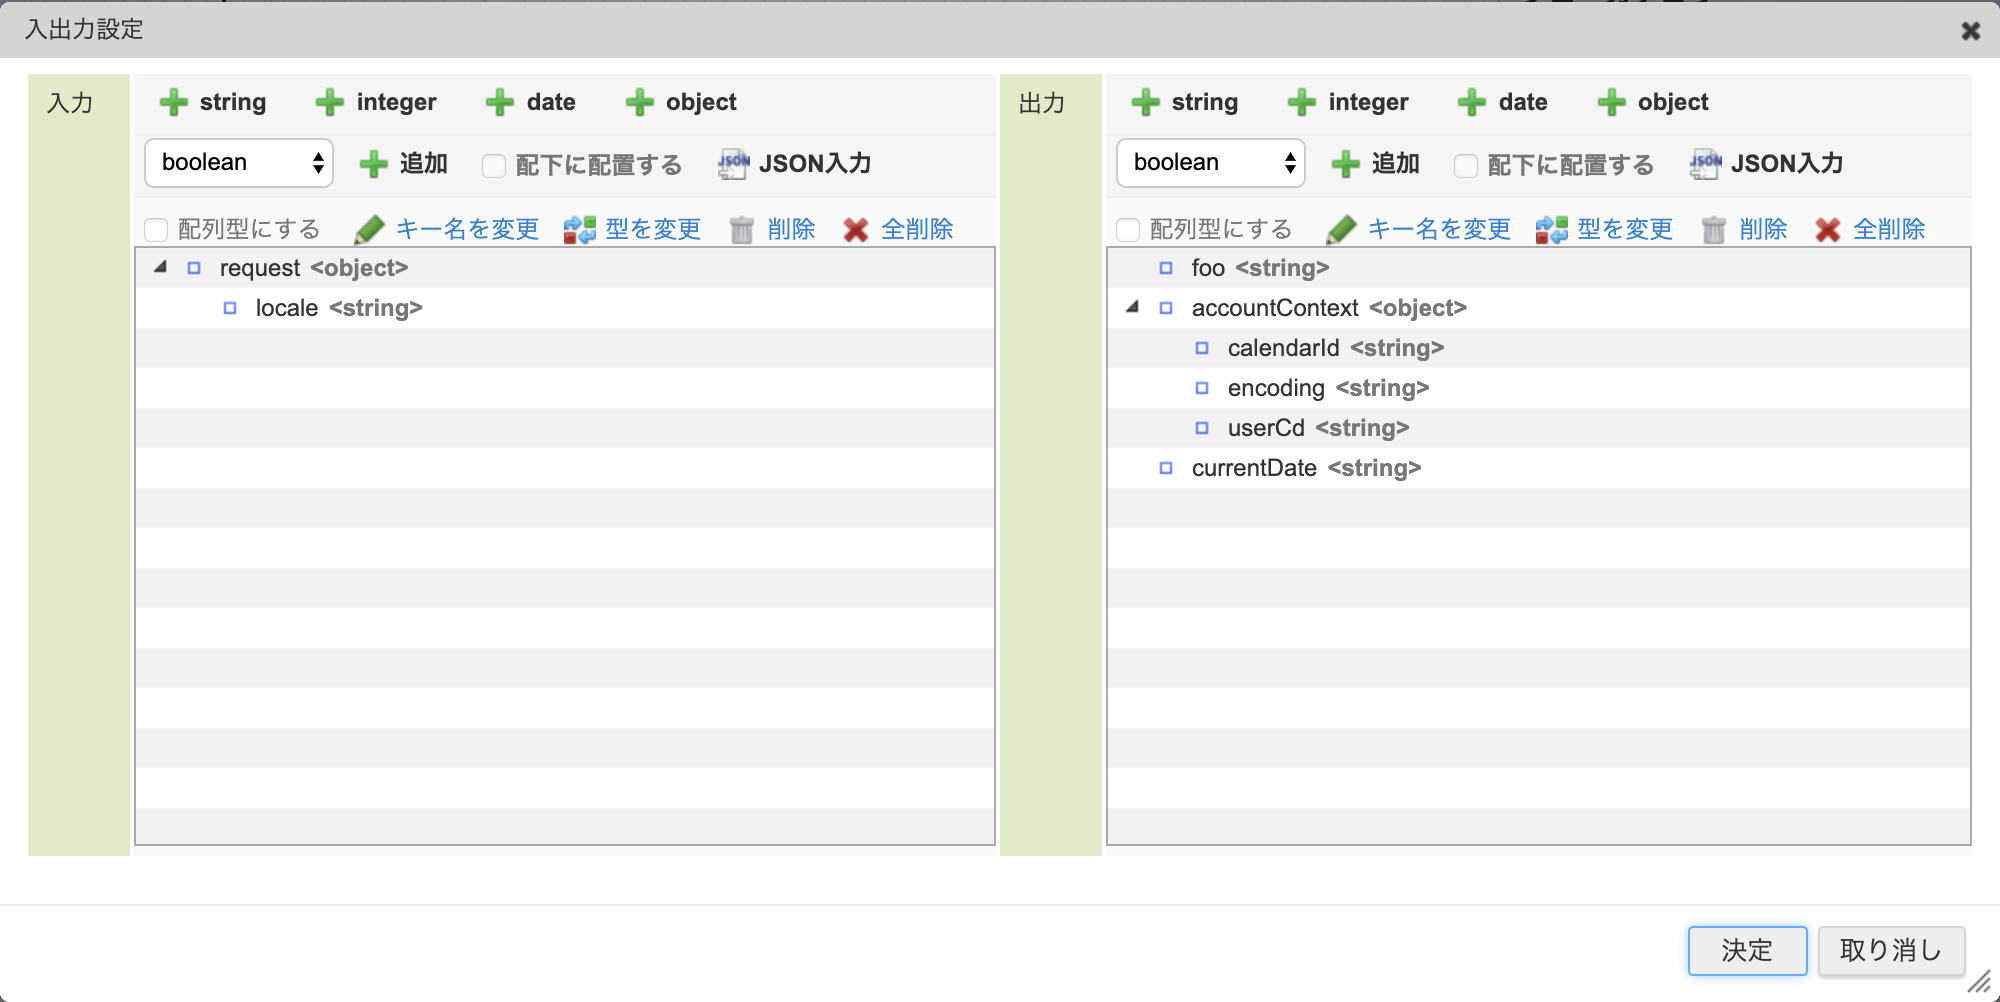
次にフロー定義を作成します。
入出力設定を以下のように定義します。
次に先ほど作成したユーザ定義を配置し、開始と終了に接続します。
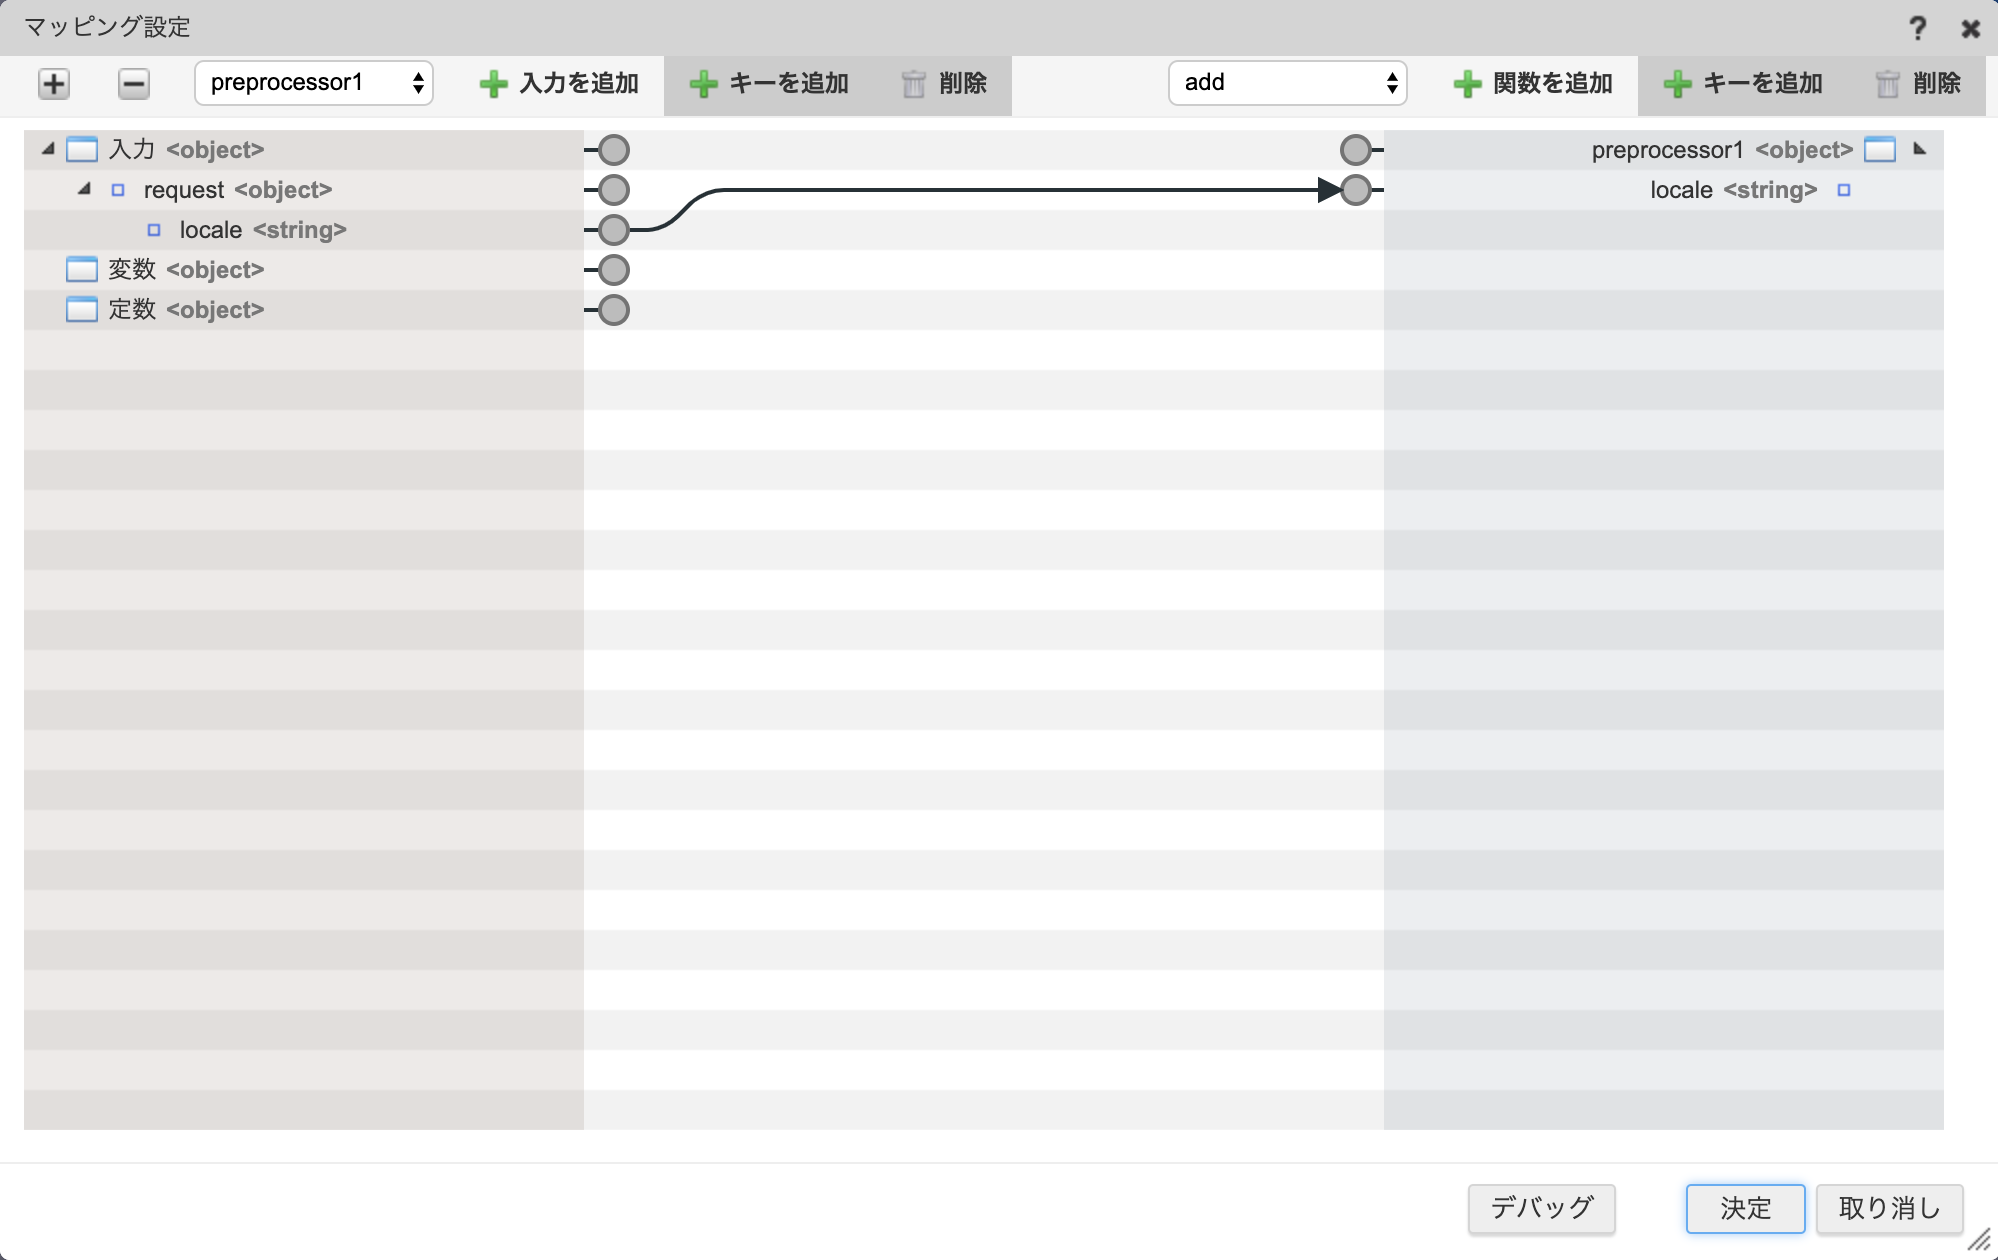
最後にマッピング設定を行います。
preprocessor のマッピング定義は以下のように定義します。
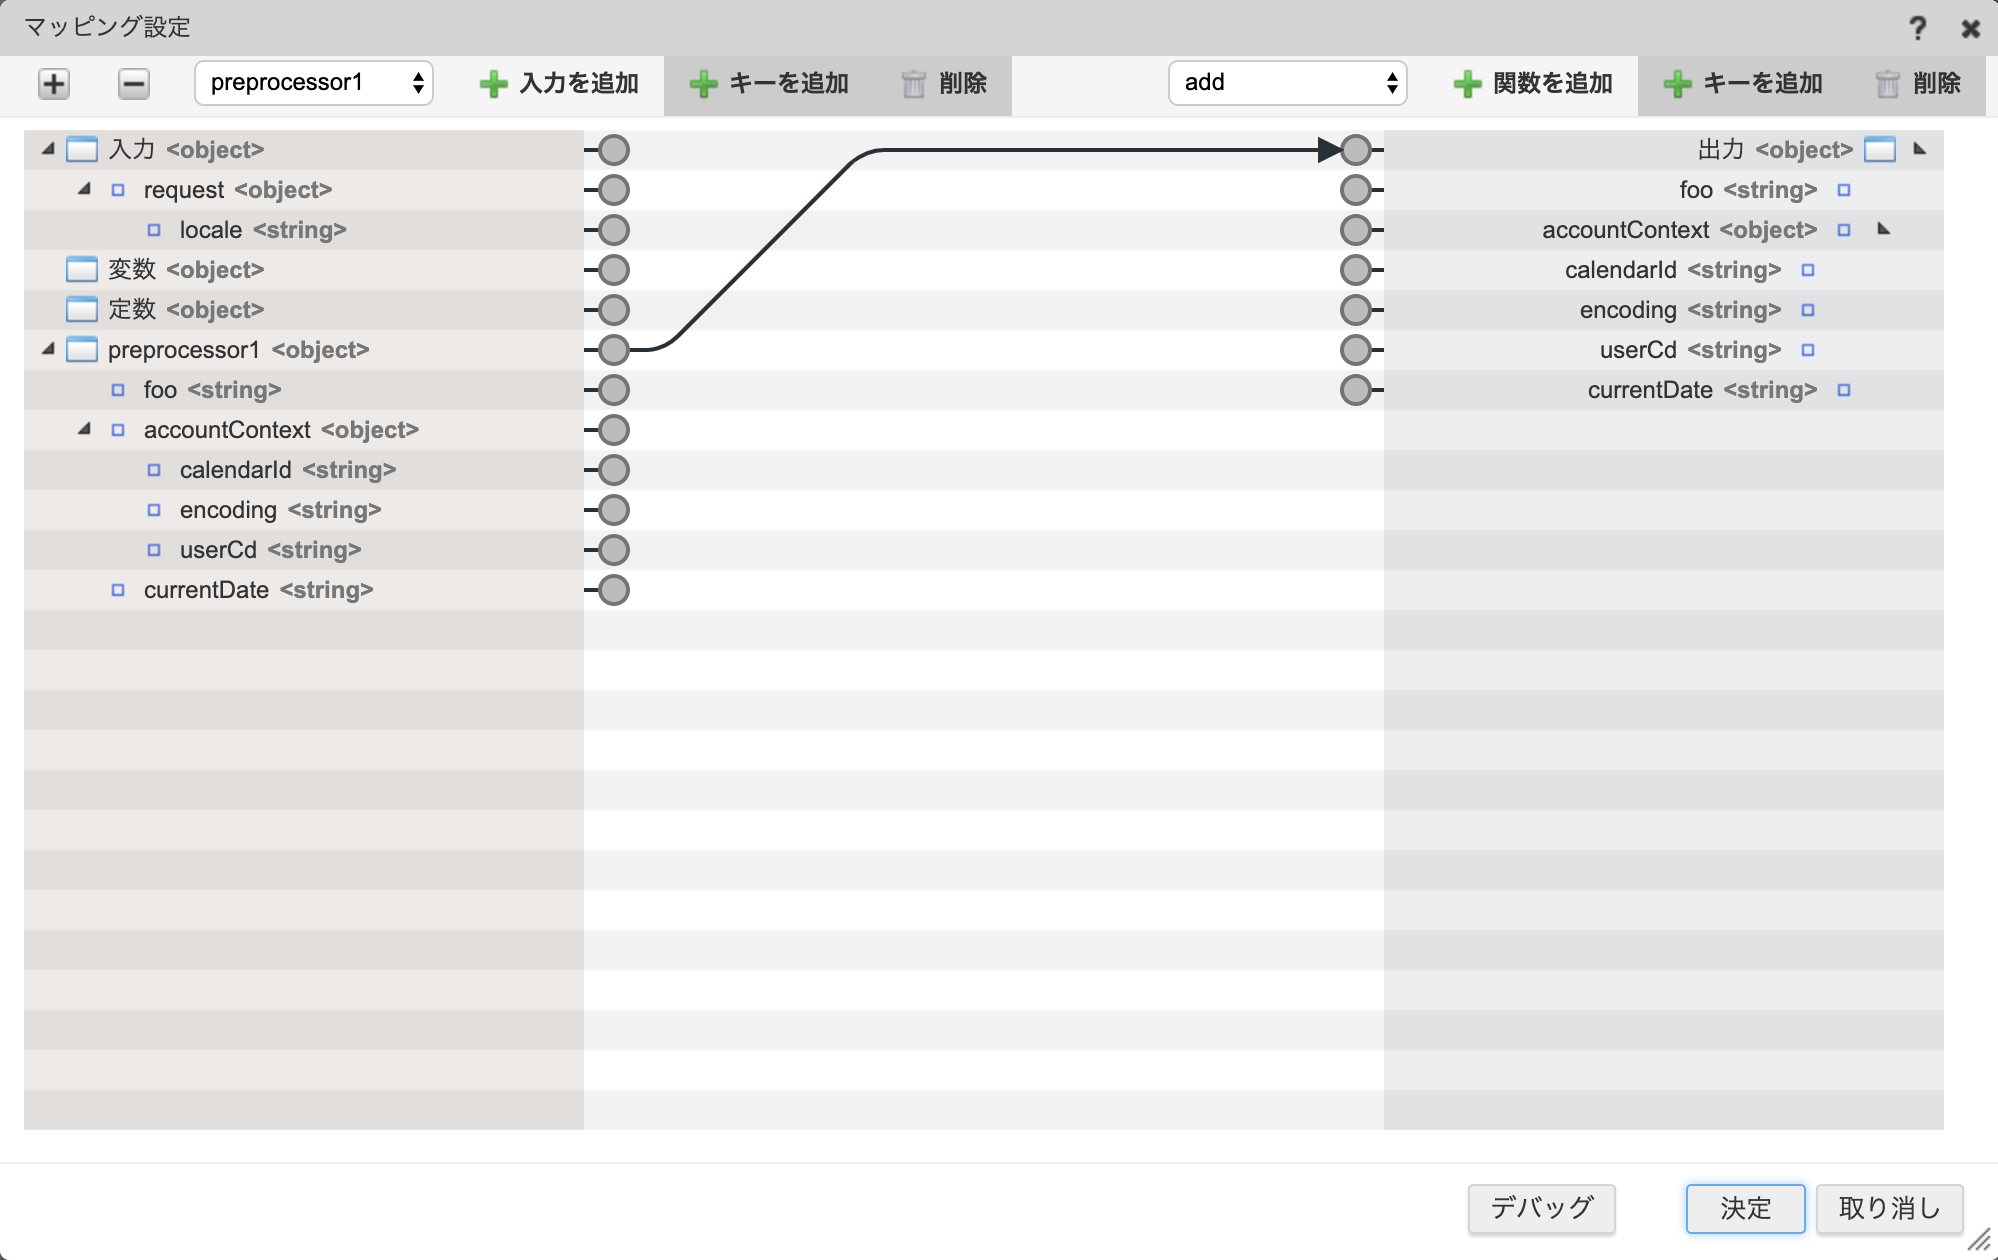
終了のマッピング定義は以下のように定義します。
新規保存します。フロー定義IDなど適当な値を入力してください。今回はフローIDなどを preprocessor とします。
コンテンツは上記のものを再度利用します。 ルーティングは以下のように定義します。
ルーティングに指定した URL にアクセスすると、以下のように表示されます。

URLに ?locale=ja を追加すると、currentDate の表示が変化します。
3.2.3. サンプル実装の資材
-
- IM-Juggling でユーザモジュールとして追加してください。
- ソース
-
LogicDesigner のインポートからインポートしてください。
以下のフローが定義されます
- フローカテゴリ : BloomMaker
- フロー定義ID : preprocessor
- フロー定義名 : preprocessor
-
BloomMaker のインポートからインポートしてください。
以下のコンテンツ、ルーティング定義が定義されます。
コンテンツ
プログラミングガイド
- サンプル
ルーティング定義
プログラミングガイド
- サンプル
- サンプル2
注意
上記ファイルのインポート後、IM-BloomMaker ルーティング定義の認可の設定を行ってください。