10.3. Integrated Windows Authentication
Topics
10.3.1. Overview
Integrated Windows Authentication function allows the user who has the same user code with the authenticated user on the domain controller to allow automatic log-in by obtaining the user information who has completed Integrated Windows Authentication when intra-mart Accel Platform is accessed.This would allow Single Sign-On to be provided.Warning
Log-in from the Log-in Screen is not supported. Please see the limitations below for detail.
10.3.2. Prerequisites
Resin should be used as an application server.
It is necessary to have Resin operate on Windows Server.
Windows Server that executes Resin needs to participate in the domain.
- Integrated Windows Authentication Module is necessary.
- You need to select [Additinal Function]-[Integrated Windows Authentication Module] on IM-Juggling, and build intra-mart Accel Platform.
- For the Integrated Windows Authentication module, please use the version 8.0.0-PATCH_001 or later.
Warning
In order to achieve Single Sign-On, it is necessary that the user code on the domain controller and the user code on intra-mart Accel Platform should match.Warning
Domain controller and the browser that supports Integrated Windows Authentication are required for the Integrated Windows Authentication function.Warning
Integrated Windows Authenticationis executed on Resin as intra-mart Accel Platform function. Therefore, please disable Windows authentication of IIS.Please set other authentications as required.
10.3.3. Setup
10.3.3.1. Integrated Windows Authentication Function Setting
Please do the following settings after tenant environment setup.
Setting of Function Enablement
- Open the Integrated Windows Authentication Setting File(<(expanded war)>/WEB-INF/conf/im-sso-windows-config.xml).
- Set <im-sso-windows-config>/<authentication>/<@enable> to true.
Tenant Resolution Setting(intra-mart Accel Platform 2014 Spring(Granada) or later only)
plugin has been adopted as a method to resolve the tenant which is the subject for authentication.Please refer to [PluginManager API Document] for the setting specifications of plugin.
Open <(expanded war)>/WEB-INF/plugin/jp.co.intra_mart.foundation.admin.tenant.context.tenant.resolver.windows_8.0.1/plugin.xml>.
- For the available implementation class and the parameter to be set, please refer to Setting of Tenant Resolution Plugin.
This completes the setting of Integrated Windows Authentication function.
10.3.3.1.1. Setting of Tenant Resolution Plugin
Following 2 implementation classes are provided for the resolution of tenant :
Implementation Class Overview jp.co.intra_mart.foundation.admin.tenant.context.DomainBasedWindowsTenantIdResolver Domain which the user participates is resolved as Tenant ID. jp.co.intra_mart.foundation.admin.tenant.context.FixedConfigBasedWindowsTenantIdResolver Fixed value that is set is resolved as Tenant ID.
jp.co.intra_mart.foundation.admin.tenant.context.DomainBasedWindowsTenantIdResolver
Domain which the user participates is resolved as Tenant ID.There is no parameter that is required for this implementation class.
jp.co.intra_mart.foundation.admin.tenant.context.FixedConfigBasedWindowsTenantIdResolver
tenant_id receives the parameter, and resolves it by making the value as Tenant ID.In the setting example below, [default] is resolved as Tenant ID.<tenant-id-resolver class="jp.co.intra_mart.foundation.admin.tenant.context.FixedConfigBasedWindowsTenantIdResolver"> <init-param> <param-name>tenant_id</param-name> <param-value>default</param-value> </init-param> </tenant-id-resolver>
10.3.3.2. Utilize Web service in Integrated Windows Authentication Environment
Following settings are necessary to utilize Web service in Integrated Windows Authentication environment.
Setting of Function Enablement
Open the setting file (<(expanded war)>/WEB-INF/conf/im-sso-windows-path-config/im-sso-windows-path-config_ws_auth.xml>).
You should remove the comment and enable the setting as follows :
<no-authentication>
  <path regex="true">/services/.*</path>
  <path regex="true">/axis2-admin/.*</path>
</no-authentication>
10.3.3.3. Utilize External Software Linkage Function in Integrated Windows Authentication Environment
Following settings are necessary to utilize external software linkage function in Integrated Windows Authentication environment.
Setting of Function Enablement
Open the setting file (<(expanded war)>/WEB-INF/conf/im-sso-windows-path-config/im-sso-windows-path-config_imaca_provider.xml>).
You should remove the comment and enable the setting as follows :
<no-authentication>
  <path>/HTTPActionEventListener</path>
</no-authentication>
10.3.3.4. Setting of Internet Explorer
Log-in user of Windows can automatically log in to intra-mart Accel Platform by changing the setting of Internet Explorer.
Display Internet Options.
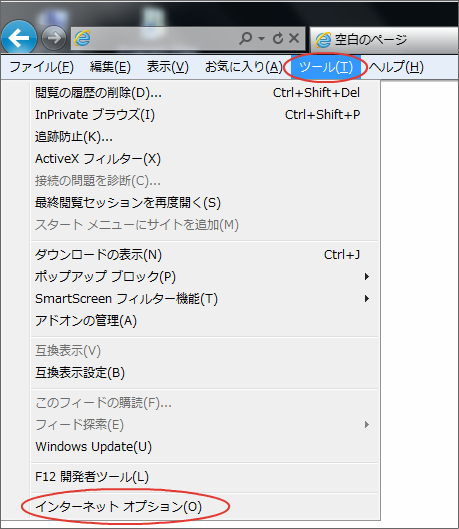
Note
If the Tool Menu is not displayed, it will be displayed by pressing the Alt key.Note
You can display Internet Options from the Control Panel too.Display Security Setting Screen.
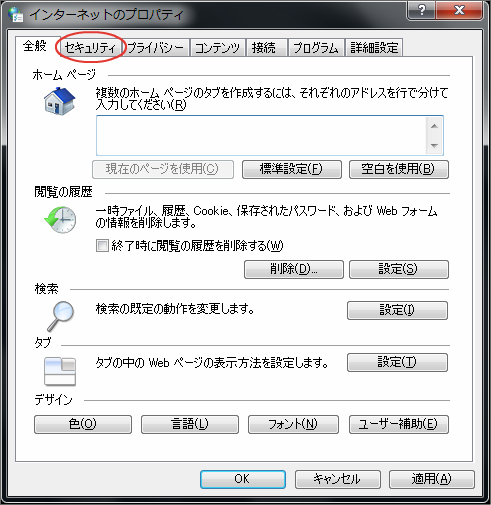
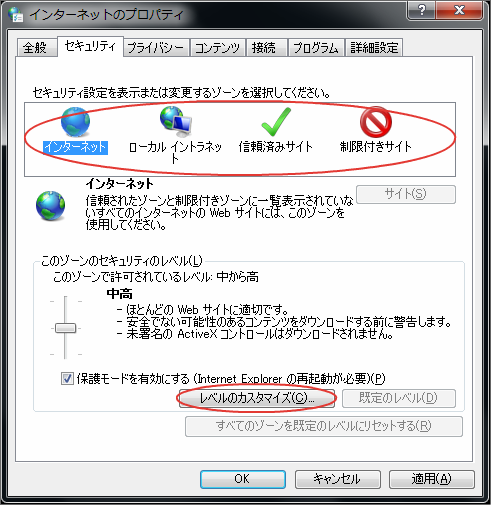
Display Customization Screen for the level of the corresponding zone to intra-mart Accel Platform.
Change User Authentication Setting.
Check [Log on automatically with current user name and password].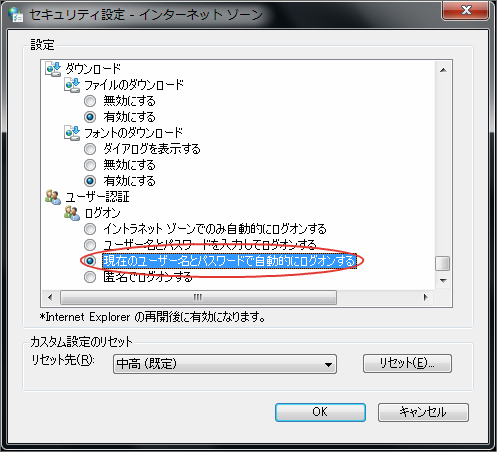
Note
By making the settings above, user authentication will be automatically made when Internet Explorer is used.
10.3.4. How to disable Integrated Windows Authentication function
If you want to disable Integrated Windows Authentication function, execute following procedures or create war without Integrated Windows Authentication and redeploy simply.
Open <(expanded war)>/WEB-INF/conf/im-sso-windows-config.xml file.
Set <im-sso-windows-config>/<authentication>/<@enable> to false.
<?xml version="1.0" encoding="UTF-8"?>
<im-sso-windows-config
    xmlns="http://www.intra-mart.jp/sso-windows/config/im-sso-windows-config"
    xmlns:xsi="http://www.w3.org/2001/XMLSchema-instance"
    xsi:schemaLocation="http://www.intra-mart.jp/sso-windows/config/im-sso-windows-config ../schema/im-sso-windows-config.xsd">

  <authentication enable="false"> <!-- enable="false" is set -->
    <parameter>
      <param-name>allow-guest-login</param-name>
      <param-value>false</param-value>
    </parameter>
  </authentication>
</im-sso-windows-config>
Open <(expanded war)>/WEB-INF/plugin/jp.co.intra_mart.foundation.security.certification.sso.user.provider.windows_8.0.0/plugin.xml file.
Set <plugin>/<extension>/<sso-user-providers>/<@enable> to false (add enable attribute if there is none)
<?xml version="1.0" encoding="UTF-8"?>
<plugin>
  <extension point="jp.co.intra_mart.foundation.security.certification.sso.user.providers">
    <sso-user-providers
      id="jp.co.intra_mart.foundation.security.certification.sso.user.provider.windows"
      name="Windows SSO User Provider"
      version="8.0.0"
      rank="90"
      enable="false"> <!-- enable="false" is set or added -->
      <sso-user-provider class="jp.co.intra_mart.foundation.security.certification.sso.WindowsSSOUserProvider"/>
    </sso-user-providers>
  </extension>
</plugin>
Open <(expanded war)>/WEB-INF/plugin/jp.co.intra_mart.foundation.admin.tenant.context.tenant.resolver.windows_8.0.1/plugin.xml file.
Set <plugin>/<extension>/<tenant-id-resolvers>/<@enable> to false (add enable attribute if there is none)
<?xml version="1.0" encoding="UTF-8"?>
<plugin>
  <extension point="jp.co.intra_mart.foundation.admin.tenant.context.tenant.resolvers">
    <tenant-id-resolvers
      id="jp.co.intra_mart.foundation.admin.tenant.context.tenant.resolver.windows"
      name="Windows Tenant Id Resolver"
      version="8.0.1"
      rank="90"
      enable="false"> <!-- enable="false" is set or added -->

      <!-- resolver which has domain as tenant ID
           It resolves an participating domain as tenant ID. -->
      <!--tenant-id-resolver class="jp.co.intra_mart.foundation.admin.tenant.context.DomainBasedWindowsTenantIdResolver"/-->

      <!-- resolver which has set fixed value as tenant ID
           It resolves the value which was set to tenant_id parameter as tenant ID -->
      <!--tenant-id-resolver class="jp.co.intra_mart.foundation.admin.tenant.context.FixedConfigBasedWindowsTenantIdResolver">
        <init-param>
          <param-name>tenant_id</param-name>
          <param-value>default</param-value>
        </init-param>
      </tenant-id-resolver-->
    </tenant-id-resolvers>
  </extension>
</plugin>
Open <(expanded war)>/WEB-INF/plugin/jp.co.intra_mart.foundation.admin.tenant.context.tenant.validator.windows_8.0.1/plugin.xml file.
Set <plugin>/<extension>/<tenant-id-validators>/<@enable> to false
<?xml version="1.0" encoding="UTF-8"?>
<plugin>
  <extension point="jp.co.intra_mart.foundation.admin.tenant.context.tenant.validators">
    <tenant-id-validators
      id="jp.co.intra_mart.foundation.admin.tenant.context.tenant.validator.windows"
      name="Windows TenantIdValidator"
      version="8.0.1"
      rank="100"
      enable="false"> <!-- enable="false" is set -->
      <tenant-id-validator class="jp.co.intra_mart.system.sso_windows.context.WindowsSSOTenantIdValidator">
        <!-- Tenant ID resolve mandatory check -->
        <init-param>
          <param-name>required_tenant_id</param-name>
          <param-value>true</param-value>
        </init-param>
        <!-- Tenant ID existence check -->
        <init-param>
          <param-name>valid_tenant_id</param-name>
          <param-value>true</param-value>
        </init-param>
      </tenant-id-validator>
    </tenant-id-validators>
  </extension>
</plugin>
Note
In case of intra-mart Accel Platform 2014 Spring(Granada) or earlier, setting value such as <plugin>/<extension>/<tenant-id-validators>/<@id> may be different from the one shwon above, but please set enable=”false” according to the procedure.
10.3.5. How to disable Integrated Windows Authentication function depending on the request
By setting the following request header, you can disable Integrated Windows Authentication function and tenant validation function.
Request Header Value Operations x-jp-co-intra-mart-sso-windows-disable-authentication true Integrated Windows Authentication is not performed in the corresponding request. x-jp-co-intra-mart-sso-windows-disable-tenant-validation true Tenanat validation is not performed in the corresponding request. Warning
Please specify “true” to the value. Operations when specifying other value is not guaranteed.
10.3.5.1. In case you disable using Apache
Please follow the procedure below to set above header using Apache.
Open <%APACHE_HOME%/conf/httpd.conf> file.
Add the following setting to or remove comment out from Dynamic Shared Object (DSO) Support area.
LoadModule headers_module modules/mod_headers.soAdd the following settings.
RequestHeader append x-jp-co-intra-mart-sso-windows-disable-authentication "true"
RequestHeader append x-jp-co-intra-mart-sso-windows-disable-tenant-validation "true"
Restart Apache.
10.3.5.2. In case you disable by using Internet Information Services(IIS)
In order to set above header by using IIS, please follow the procedure below.
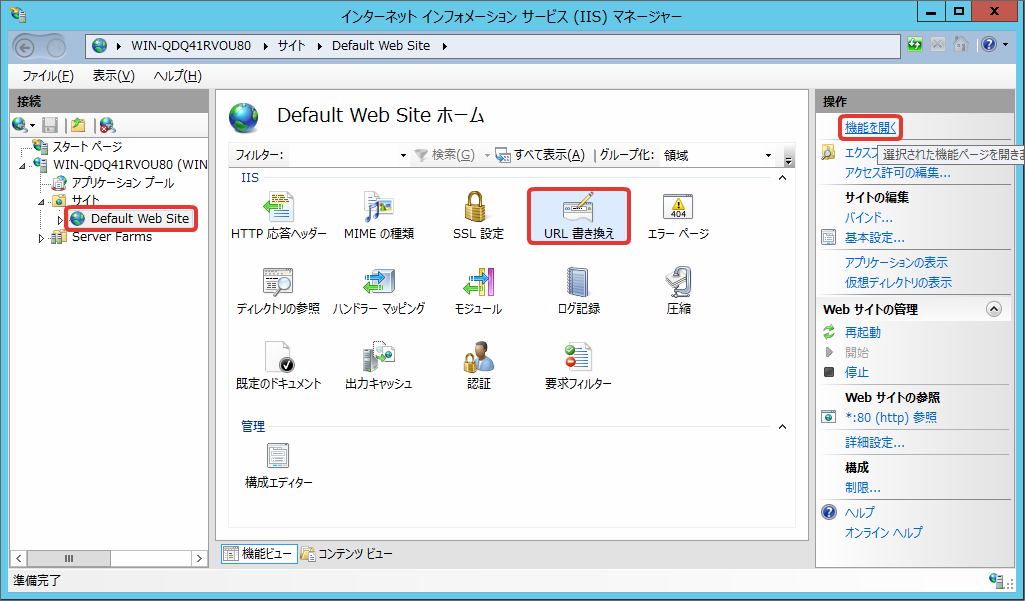
Click in the order of the site that you want to disable Integrated Windows Authentication function, [URL Rewrite], and [Open Function].
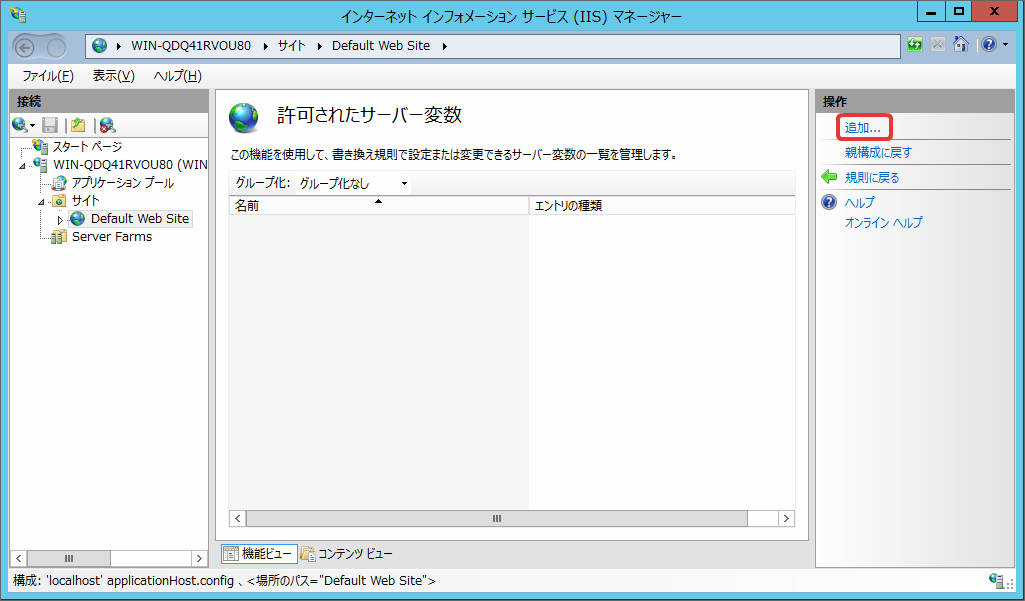
Click [Server Variable Display].

Click [Add].
Enter [HTTP_X_JP_CO_INTRA_MART_SSO_WINDOWS_DISABLE_AUTHENTICATION] to [Server Variable Name], and click [OK].
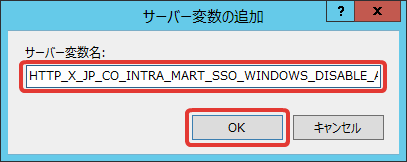
Similarly, add server variable [HTTP_X_JP_CO_INTRA_MART_SSO_WINDOWS_DISABLE_TENANT_VALIDATION].
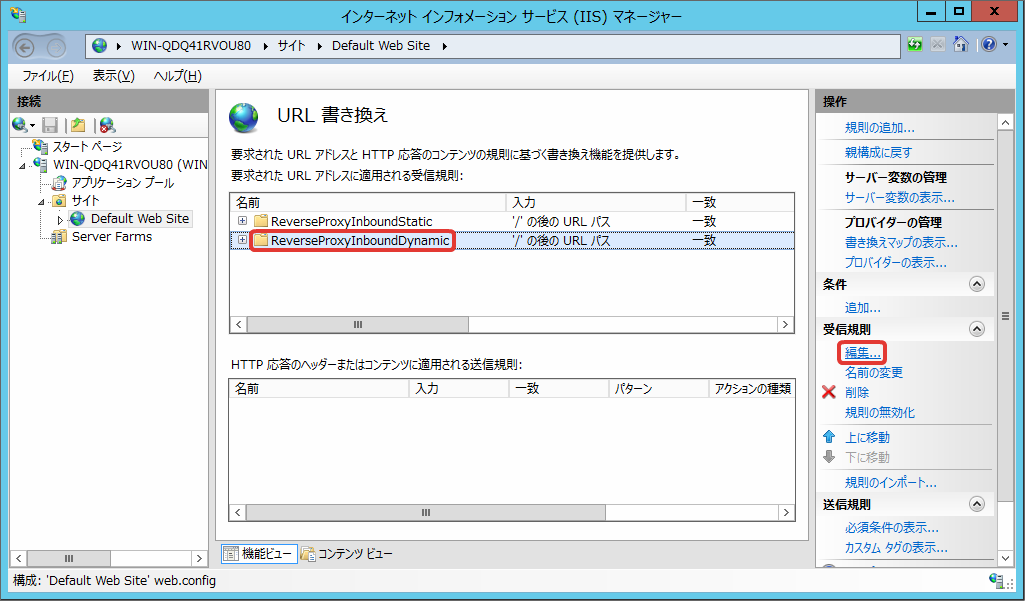
Click in the order of the site that you want to disable Integrated Windows Authentication function, [URL Rewrite], and [Open Function].
Select assignment rule for Resin (ReverseProxyInboundDynamic here) and click edit.
Click [Add] of [Server Variable].
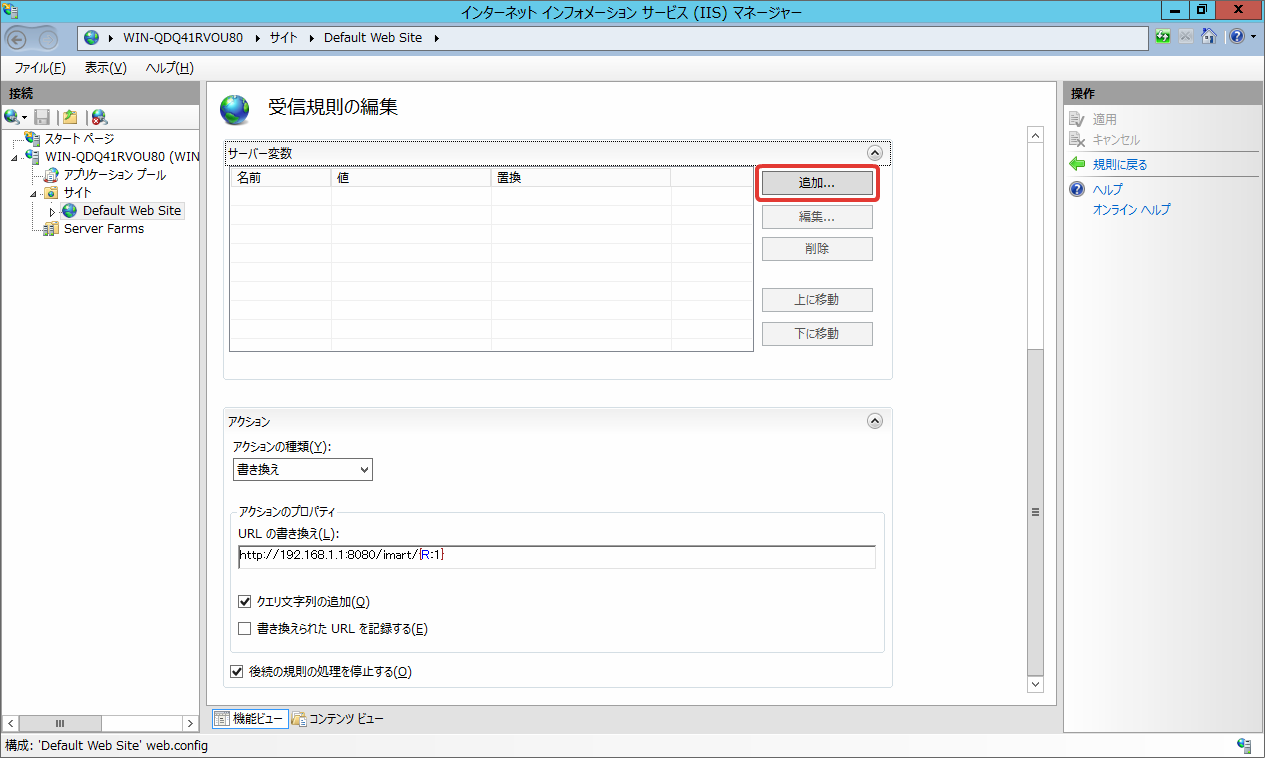
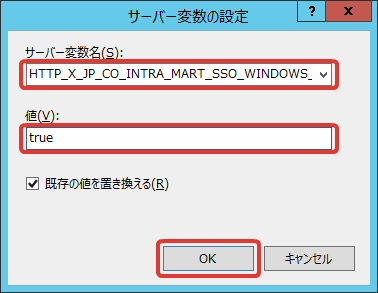
Enter the following contents and click [OK].
Server Variable Name
HTTP_X_JP_CO_INTRA_MART_SSO_WINDOWS_DISABLE_AUTHENTICATION
Value
true
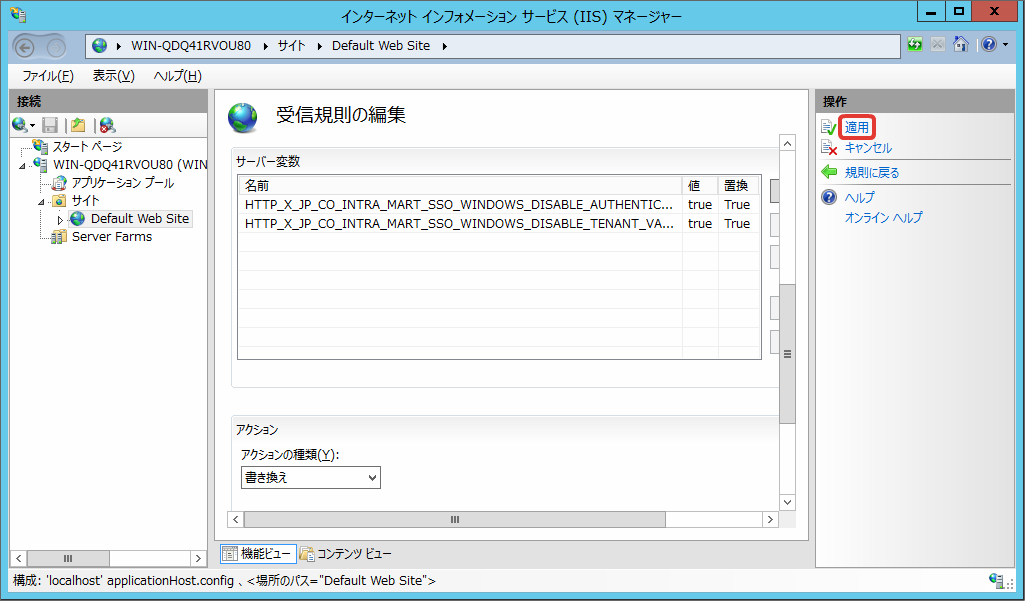
Similarly, add following server variable.
Server Variable Name
HTTP_X_JP_CO_INTRA_MART_SSO_WINDOWS_DISABLE_TENANT_VALIDATION
Value
true
Click [Apply].
Restart Internet Information Services(IIS).