Example: To create list screen
In this section, the example of the screen to display TODO which is registered in TODO registration screen in smartphone is introduced.
Items
Prerequisites
intra-mart Accel Platform should be installed and default settings should be complete.
Create the table creation and sample screen before referring to Example: To Create Registration Screen.
Preparation of screen
Preparation and placement of source
First, create the following 2 files.
sample.sastruts.action.samplesp.ListAction.java
package sample.sastruts.action.samplesp;

import org.seasar.struts.annotation.Execute;

public class ListAction {

    @Execute(validator = false)
    public String index() {
        return "/sample/imsp/list/list.jsp";
    }
}
<CONTEXT_PATH>/WEB-INF/view/sample/imsp/list/list.jsp
<%@ page language="java" contentType="text/html; charset=UTF-8" pageEncoding="UTF-8" %>
<%@ taglib prefix="c" uri="http://java.sun.com/jstl/core" %>
<%@ taglib prefix="imsp" uri="http://www.intra-mart.co.jp/taglib/imsp" %>
<%@ taglib prefix="imui" uri="http://www.intra-mart.co.jp/taglib/imui" %>
<imui:head>
  <title>TODO List</title>
</imui:head>
<div data-role="page" id="main" data-theme="a">
  <imsp:headerWithLink headerText="TODO List" />
  <div data-role="content">
  </div>
  <imsp:commonFooter dataPosition="fixed"/>
</div>
Menu Settings
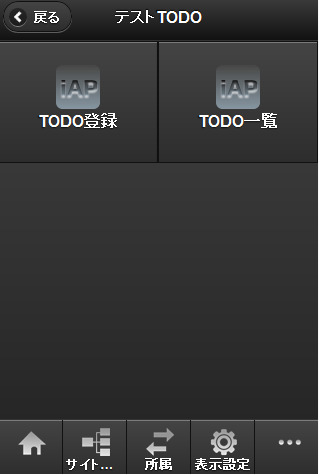
Add the registration screen and list screen as well in the menu. Path is “samplesp/list”.
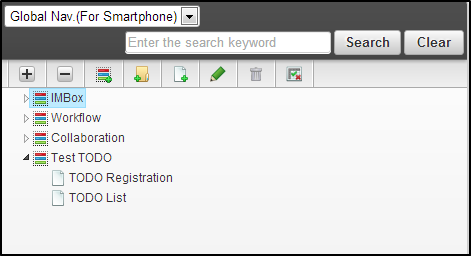
Client type is switched to smartphone and global navi screen is displayed.
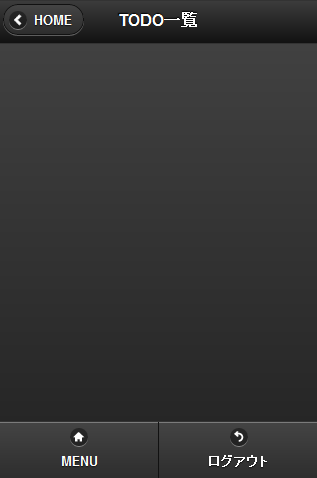
Select TODO list. Blank screen created earlier is displayed.
To place list display part
Use <ul> tag and <li> tag to implement the list display.
Markup example of list
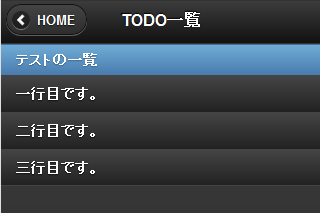
As an example, display the heading line and list of 3 lines.Add following statements in list.jsp.<div data-role="content"> <ul data-role="listview"> <li data-role="list-divider">List of Tests</li> <li>It is the first line.</li> <li>It is the second line.</li> <li>It is the third line.</li> </ul> </div>Note
- When displaying the list, add the data-role=”listview” attribute to ul tag.
- By adding data-role=”list-divider” attribute in li tag, it gets highlighted.
Markup result. li tag enclosed in ul tag is displayed line by line.
In this way the process of actually displaying the TODO list is implemented.
Implementation of Search Process
Add the search process in ListAction.
public class ListAction {
    @Resource
    public JdbcManager jdbcManager;

    public List<MfwSample> list;

    @Execute(validator = false)
    public String index() {
        list = jdbcManager.from(MfwSample.class).getResultList();
        return "/sample/imsp/list/list.jsp";
    }
}
Note
- Refer to Database for the details of database.
- Refer to S2JDBC JdbcManager <http://s2container.seasar.org/2.4/ja/s2jdbc_manager.html> for the details of JdbcManager.
Modifies the contents of ul tag of list.jsp.
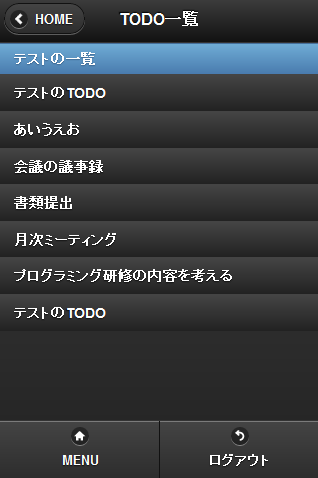
  <ul data-role="listview">
    <li data-role="list-divider">List of tests</li>
    <c:forEach var="record" items="${list}">
    <li><c:out value="${record.title}"/></li>
    </c:forEach>
  </ul>
Markup result. Title of TODO of all the registered items is displayed.
Note
The following points are confirmed in this item.
- Use <ul data-role=”listview”> to display list
- Use <li> tag for displaying the line
To implement paging process
Add paging process in TODO list.
Definition of page information
Modify ListAction class in the following manner.
 public class ListAction {

     @Resource
     protected JdbcManager jdbcManager;

     public List<MfwSample> list;

     public long maxRecord;

     public int currentPage = 1;

     public int pageLine = 5;

     @Execute(validator = false)
     public String index() {

      maxRecord = jdbcManager.from(MfwSample.class).getCount();

     list = jdbcManager.from(MfwSample.class)
                       .limit(pageLine)
                       .offset(pageLine * (currentPage - 1))
                       .orderBy(Operations.asc("limitDate"))
                       .getResultList();
     return "/sample/imsp/list/list.jsp";
 }
}
Placement of tag for paging
Displays <imsp:pagingButton> tag in the ul of list.jsp. Moreover, sets the form for sending the page.
 <ul data-role="listview">
   <li data-role="list-divider">List of tests</li>
   <c:forEach var="record" items="${list}">
   <li><c:out value="${record.title}"/></li>
   </c:forEach>
   <imsp:pagingButton currentPage="${currentPage}" pageLine="${pageLine}" maxRecord="${maxRecord}" />
 </ul>
 <form id="pageForm" method="POST">
   <input type="hidden" name="currentPage" />
 </form>
About tags to be used
jsp Tag Name
Functional Overview
Markup Example
pagingButton
Provides the button to transit the list page.

Implementation of Paging Process
Finally, add the process to be carried out after pressing the page transition button in list.jsp.
 <div data-role="page">
   <script>
     function onPageLinkFunc(page) {
       $("input[name=currentPage]").val(page);
       $("#pageForm").submit();
     }
   </script>
Note
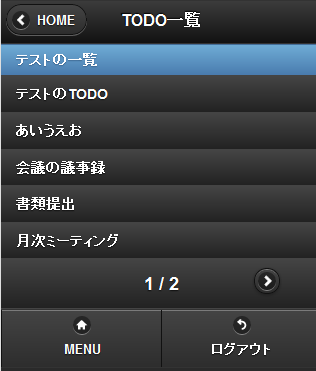
Since the page transition button of pagingButton tag calls the unimplemented function “onPageLinkFunc”,implement it if required.Markup result. Page transition button is displayed at the lower part of the list and list is displayed after every 5 pages.
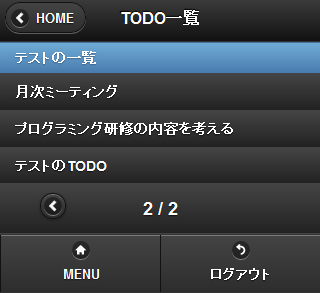
At the time of pressing page transition button. Second page was displayed.
Note
The following points are confirmed in this item.
- Use <imsp:spPagingButton> tag to implement the paging process.
To Customize the Format
Modify the format of the list display to make the layout user friendly.
Modify internal part of <ul> tag in the following manner.
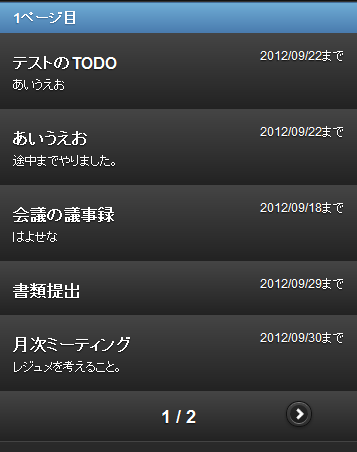
 <ul data-role="listview">
   <li data-role="list-divider"><c:out value="${currentPage}" />Page Number</li>
   <c:forEach var="record" items="${list}">
     <li>
       <p class="ui-li-aside"><c:out value="${record.limitDate}"/></p>
       <h3><c:out value="${record.title}"/></h3>
       <p class="ui-li-desc"><c:out value="${record.comment}"/></p>
     </li>
   </c:forEach>
   <imsp:pagingButton currentPage="${currentPage}" pageLine="${pageLine}" maxRecord="${maxRecord}" />
 </ul>
Note
<h> tag in <li> tag is treated as the subject.<p class=”ui-li-aside”> is displayed as the decorative part at the right end.<p class=”ui-li-desc”> is displayed as the subtitle under the subject. It can be placed multiple times.Markup result. Date and comments can be displayed in list.