4.6. Apache Solr
4.6.1. 概要
为了使用“ IM-ContentsSearch for Accel Platform ”,需要 Apache Solr 。
在 im-Juggling 上选择“标准应用程序”-“ IM-ContentsSearch for Accel Platform ”模块 使用“ IM-ContentsSearch for Accel Platform ”时,需要构筑“ Apache Solr ”服务器。
警告
虽然可选择任意一个服务器来构筑“ Apache Solr ”,但由于“ Apache Solr ”会发生大量磁盘访问, 因此若将其构筑在安装了“ intra-mart Accel Platform ”的同一服务器上, 则有可能发生响应速度低下的问题,因此强烈建议在其他服务器上构筑运行环境。
4.6.2. 前提条件
- 需要已安装“ Java ”。
- 在“ Resin ”上安装“ Apache Solr ”时,需要先安装“ Resin ”。
- 在“ Tomcat ”上安装“ Apache Solr ”时,需要先安装“ Tomcat ”。
4.6.3. 安装
“ IM-ContentsSearch for Accel Platform ”提供了“ Apache Solr ” 的安装工具。可通过使用安装工具进行下述处理。 使用安装工具构筑的“ Apache Solr ”处于已设定了“ IM-ContentsSearch for Accel Platform ”专用定制的状态。- 使用应用程序服务器“ Jetty ”的构筑及启动(主要面向开发及演示)- 输出用于构筑到应用程序服务器“ Resin ”上的文件群- 输出用于构筑到应用程序服务器“ Tomcat ”上的文件群
获取“ Apache Solr ”安装工具。
可从以下URL下载“ Apache Solr ”安装工具。
或者,请使用安装磁盘的./Products/tools/iap/im_contents_search/solr_setup.zip。
获取安装工具后,将<solr_setup.zip>文件展开到任意路径。
※展开文件时,请使用可展开zip格式压缩文件的解压缩工具。
注解
作为例子,本文指定了下述目录。
「C:/solr」
打开命令提示,移动到以下路径。
C:/solr/solr_setup
如下所述输入setup命令,按下<Enter>键后就会执行安装工具,并显示安装工具的命令一览及其说明。
<OS是Window时> C:/solr/solr_setup> setup.bat<OS是Linux时> [ root@localhost solr]# ./setup.sh注解
Windows环境下的例子。
C:\solr\solr_setup> C:\solr\solr_setup> setup.bat Buildfile: C:\solr\solr_setup\build\build.xml usage: [echo] Welcome to the Apache Solr Installation! [echo] Use '' to display usage [echo] Use 'usage' to display usage [echo] Use 'jetty' to download the jetty zip file, solr zip file and the solr.war and unzip the zip files and config the jetty port [echo] Use 'jetty.start' to download the jetty zip file, solr zip file and the solr.war and unzip the zip files and config the jetty port and start the jetty [echo] Use 'resin' to download the solr zip file and the solr.war for resin and unzip the zip file [echo] Use 'tomcat' to download the solr zip file and the solr.war for tomcat and unzip the zip file BUILD SUCCESSFUL Total time: 1 second C:\solr\solr_setup>下面对安装工具的各个命令进行说明。通过setup.bat(OS是Windows时)或setup.sh(OS是Linux时)的参数来指定命令。例子:C:/solr/solr_setup> setup.bat jetty.start
<安装工具的命令及其说明> 命令
执行内容
(无)
显示安装工具的说明。
usage
显示安装工具的说明。
jetty
构筑将启动端口变更成了./build_user.properties中指定的端口,“Apache Solr”可以使用的 Jetty 。
jetty.start
执行jetty命令,启动应用程序服务器 Jetty 。
resin
将需要安装到 Resin 文件群输出到./dist目录。
tomcat
将需要安装到 Tomcat 文件群输出到./dist目录。
在此将继续对设想执行了setup.bat resin的情况进行说明。
执行C:/solr/solr_setup> setup.bat resin后,会在./dist目录下生成resin目录。
注解
执行setup.bat resin所显示画面的一部分。
      [get] ....................................................
      [get] ....................................................
      [get] ....................................................
      [get] ....................................................
      [get] ....................................................
      [get] ....................................................
      [get] ....................................................
      [get] ....................................................
      [get] ...........
      [get] last modified = Thu Sep 27 01:25:24 JST 2012

md.resin.webapps:
     [echo] make resin webapps dir(../dist/resin/resin/webapps)...
    [mkdir] Created dir: C:\solr\solr_setup\dist\resin\resin\webapps

copy.resin.solr.war:
     [echo] copy the solr.war from ./download/solr.war to ../dist/resin/resin/webapps...
     [copy] Copying 1 file to C:\solr\solr_setup\dist\resin\resin\webapps

common.display.readme:
     [echo] ==========================================================================================================
     [echo] ●定义
     [echo]     <%resin_home%>:Application Server Resin的安装目录
     [echo]
     [echo] ●配置和设定Solr
     [echo]     请将 /dist/resin_solr/resin/*.* 复制到 <%resin_home%>。
     [echo]
     [echo] ●设定Solr起始位置
     [echo]     在<%resin_home%>/conf/resin.xml中添加/dist/resin_solr/env-entry.txt的内容。
     [echo]
     [echo]     将env-entry.txt的内容复制到resin.xml的</resin>之前。
     [echo]
     [echo] ==========================================================================================================
     [echo] C:\solr\solr_setup\dist\resin\readme.txt

BUILD SUCCESSFUL
Total time: 11 seconds

C:\solr\solr_setup>
安装工具执行完成后,安装时所需要的文件群会被输出到./dist目录。
在应用程序服务器中使用 Resin 或 Tomcat 时,请继续按照文件内的readme.txt所记述的步骤(与完成命令时所显示的内容相同)操作。 在应用程序服务器中使用 Jetty 时,由于 Jetty 主体被存放在/dist/jetty目录,可以直接执行。
通过以上操作可完成安装。
4.6.4. 启动“ Apache Solr ”,连接到Admin画面,停止
启动安装了“ Apache Solr ”的应用程序服务器。
“ Apache Solr ”的启动/停止与应用程序服务器的启动/停止时间相同,因此关于启动/停止方法及服务化步骤请参照各应用程序服务器上的使用方法。
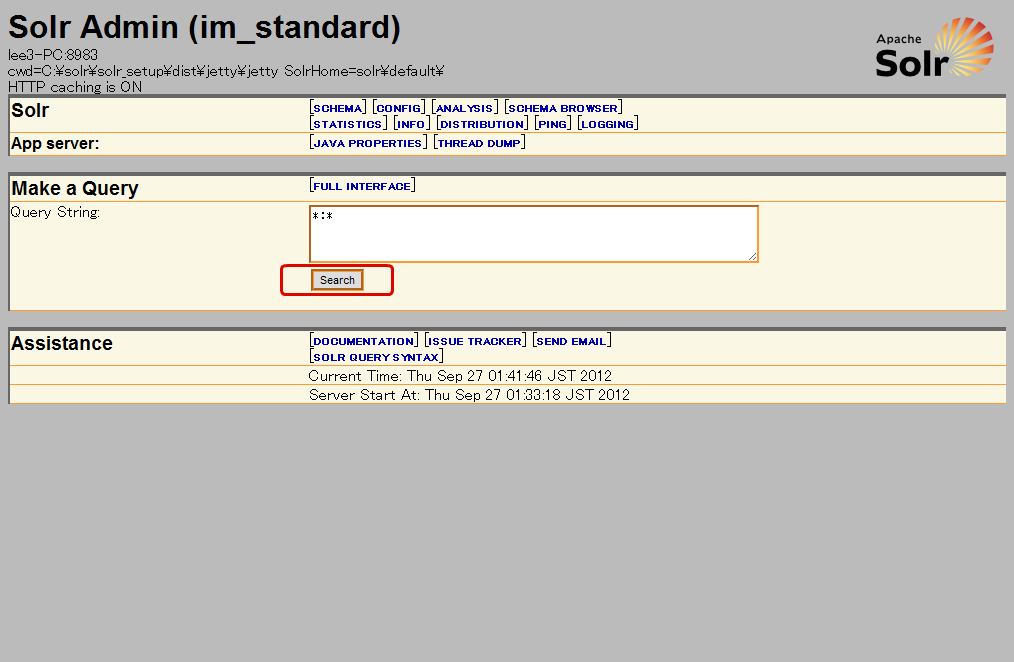
连接到“ Apache Solr ”的Admin画面,确认“search”按钮会正常动作。
作为例子,会连接到 Jetty 中安装的“ Apache Solr ”的Admin画面
停止安装了“ Apache Solr ”的应用程序服务器。
4.6.5. 所使用Java的版本
使用 Apache Solr 时,关于所使用Java的版本有如下注意事项。使用Java SE Development Kit 7u40以上的版本时,需要在JVM中指定以下启动参数。-XX:-UseSuperWord不指定上述启动参数时,已确认会发生索引数据损坏且无法正常动作的错误,因此请务必指定该参数。使用Java SE Development Kit 7u25之前的版本时,不会发生上述问题。关于JVM启动参数的指定方法,请确认所使用的各个应用程序服务器的设定方法后再行指定。使用安装工具中绑定发行的Jetty时,可按照以下步骤操作。
- 执行已经说明过的安装命令 setup.bat jetty 或 setup.sh jetty。
- 用编辑器打开与OS相对应的启动脚本。
- OS是Windows时 “solr_setup\dist\jetty\jetty\startup.bat”
- OS是Linux时 “solr_setup/dist/jetty/jetty/startup.sh”
- 哪个文件都相同,确认其中有 java -jar start.jar 的记述。
- 请将确认的记述内容替换成 java -XX:-UseSuperWord -jar start.jar。
关于错误的详细说明,请确认在Java SE Development Kit 7u40的Release Note中记载的“Irregular crash or corrupt term vectors in the Lucene libraries.”项目。注解
Update Release Notes - Java SE Development Kit 7, Update 40